Ride on, Black windshield trim, Installation – Kuryakyn 1318 BLACK WINDSHIELD TRIM User Manual
Page 2
PAGE
2
STEP 3
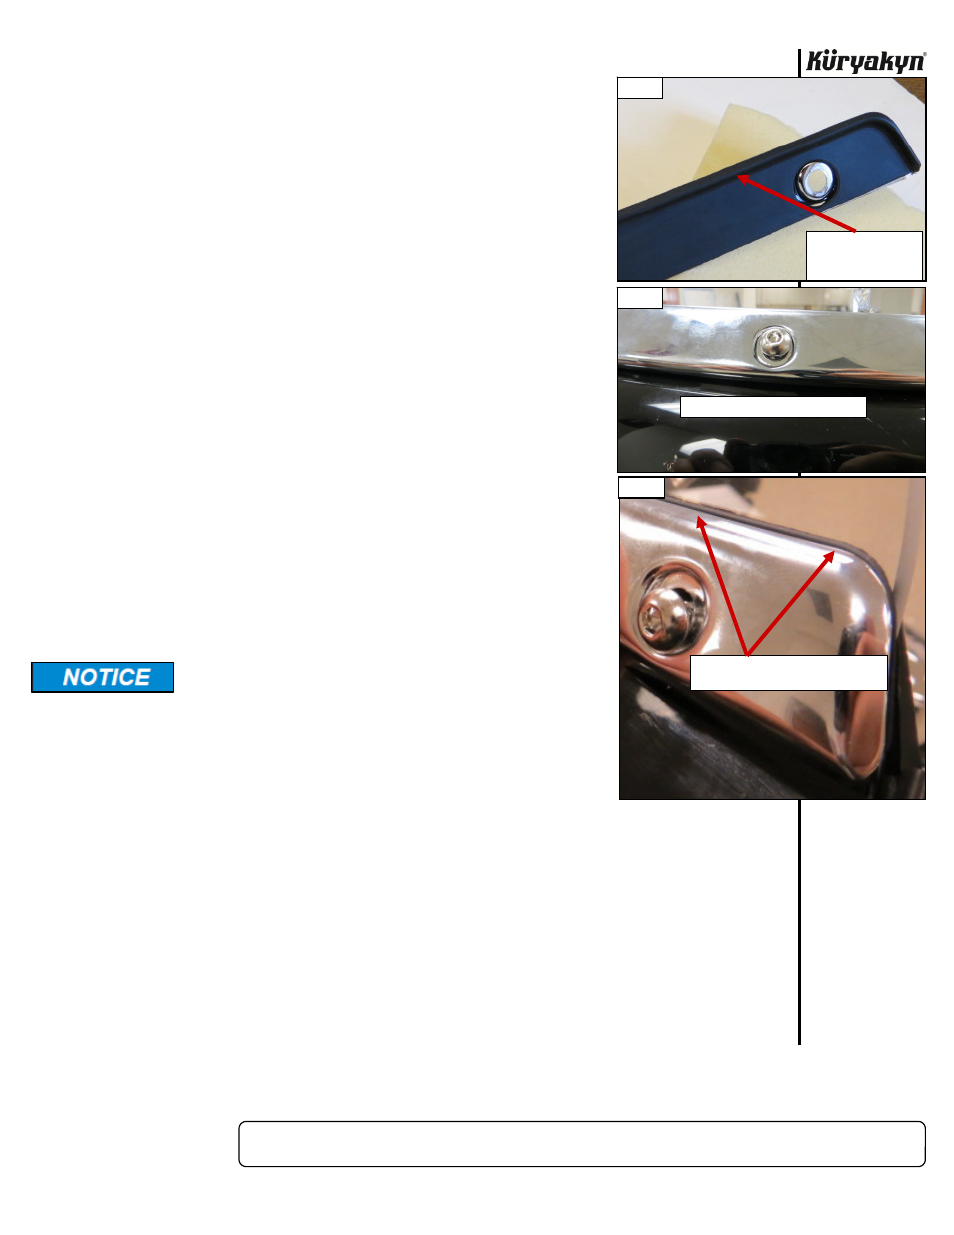
Place the included rubber gasket onto the back of the Black Trim. The
tall raised lip on the gasket goes on the top of the Black Trim and faces
the windshield. PIC 2
STEP 4
Holding the rubber gasket and Black Trim together, place it on the
outer fairing lining up the holes in the trim with the holes in the in the
outer fairing and windshield. Loosely install a 1/4”- 20 x 5/8” button head
cap screw in the center hole. PIC 3
NOTE:
If installing windshield trim on Küryakyn Airmaster fairing, use a
1/4”-20 x 7/8” button socket cap screw in the center hole .
STEP 5
Loosely install a 1/4”- 20 x 5/8” button head cap screw in each outside
hole. PIC 4
NOTE:
If installing windshield trim on Küryakyn Airmaster fairing, use
the 1/4”-20 x 7/8” button socket cap screws in the outside holes.
STEP 6
Making sure the short lip of the rubber gasket is just above the top of the
Chrome
Trim,
PIC
4,
tighten the center fastener first (when tightening
the fasteners, make sure the head of the fastener is centered in
the recess of the Trim. You may need to push down on the Trim
slightly to center the fasteners.), then the outside fasteners, being
careful not to over tighten them, which may damage the trim, windshield
or
fairing.
It is the installer’s responsibility to ensure that all of the
fasteners (including pre-assembled) are tightened before
operation of the motorcycle. Küryakyn will not provide
warranty coverage on products or components lost due to
improper installation or lack of maintenance. Periodic
inspection and maintenance are required on all fasteners.
Ride On!
BLACK WINDSHIELD TRIM
INSTALLATION
PIC 4
PIC 3
PIC 2
TALL LIP OF GASKET
TO TOP OF TRIM
FACING WINDSHIELD
LOOSELY START CENTER FASTENER
MAKE SURE SHORT LIP ON RUBBER
GASKET IS JUST ABOVE TOP OF TRIM