Installation hardware step 1: mount track to wall, Step 2: attach monitor arm to track – Humanscale V7 User Manual
Page 2
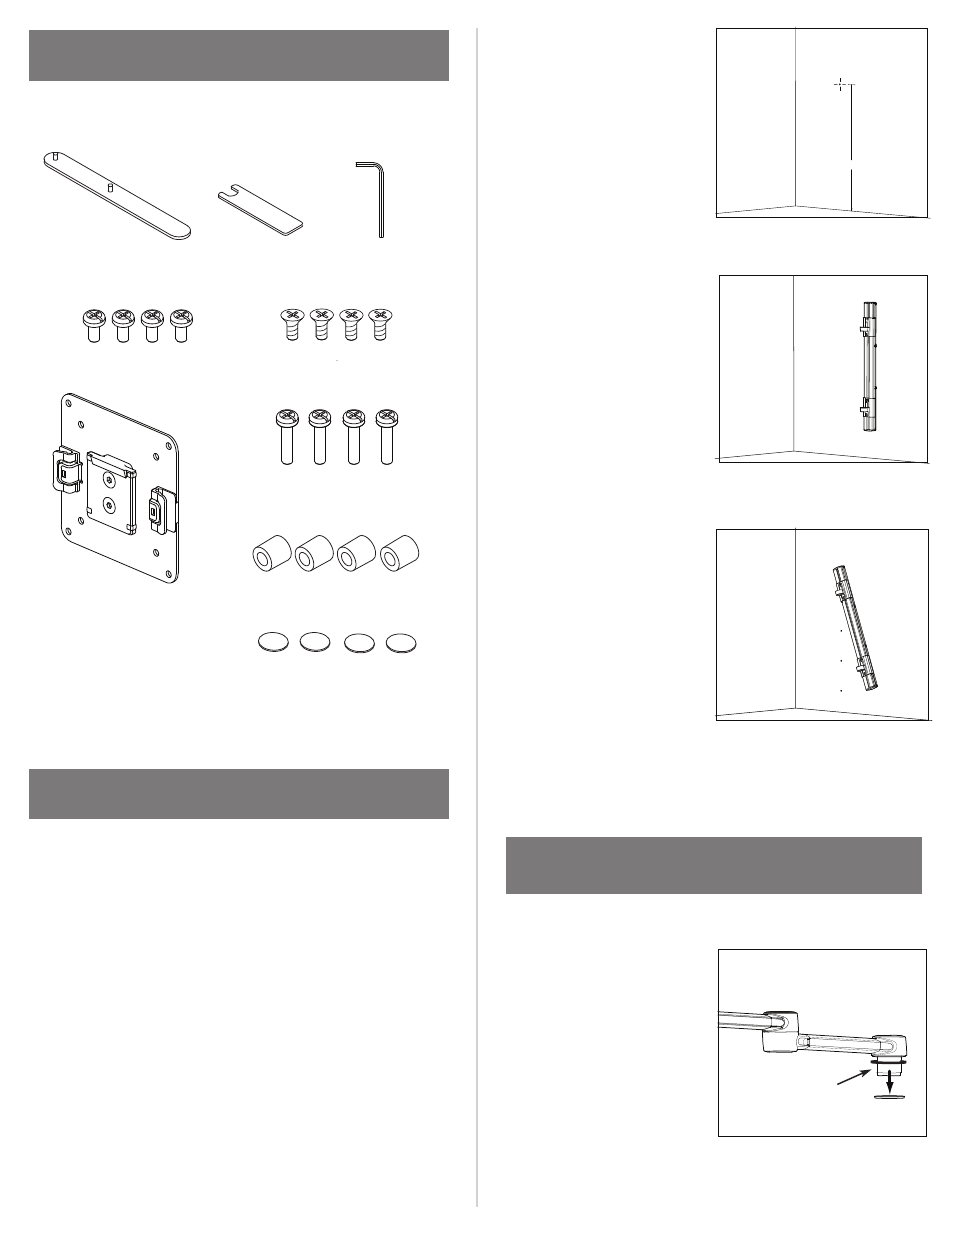
a. Unscrew aluminum nut from
the bottom of Aluminum
Bushing (A).
INSTALLATION HARDWARE
STEP 1: MOUNT TRACK TO WALL
b. Choose the desired
hole location for top
fastener, ideally 66” to
68” off the floor. Drill hole
and install appropriate
fastener.
c. Hold Track against the
wall and fasten using the
appropriate fastener in
pre-drilled hole.
d. Use level to ensure
Track is perfectly plumb.
Mark the other 4
mounting hole locations.
e. Pre-drill the 4 remaining
mounting holes and install
appropriate fastener.
f. Fasten Track with
appropriate fasteners in
the remaining mounting
holes. Be sure to tighten
fully so fastener heads do
not protrude beyond track
surface.
STEP 2: ATTACH MONITOR ARM
TO TRACK
1b
1d
1e
66 - 68 “
2a
4 Standard VESA Bracket Screws
4 Plastic Spacers
4 Extended VESA Bracket Screws
VESA Bracket
Hex Key (2mm)
Two-Prong Spanner Wrench
10 mm Flat Wrench
4 Keyboard Tray Screws
Hardware Kit
Additional hardware required:
Electric drill with 3” driver or driver extension
a. For new construction, Track can be mounted to a wall
stud or mounting board. For existing construction, test
the wall by drilling a pilot hole to determine what fasteners
are most suitable for installation. Be sure to drill the pilot
hole in a spot that will be covered by the Track.
Recommendations:
For wood – Use 2” #10 flat-head wood screws.
For metal – Use 2 ¾” #10 flat-head self-tapping screws.
For drywall – Use 3/16” flat-head toggle bolts
(Hilti brand recommended).
Note: For exact fastener requirements, please refer to
OSHPD specifications (OPA-2238-07) included.
A
4 3M Dual Lock Coins