Brita 1200 User Manual
Page 10
6.1 Removing the Filter Cartridge
Switch off the power supply of the terminal equipment (remove plug).
Close the inlet valve
6
at the inlet hose
5
.
Place the fl ush hose in a bucket and remove pressure from the fi lter system by
opening the fl ush valve
16
. Collect waste water in the 10L bucket.
Note: If the escaping water is more than 1 litre, the inlet value
6
is not completely
closed or is blocked with scale.
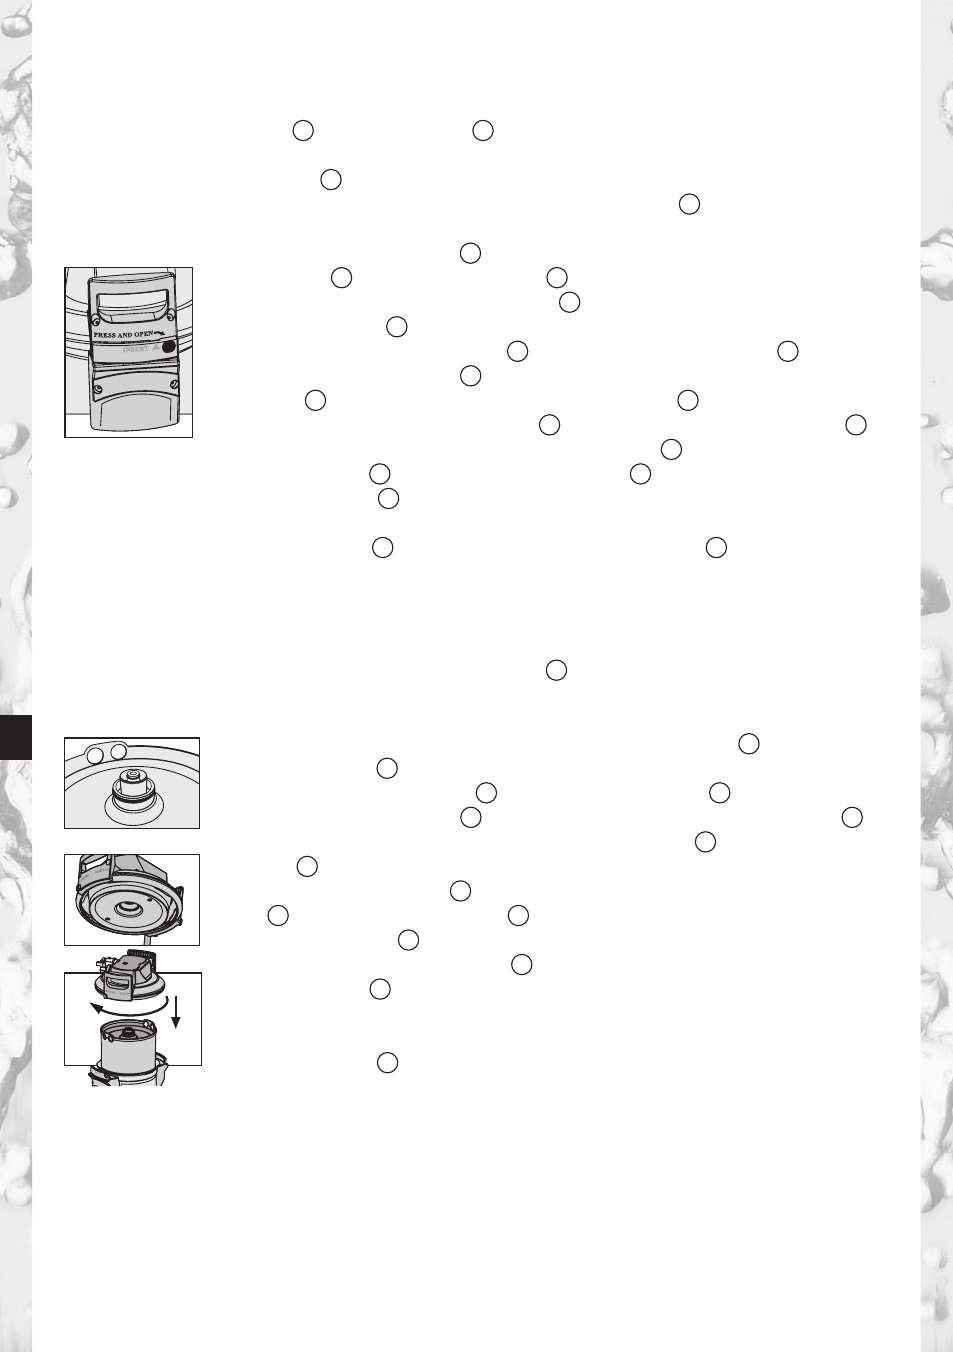
Stand on the kick loops
9
with both feet while opening the pressure
vessel lid
3
by pressing the lock
8
and turning it anti-clockwise as
far as it will go. The fi lter cartridge
2
is released by pressing on the
mantle handles
11
.
Place the pressure vessel lid
3
vertically on the lid handle
14
.
Stand on the kick loops
9
with both feet while turning the pressure
vessel
1
anti-clockwise by the mantle handles
11
as far as it will go.
Take your feet off the kick loops
9
and press the pressure vessel
1
down with both hands on the mantle handles
11
.
Remove used fi lter cartridge
2
from the pressure vessel
1
.
Place the used fi lter cartridge
2
in the sink with the connection facing down for
drainage (> 5 min).
Lock the used fi lter cartridge
2
with the transport protection cap
12
of the new fi lter
cartridge and return in the original packaging to the appropriate BRITA address listed
on the back of the cover.
6.2 Inserting the Filter Cartridge
Check the O-ring seal of the new fi lter cartridge
2
for correct seat in the groove, dirt
and damage. Note: The cartridge seat has been lubricated with food-safe lubricant at
the factory.
Check the connector seat of the fi lter cartridge O-ring
2
in the pres-
sure vessel lid
3
for dirt and damage.
Place new fi lter cartridge
2
in the pressure vessel
1
.
Stand on the kick loops
9
with both feet; lift the pressure vessel
1
whole turning clockwise until the mantle handles
11
are over the kick
loops
9
.
Stand on the kick loop
9
with both feet and place the pressure vessel
lid
3
on the pressure vessel
1
. The positioning of the arrow marking
on the lid handle
14
must line up with the “INSERT” groove.
Press the pressure vessel lid
3
down and turn clockwise until the
lock engages
8
.
Switch on electrical power supply to the terminal device.
Execute the steps described under 5.3 to fl ush and bleed the new
fi lter cartridge
2
.
•
•
•
•
•
•
•
•
•
•
•
•
•
•
•
•
•
•
18