Adaptable hard drive cages – Fractal Design Arc Mini R2 User Manual
Page 5
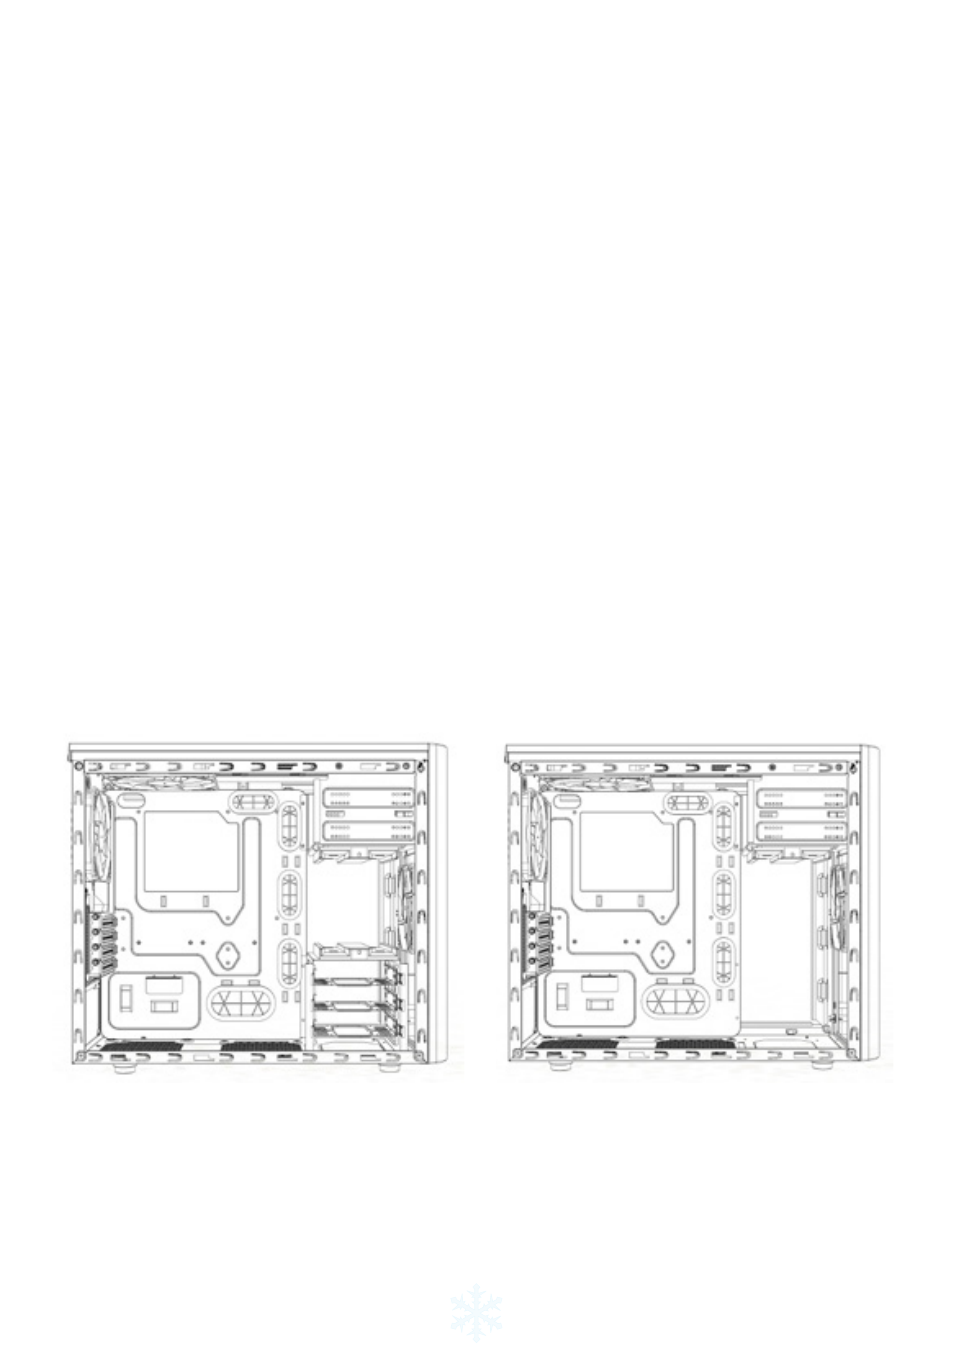
Adaptable hard drive cages
All drive cages in the Arc Mini R2 can be removed in order to fit bigger components or simply
to optimize airflow throughout the case.
Removing or rotating the upper hard drive cage
In its original position, the upper HDD cage has been strategically placed to optimize a clean
build with excellent HDD cooling and cable management. In order to fit graphics card(s) lon-
ger than 260mm you may need to remove the upper HDD cage. When the upper HDD cage
is rotated, it acts as a guide for the front fan and directs airflow to the graphics card(s). To
remove or rotate the upper HDD cage, the two thumbscrews securing it must be removed.
Following rotation of the HDD cage, re-insert it in the desired position and secure the thumb-
screws in the new position or remove it completely.
Removing the lower hard drive cage
In order to fit water cooling radiators to the front panel you will need to remove the lower
HDD cage to make space for it. The cage is removed by unscrewing 4 screws at the bottom
of the case.
Removing the optical drive bay
In order to install a 360mm radiator in the top panel you need to remove the optical drive bay
from the front of the case. This is secured by 8 screws, two on each side connecting to the
top panel and four in the front connected to the front metal panel. Simply unscrew the eight
screws and remove the optical drive bay from the case.
4