Installation & pressing instructions, Jaw pressing instruction, Ring, sling, chain pressing instruction – Elkhart Products Corporation (EPC) APOLLOXPRESS User Manual
Page 5: Typically for ½” through 2” sizes, Typically for 2 ½” through 4” sizes
For additional inf
orma
tion, submittal sheets and manuals
, visit w
ww
.apollo
valv
es
.com
APOLLO VALVES Customer Service (704) 841-6000
64
www.apollovalves.com
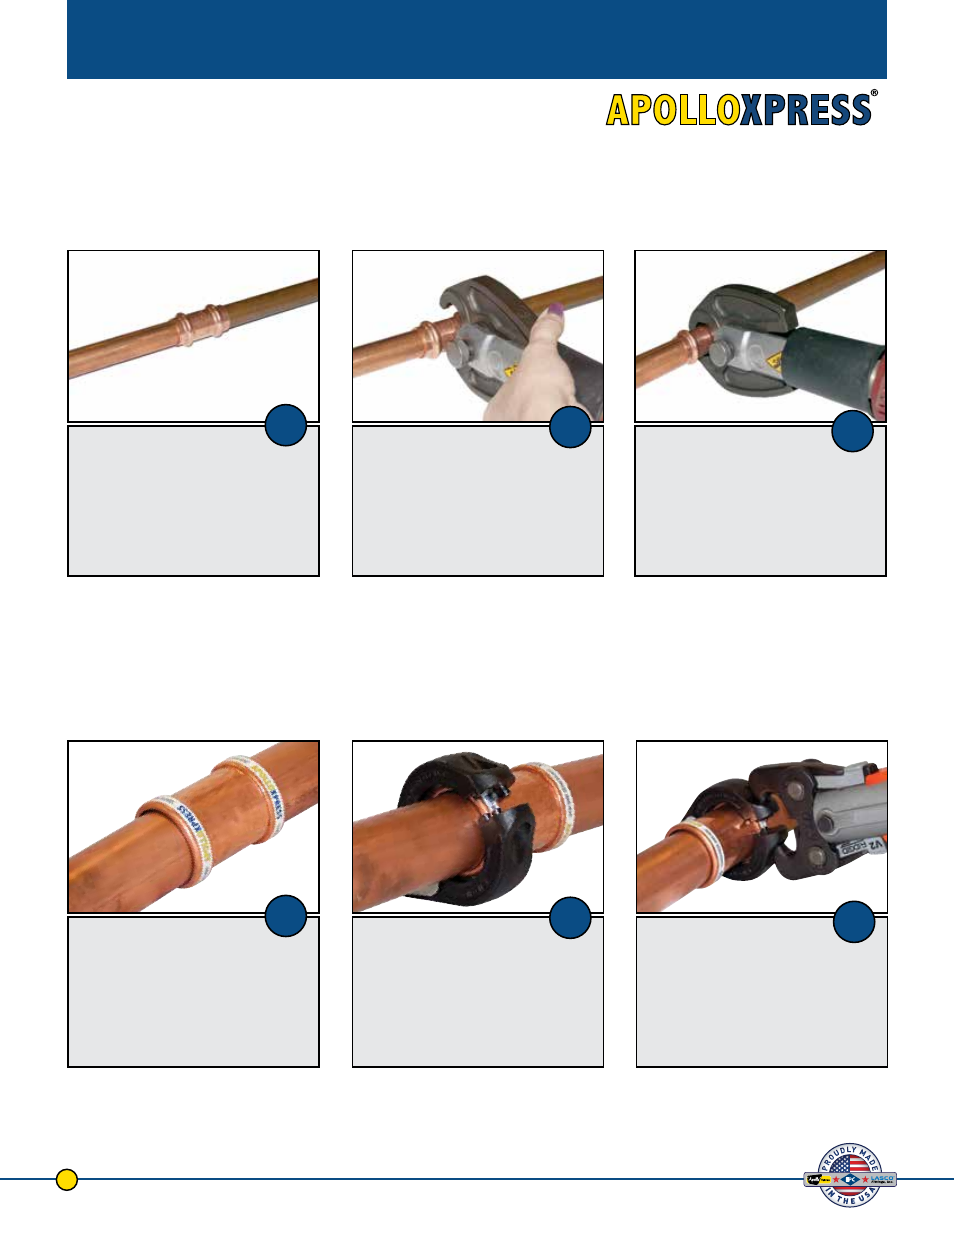
InSTALLATIOn & PRESSInG InSTRUCTIOnS
Insert the tube into the fitting or valve
with twisting motion until it meets tube
stop AND insertion depth mark. Wetting
the tube, fitting or valve with clean water
may reduce insertion force.
Using approved press tool and jaw of
the correct size, open the jaw and place
over the bead of the fitting or valve at a
90 degree angle to the tube centerline.
Press. Please refer to the specific tool
manufacturer instruction.
1
2
Jaw Pressing Instruction
Typically for ½” Through 2” Sizes
3
Insert the tube into the fitting or valve
with twisting motion until it meets tube
stop AND insertion depth mark. Wetting
the tube, fitting or valve with clean water
may reduce insertion force.
Using approved press tool and ring,
sling, chain of the correct size, open
the ring, sling or chain and place over
the bead of the fitting or valve at a 90
degree angle to the tube centerline.
Press. Please refer to the specific tool
manufacturer instruction.
1
2
3
Ring, Sling, Chain Pressing Instruction
Typically for 2 ½” Through 4” Sizes