Inspection procedure installation procedure, Lubrication procedure, Replacement parts & supplies – Condux 819 D.Drill Swivels User Manual
Page 2
Inspecting the swivel before and after each use ensures proper
operation throughout the job.
1. Rotate the swivel to test for proper operation.
2. Wiggle the swivel’s end to ensure there is no lateral play.
3. Make sure nuts and bolts are not damaged and are the correct size
and grade for the swivel.
4. If necessary, lubricate the swivel (see Lubrication Procedure)
!WARNING: Read and understand all procedures
and safety instructions before using this product.
Failure to do so, may result in personal injury or
property damage. Save this user guide for future
reference.
Inspection Procedure
Installation Procedure
!ADVERTENCIA: Lea y entienda todos los
procedimientos e instrucciones de seguridad antes
de usar este producto. La falta de hacer así pues,
puede dar lugar a daños corporales o a daños
materiales. Excepto esta guía de usuario para la
referencia futura.
ADVERTENCIA
Instrucciones
de Operación
Wear personal protective equipment: hard hat,
safety glasses, safety shoes, and leather gloves. Failure to do
this could result in personal injury.
Do not exceed the load capacity of the D. Drill™
Swivel or any element in the pull string. Do not stand directly
behind the pull string. If any component breaks, severe personal
injury or property damage could result.
The D. Drill™ Swivel will fail if not properly
lubricated. Personal injury or property damage could result.
Working Load (lbs.)
Part Number
Tension
Compression
08190016
8,500
2,800
08190020
10,000
3,300
08190025
20,000
6,600
08190030
30,000
10,000
08190040
45,000
15,000
08190045
60,000
20,000
08190060
90,000
30,000
08190061
90,000
30,000
08190080
120,000
40,000
Table 1. D.Drill™ Swivel Load Ratings
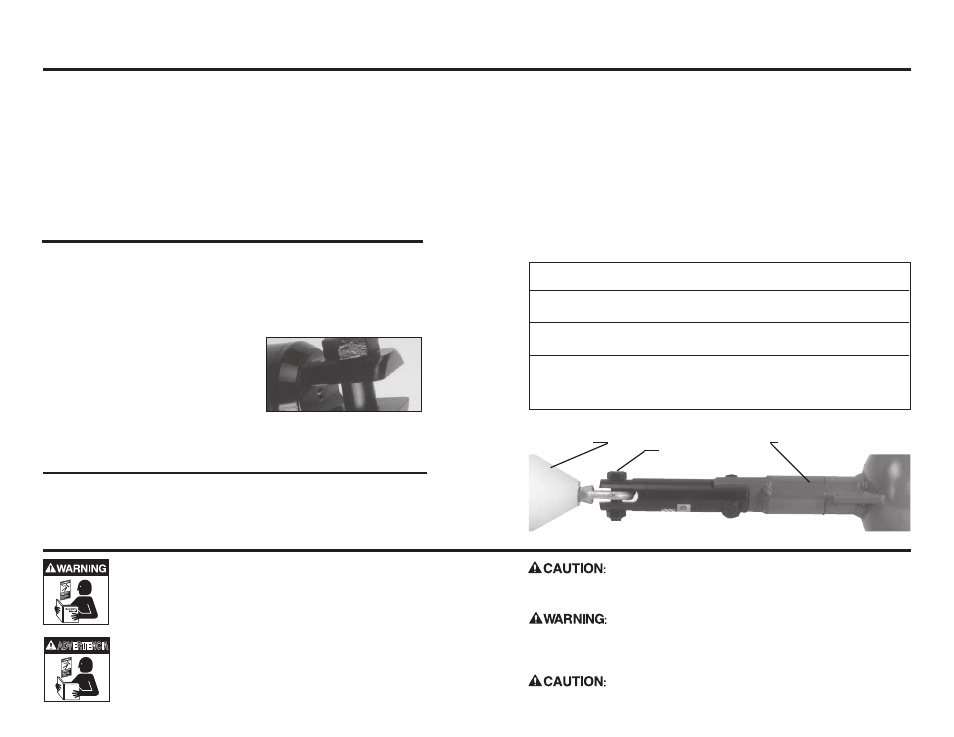
Figure 2. Swivel Connection
NOTE: The D.Drill™ Swivel has (4) angular contact bearings: (3) for
tension loads and (1) for compression loads. The direction of
installation is not critical, but we recommend pointing the grease zerk
towards the reamer. This helps prevent dirt from getting past the seals.
1. Ensure the swivel is the correct size for the job (see Table 1), and
test the swivel operation.
2. Connect the swivel between the
pulling eye and the earth packer
or
reamer (Figure 2).
3. Tighten the
clevis bolt(s) securely.
Removal is the opposite of the installation procedure.
Lubrication Procedure
NOTE: Always use special Condux D.Drill grease (Condux pn:
08190007). It is specially formulated with a calcium-complex soap for
exclusive use in bentonite environments. Use of any lithium-based
grease voids the warranty.
1. Locate and clean the
grease-zerk fitting (Figure 1.)
2. Inject grease through the zerk fitting
until the old grease flushes past the
seals on the swivel’s other end.
3. Lubricate after every job. This
extends the life of the swivel and
prevents swivel lockup.
Replacement Parts & Supplies
Condux offers clevis bolts, clevis nuts, and directional drilling grease.
Consult your Condux catalog, or see your Condux representative for
more information.
Figure 1. Grease-Zerk
Earth packer or reamer
Clevis Bolt
Pulling Eye