Bruce Reserve Premium User Manual
Page 19
Page | 19
For questions about Armstrong Laminate Flooring please call Customer Relations and Technical Services at 1.800.233.3823.
Getting Started: All Installations
Always check each board for damage before installing.
1. Avoid narrow pieces at the finish wall. Measure the distance between the starting wall and the finish
wall.
2. Divide this number by the width of the board.
3. If the remainder is less than 2-1/2" (6.35 cm), cut off 2-1/2" (6.35 cm) from the width of the first row or
(to balance the room) add the difference to the plank width and divide by two.
4. Roll out Armstrong Quiet Comfort or Quiet Comfort Premium Underlayment or Armstrong Moisture
Barrier Sheeting along the starting wall, and cut to length. Kitchen and bathroom installations require
folding the underlayment up the wall 2˝ (5 cm). Place additional sections with butt seams as the
installation progresses.
To minimize pattern repeats in the floor, always pull from at least 3 cartons of flooring while installing.
Wall Irregularities
All wall irregularities require cutting the first or last row of boards to fit
the contour of the wall.
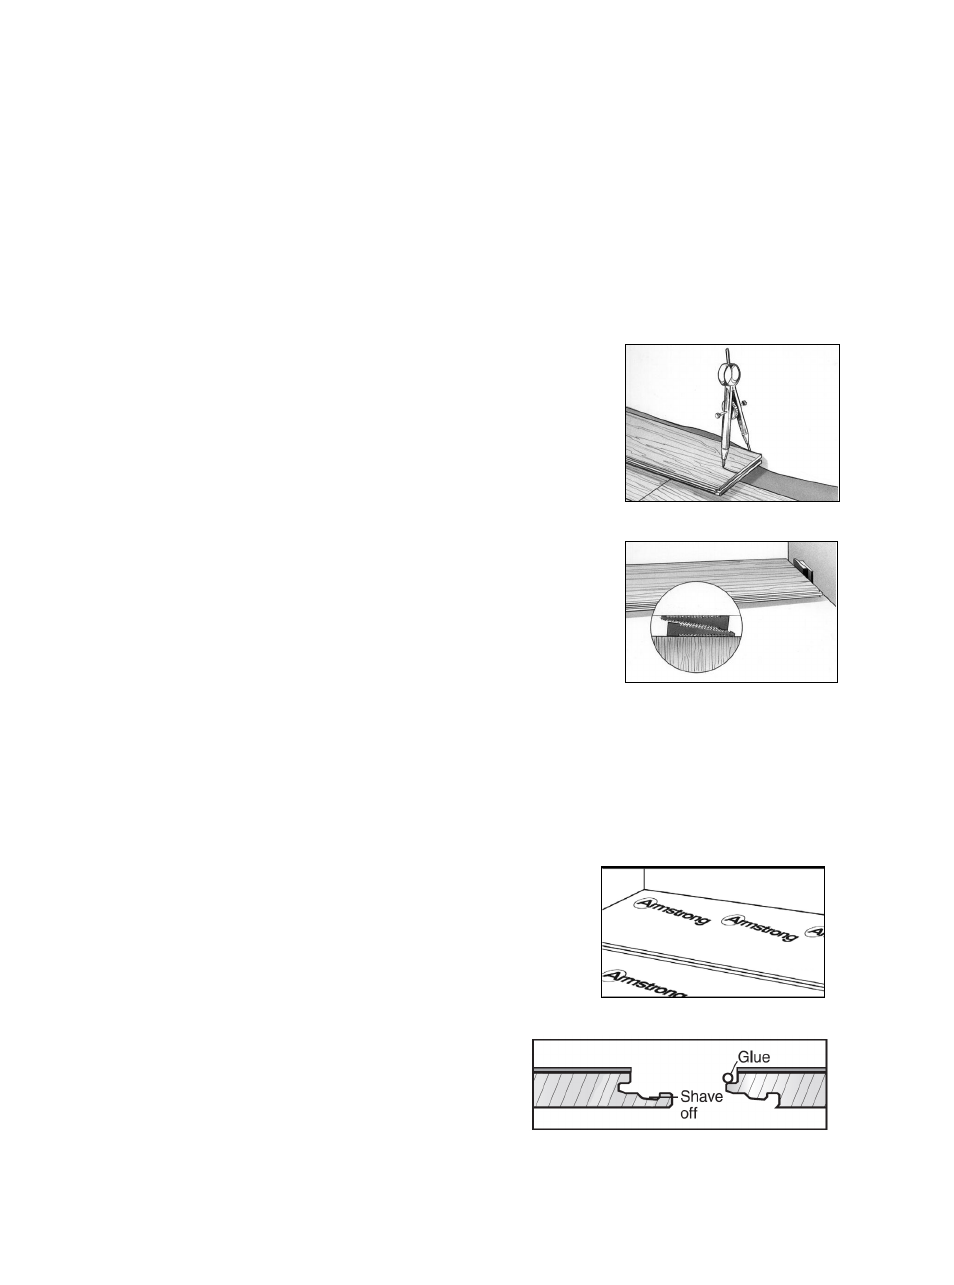
1. Use dividers or a 1" (2.54 cm) spacer turned sideways to mark the
contour (Fig. 3).
2. Cut to shape.
3. Position the cut piece, using the pull bar to tighten the last piece in
place.
4. Place a spacer between the end of the board and the side wall.
5. Two tapered spacers can be used as wedges to accommodate
irregular walls (Fig. 4).
Cutting
1. A good quality carbide-tipped cutting blade that has been designed
for composition and laminate materials such as melamine,
coreboard or other hard, dense, man-made materials is
recommended. When extra clean-cut edges are required- e.g., custom
installations- you may need more elaborate cutting equipment.
2. When using a hand saw, cut with the decorative side of the board facing up.
3. When using power saws, the direction of blade must cut into the decorative side of the board to
minimize chipping.
4. Use a square to keep your cut line straight.
5. Cut the marked piece in another area to keep the sawdust away from the installation site.
Install Underlayments (All Installations)
Cover subfloor with underlayment, logo side up. If subfloor is
concrete or for any existing floor over concrete, tape the seams
with clear plastic tape (Fig. 5).
Installing Under a Door Jamb or Toe Kick (All Installations)
Installation of locking laminate through a door jamb or under a toe kick
requires the lip of the groove to be reduced in size.
1. Using a small plane or utility knife, plane or shave off
75% of the ledge of the groove (Fig. 6).
Fig. 3
Fig. 4
Fig. 5
Fig. 6