End panel mounting – BKI CSW Hot Food Deli Case User Manual
Page 11
Hot Food Deli Case
Installation
9
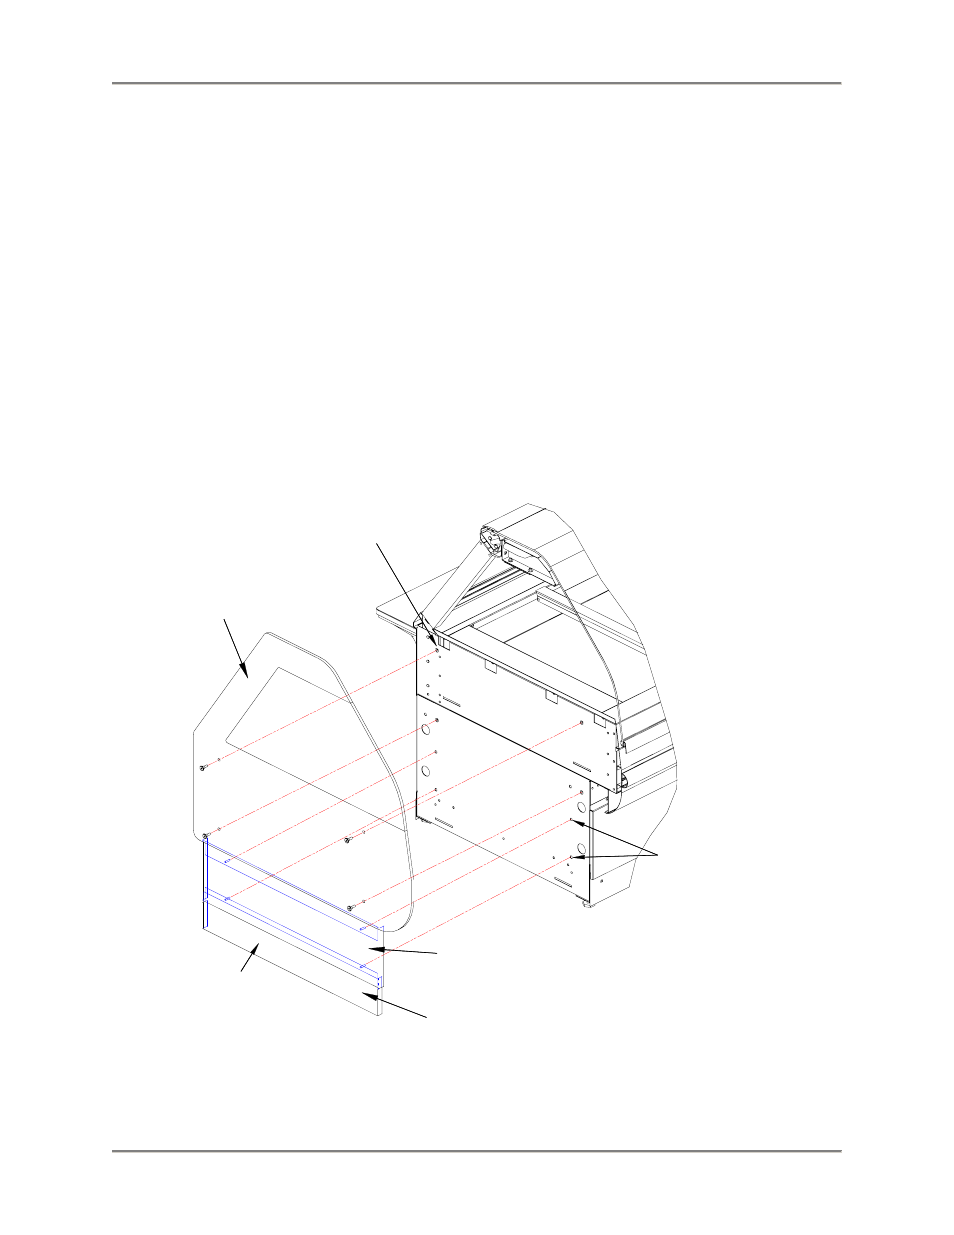
End Panel Mounting
1. Now, attach the End Trim Panels to the base ends. The studs on the Trim Panels pass through
the mounting holes in the base ends (see Figure 2). Both End Trim Panels are the same.
2. If the panel does not align properly turn it end for end. The panels are secured from inside with
the #10 Palnuts provided.
3. Attach the End Panels to the ends of the case(s) as shown in Figure 2 using the shoulder screws
provided. For Glass End Panels only, slide the plastic bushings provided over the shoulder
screws before inserting the screw into the glass panel. Be careful that the screws do not bind in
the holes in the glass panel.
NOTE: If the ends are already attached to the case, the End Kick Plates can be lowered to the
floor. To do this loosen the End Trim Panel nuts from inside the case then slide the Kick Plates
flush with the floor and tighten the Trim Panel nuts.
4. These cases are to be sealed to the floor if required by local health codes. Seal the kick plates to
the floor using a silicone-type sealant (Dow Corning RTV #732 or equivalent).
SHOULDER SCREWS
ATTACH GLASS END
PANEL TO THESE
THREADED INSERTS
END PANEL
END KICK PLATE
HELD CAPTIVE
BEHIND TRIM PANEL
END TRIM PANEL
END KICK PLATE
TRIM PANEL STUDS
THRU THESE (4)
HOLES – ATTACH
FROM INSIDE BASE
w/#10-24 PALNUT
Figure 2. Floor Model - End Kick Plate & End Panel Mounting