Assembly, Warning – Echo 74500 Owners Manual v.2 User Manual
Page 11
Page 5
Skid Steer Chipper Operator’s Manual
ASSEMBLY INSTRUCTIONS (74500 AND 74800)
Section
2
Assembly
Your chipper may arrive totally or partially assembled. If your machine arrives partially assembled, you may need to perform
the steps in this section.
WARNING
To prevent personal injury or prop-
erty damage: Shut off skid steer
engine, disconnect hydraulics, re-
move ignition key and make sure
that all moving parts have come to
a complete stop, before servicing,
adjusting or repairing.
The Bear Cat Skid Steer Chipper is
shipped an a disassembled state. The
unit will need to be assembled before
use.
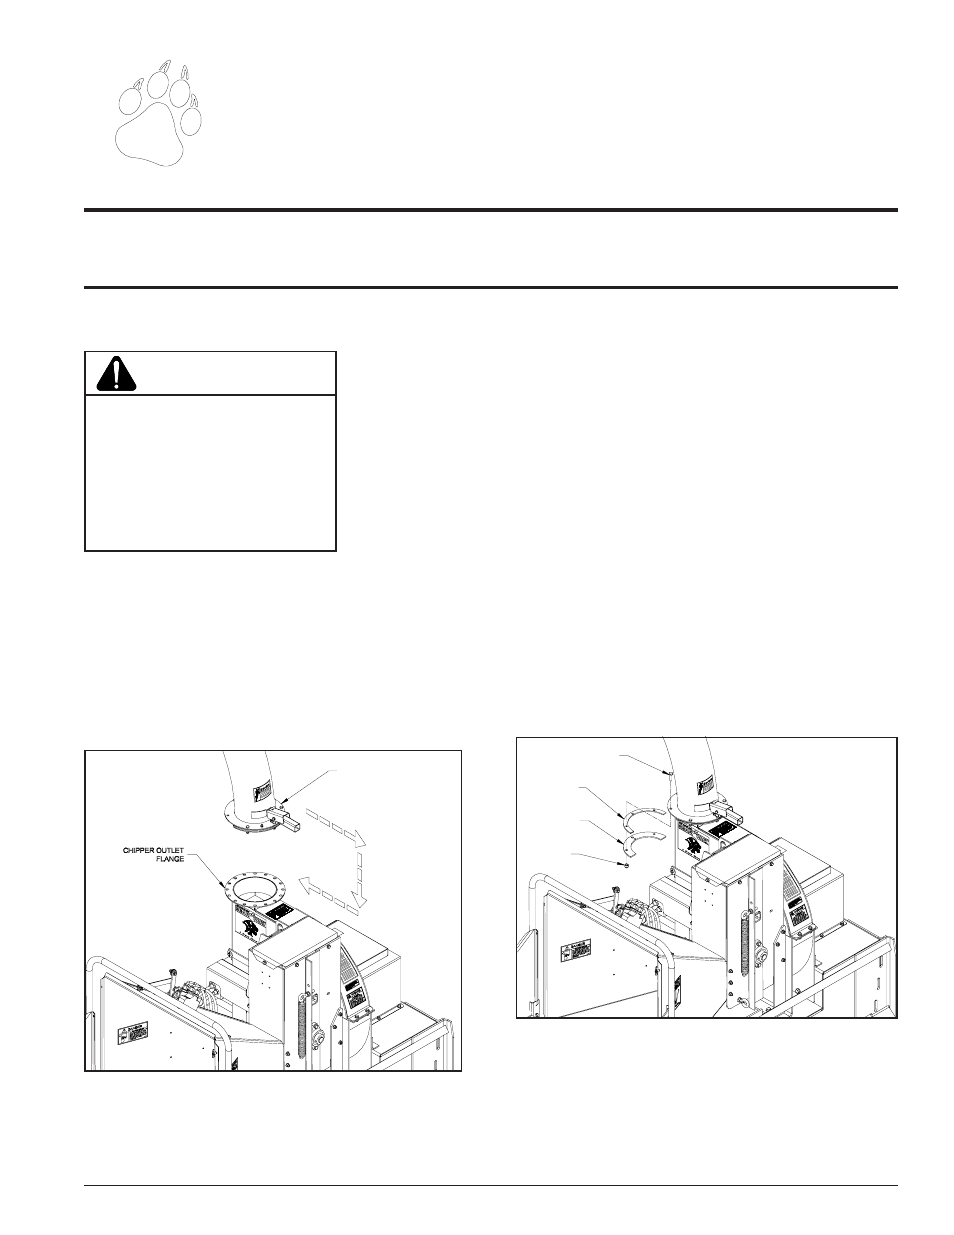
Installing the Discharge Tube
1. Remove Bear Cat Skid Steer Chip-
per from the shipping pallet.
2. Lightly grease the chipper outlet
flange.
3. Position the discharge tube over the
chipper outlet flange and slide on
using the tube latch (See Fig. #4).
4. Install the retaining rings with the
hardware provided in the owners kit.
5. Tighten the bolts so the discharge
tube does not rock on the flange.
Do not over tighten the bolts, as the
flange will distort.
6. Lift the latch on the handle of the
discharge tube and position the tube
in the desired position.
7. Release the latch making sure it
locks in one of the holes on the chip-
per flange.
8. Add one shot of grease to the greaze
zerk on the discharge flange. Ro-
tate the discharge tube to spread
grease.
SLIDE DISCHARGE
TUBE ONTO CHIPPER
CHIPPER OUTLET
FLANGE
Fig. #4, Attaching discharge tube
3/8" X 1-1/4"
BOLT
CHIPPER
DISCHARGE
SPACER
CHIPPER
DISCHARGE
CLAM
3/8" NYLOCK
NUT
Fig. #5, Securing discharge tube