Migrating an existing volume to a raid volume – Apple RAID Utility User Manual
Page 6
6
Migrating an Existing Volume to a RAID Volume
When you purchase a computer with the RAID card installed, the startup disk is
configured as a single-disk Enhanced JBOD RAID set. You can convert this RAID set,
along with one, two, or three empty disks, to a RAID volume in one step using the
Migrate RAID Set command. All files on the single original disk are moved to the new
RAID volume. Files on the additional disks are erased.
To migrate to a RAID volume:
1
Start up your computer using the Mac OS X or Mac OS X Server installation disc that
comes with the computer.
2
When the Installer opens, choose your language and click the Next button to see the
Utilities menu at the top of the screen.
3
Choose Utilities > RAID Utility.
4
Select the existing RAID set, which supports your current startup volume, in the left
column of the RAID Utility window.
5
Click Migrate RAID Set in the toolbar.
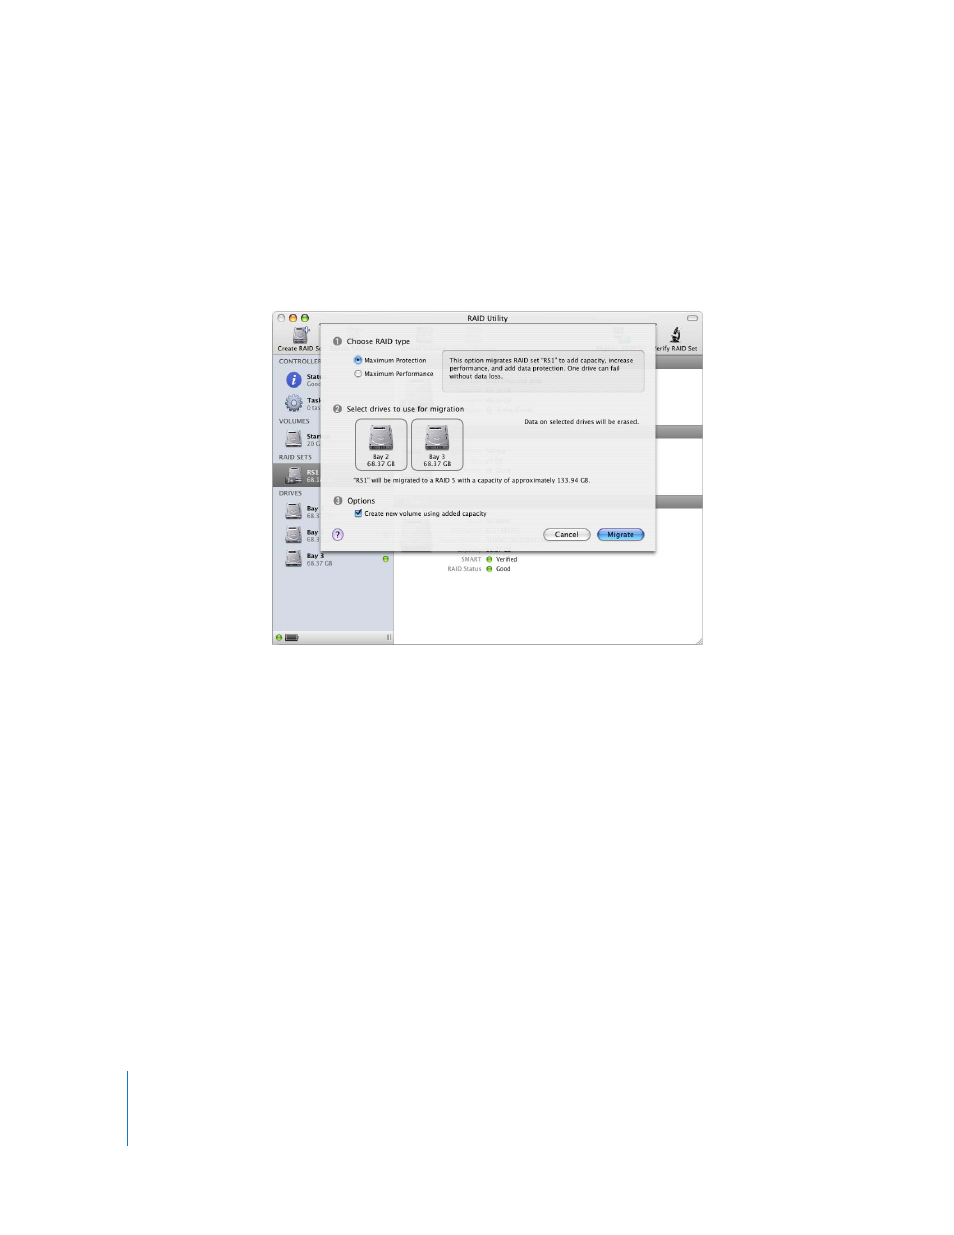
6
Choose the type of RAID volume you want to create.
Maximum Protection:
Migrates your system to a RAID volume based on either the
RAID 1 or RAID 5 level, depending on the number of drives available.
Maximum Performance:
Creates a volume based on the RAID 0 level.
7
Choose the additional drives you want to include in the volume.