Care and cleaning – Black & Decker DE791B User Manual
Page 9
16
17
7. When the clock returns to the current time, press “AUTO” button to reactivate
the timer.
8. The auto-brew indicator light on the upper right hand corner of the digital display
lights up (see fig. A)
9. To automatically brew coffee again at the same pre-set auto-brew time, prepare
coffeemaker for brewing and press the “AUTO” button.
10. If you want to change the time of the auto-brew just follow steps 1-3.
Note: The auto-brew function can be canceled at any time by pressing the “AUTO” button
a second time. The coffeemaker and the auto brew indicator light automatically shut off.
Important: If the coffeemaker is unplugged or a power failure occurs, the clock/timer
and auto-brew have to be programmed again in order to automatically brew your coffee.
Care and Cleaning
This product contains no use serviceable parts. Refer service to qualified service
personnel. Important: Do not use abrasive cleansers or scouring pads. Never immerse
the coffeemaker in water. Do not place the thermal carafe in the dishwasher.
Cleaning
1. Make sure the unit is shut off and cool.
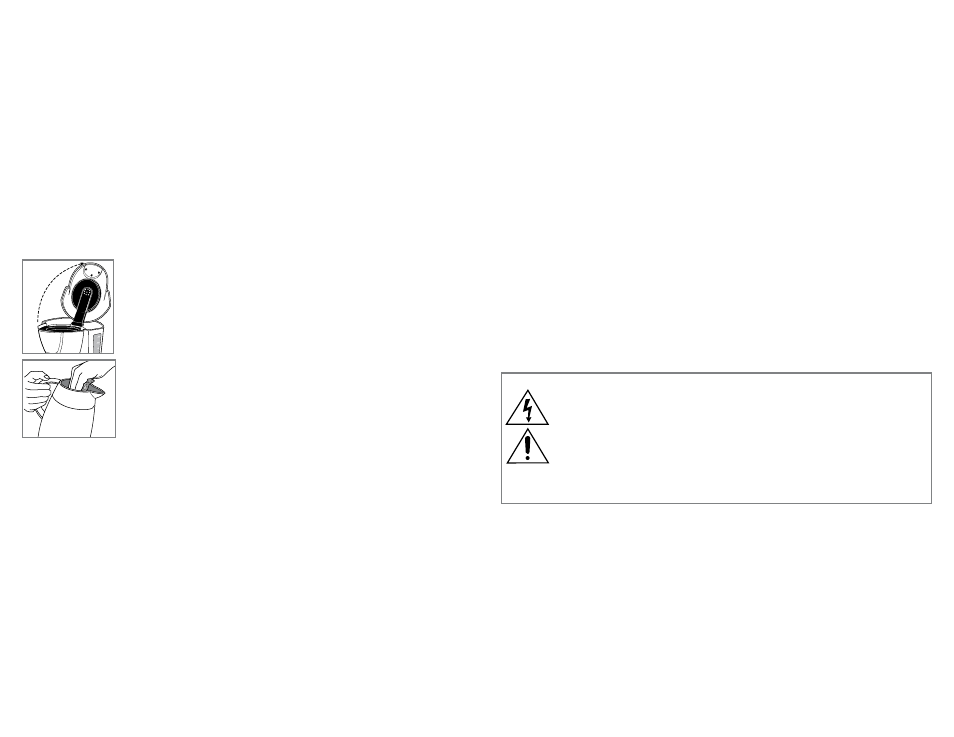
2. Open the cover and remove the brew basket and discard the paper
filter and grounds (G).
3. The brew basket may be hand washed with warm sudsy water or
place on the top rack of the dishwasher.
4. Dry the brew basket and put back in place.
5. The coffeemaker's exterior, control panel area and carafe plate
may be clean with a soft damp cloth.
6. To clean the thermal carafe, open the brew-thru lid by turning it
counterclockwise.
7. Wash the thermal carafe by hand with warm sudsy water (H).
8. Dry the thermal carafe.
9. To insert brew-thru lid into thermal carafe, align the brew-thru lid
arrow with the “Insert and Align” arrow on the thermal carafe and
twist clockwise (see fig B).
10. Turn the lid clockwise until it is in the “Close” position (see fig C).
11. Place the thermal carafe back on the carafe plate.
Mineral Deposits and Clogging
Mineral deposits left by hard water can clog your coffeemaker. Cleaning is recommended
every 3 months. Excessive steaming or a prolonged brewing cycle is a sign that a
cleaning is needed. The frequency of flushing out deposits is affected by your usage and
water hardness. During cleaning, more steaming occurs than when brewing coffee and
may emit spurts of steam.
1. Pour white vinegar into water reservoir up to 4-cup level on water level window. Add
water up to 8-cup line.
2. Put a basket style paper filter in the brew basket and close the one piece water
reservoir and brew basket lid. Set empty thermal carafe with the tightened lid in the
coffeemaker carafe plate.
3. Turn on coffeemaker and let half the cleaning solution brew into carafe (till water level
goes down to around "4"). Turn off coffeemaker and let it soak for at least 15 minutes
to soften the deposits.
G
H
4. Turn on coffeemaker and brew remaining cleaning solution into carafe.
5. Turn off coffeemaker, empty carafe and discard soiled paper.
6. Fill reservoir with water to 8-cup line, replace empty carafe, then turn on coffeemaker
for a complete brew cycle to flush out remaining cleaning solution. You may have to
repeat this to eliminate the vinegar smell/taste.
7. Wash the brew basket and carafe as instructed in "CLEANING."
WARNING
RISk OF FIRE OR ELECTRIC SHOCk. DO NOT OPEN.
The lightning symbol refers to “dangerous voltage”; the exclamation symbol
refers to maintenance instructions. See below.
WARNING: To reduce the risk of fire or electric shock, do not remove the
cover of the coffeemaker. There are no user-serviceable parts inside. Repair
should be done by authorized service personnel only.