Rubicon Express RE7133 User Manual
Page 3
Revised
9.3.13
REQUIRED TOOLS:
Basic mechanics' hand tools
Jack Stands
Vehicle
Hoist Floor
Jacks
5/16” drill bit
Front Installation:
1. Prepare for the front installation by removing the following items from the front
of the vehicle: Tires, Shocks, Sway bar links (Front and rear), Brake line bracket
from the frame only, and track bar (axle end only).
2. With the items removed, lower the front axle assembly and remove the front coil
springs.
NOTE: Be careful not to overextend the front drive shaft into the exhaust
or skid plate.
3. Mark the center of the lower spring bucket and drill to 5/16”. Pre-tap the hole us-
ing the supplied 3/8” self tapping bolt, HW1060 x 2 from the front bump stop kit.
Do not install the bump stop at this time
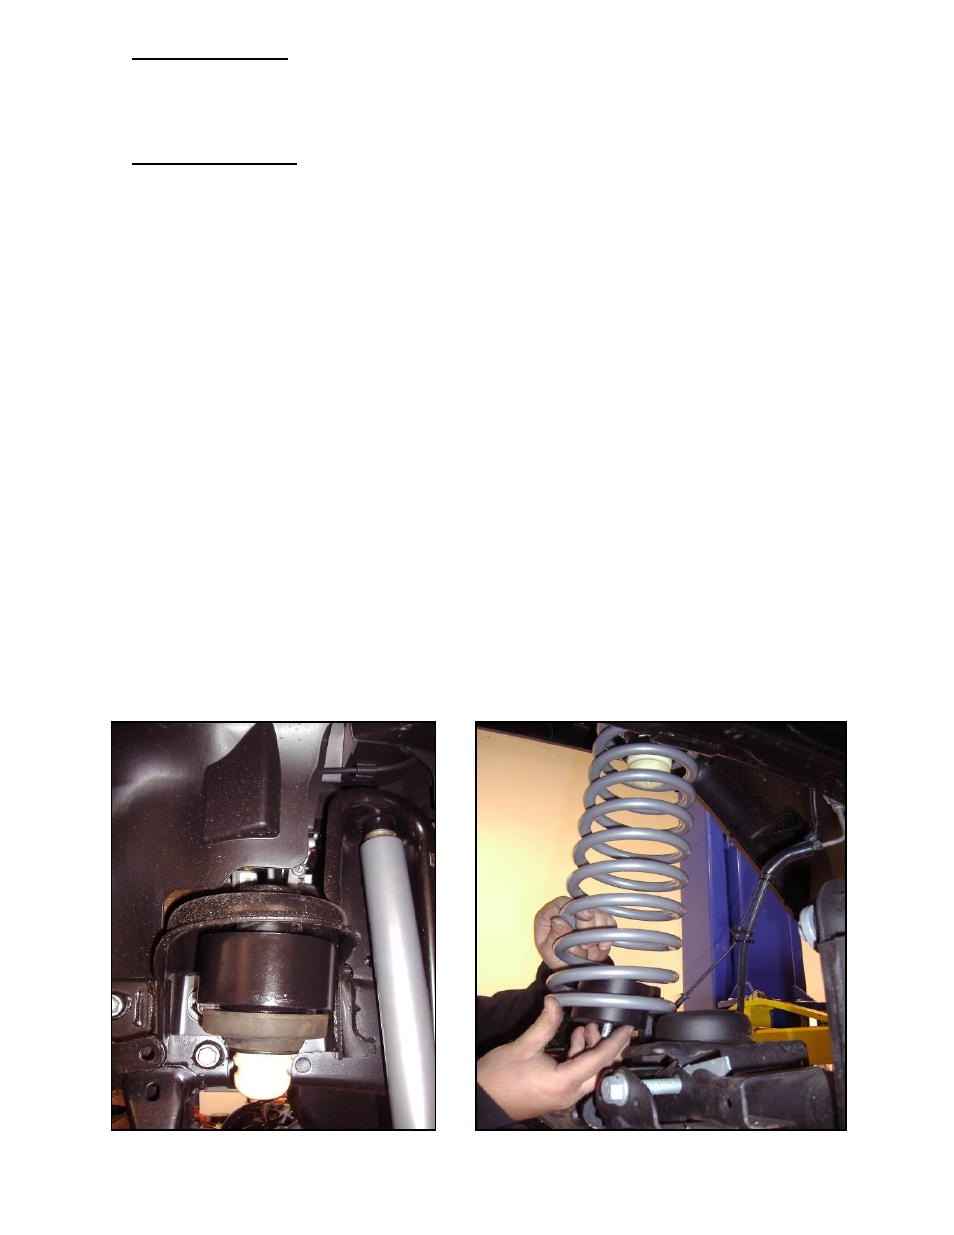
4. Slide the new front coil spring spacer, RM40090 on the upper tower with the lip
facing down. The spacer can be installed either above or below the factory rubber
isolator. (photo 1)
5. Reinstall the coil spring up into the vehicle’s upper spring tower while holding the
bump stop spacer, 90-RM42520 inside the coil. Place into the lower coil bucket
and rotate the coil into position.
6. Install the 3/8” self tapping bolt thru the bump stop and into the axle bracket.
(photo 2)
7. Raise the axle into place and reinstall the factory shocks using the front shock ex-
tensions, RE2003 at the axle mounting point or install the new front shocks,
RXT2421B or RXJ713 using the supplied hardware.
8. Reinstall the factory rear sway bar links into the front mounts, track bar, and re-
attach the brake line bracket to the frame.
(Photo #1)
(Photo #2)