Rubicon Express RE7142 User Manual
Page 3
RE7122-RE7142b Page 3 of 5
Front lower cam bolt installation
A. One side at a time remove the factory bolt that attaches the lower control arm to the axle.
B. Locate the indented marks around the square hole in the bracket to be removed.
C. Using a punch, hammer, and a receiving cup such as a socket that fits between the mounts knock out the tabs to create
elongated holes. If the tabs will not knock out with a couple hits of the punch, it will be necessary to use a burr type cutter to
elongate the holes. (Photo 2) example, rear upper pictured
D. Install the cam bolt assemblies with one washer on each side of the bracket between the locating ears. Rotate the bolt into the
center portion of the slot and tighten the nut so the bolt will not spin but not fully tight at this time.
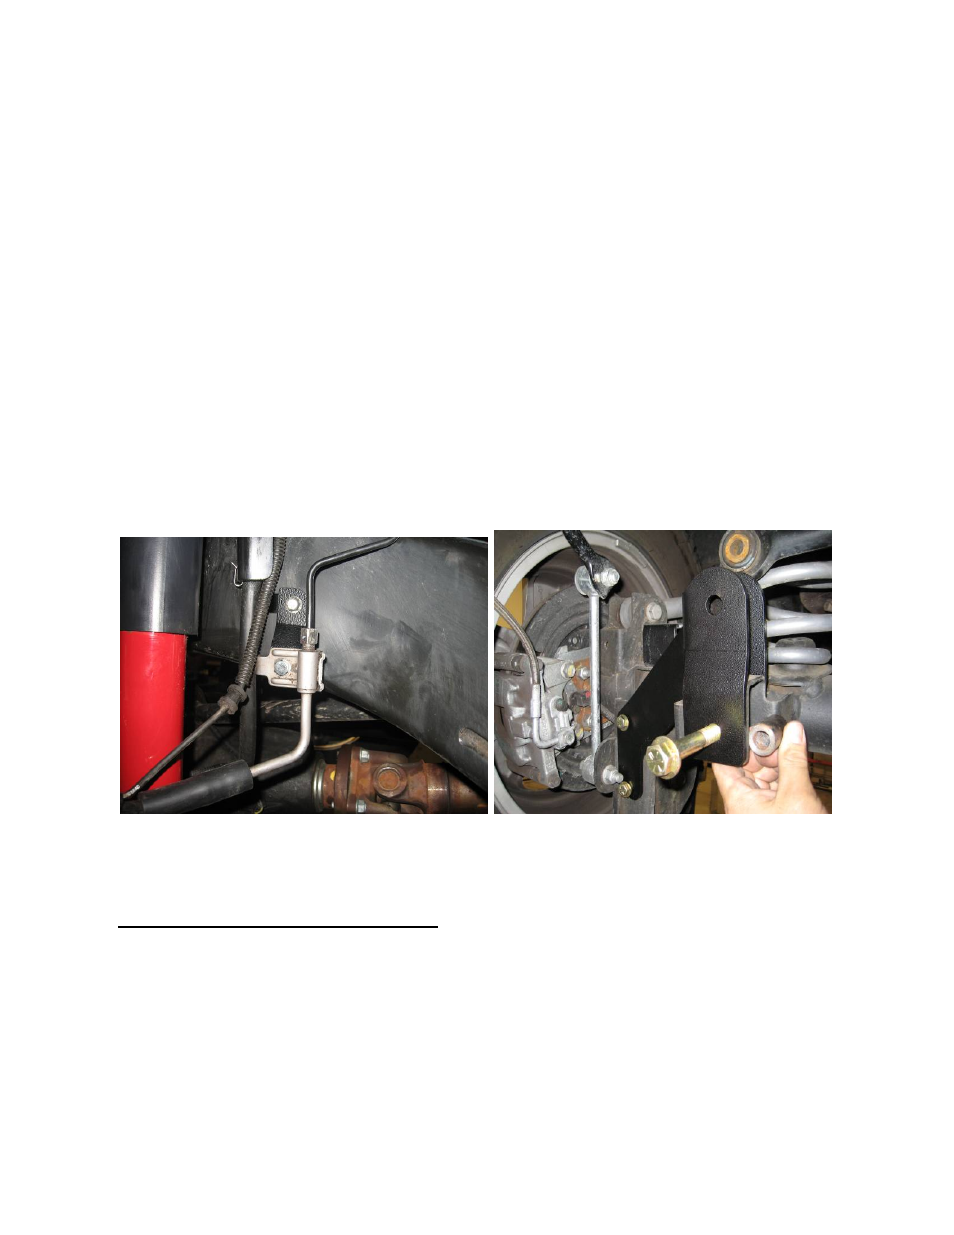
Front brake line extension brackets and sway bar links
A. With the front brake lines previously unbolted from the side of the frame install the brake line extension brackets to the frame
with the factory hardware. The tab end of the extension will locate in the frame rail as did the brake line.
B. Remove the clips that attach the ABS wire to the brake line.
C. Using the supplied ¼” hardware bolt the brake line tab to the lower hole of the extension bracket. (Photo #3)
NOTE:
When lowering the brake line mounting point, use caution when pulling on the hard lines. It may be necessary to
straighten some of the bends in the lines to get enough extension however excessive force or bending could weaken the hard brake
line and potentially cause a leak in the system.
D. With the brake line secured in its new location safely re-route the ABS wires and secure to the brake line with plastic zip ties.
E. Remove the rear sway bar links from the axle and sway bar and re-install to the front axle and sway bar. New rear links are
supplied.
PHOTO
#
3
PHOTO
#
4
Step 2 – Rear coil and component installation
A. With the vehicle and axle properly supported prepare the rear end suspension component installation by removing the following
items; shocks, sway bar links, and track bar at the axle end only (loosen the track bar bolt at the frame). The shocks and sway
bar links will not be reinstalled on the vehicle.
B Remove the brake line attaching screw at the frame and let the lines hang loose until later in the install. Unclip the abs wires from
the forward attaching point on the upper control arm brackets for additional length. It may also be helpful to remove the two
nuts holding the E-brake cables to the bottom of the body to allow for more axle droop and easier removal and installation of the
coil springs.
C. Lower the axle and remove both factory coil springs. The rubber isolators will come out with the coil and must be reinstalled with
the new coil springs.