Eye shield – Steele Products SP-PB006 User Manual
Page 4
7
3. Drill holes in the workbench at the marks.
4. Using two long bolts, washers, lock-washers and nuts, as shown (not supplied), secure the
grinder to the workbench.
Eye shield Installation
Eye shields must be installed before operating the bench grinder.
1. Mount the left and right shield rods to the inside of the wheel guards using hex bolts.
2. Once shield rods are firmly in place, slide the shield bracket onto the shield rod.
3. Tighten the carriage bolt, leaving it loose enough to allow the safety shield to be raised and
lowered easily.
Workbench
Flat washer
Hex nut
Bolt
Flat
washer
shield rod
clamp bracket
washer
hex bolt
Eye shield
8
NOTE: The eye shield should move freely when being adjusted, but stay in place when the locking
knob is tightened.
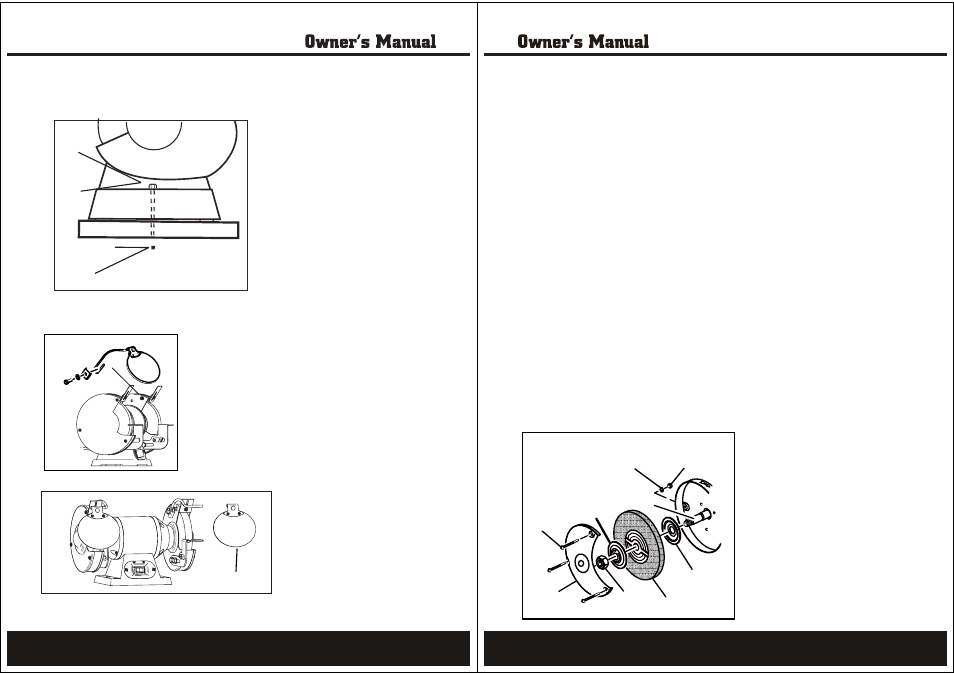
Installing or Changing the Wheel
WARNING! Turn the power off and remove the plug from the outlet before changing the grinding
wheels. When turning the grinder on with a newly installed wheel, DO NOT STAND IN FRONT OF
THE GRINDER. Stand to the side and allow the grinder to run for at least one minute before
proceeding to use it.
1. Loosen the tool rest hex nuts, and slide the tool rest away from the wheel.
2. Use a screwdriver to remove the wheel cover screws and remove the wheel cover.
3. Fit an appropriately sized wrench on the spindle hex nut.
4. Loosen the wheel nut in a clockwise direction for the left side and a counter-clockwise
direction for the right side.
5. Remove the outer flange and grinding wheel.
6.
Inspect the new wheel carefully to ensure there are no cracks, chips or other damage.
7.
Wipe the flange surfaces clean, and install the new wheel, flange and the spindle hex nut.
8. To install a new grinding wheel, reverse the above procedure.
9. Be sure the grinding wheel and outer flange are properly seated on the spindle shaft.
10. Replace the wheel cover and reposition the tool rest.
11. The tool rest, spark deflector and eye shields will need to be readjusted after installation
of the wheel is complete.
12. When turning the grinder on with a newly installed wheel, DO NOT STAND IN FRONT
OF THE GRINDER. Stand to the side and allow the grinder to run for at least one minute
before proceeding to use it.
IMPORTANT! Do not overtighten the spindle hex nut, because this may cause the wheel to crack.
CAUTION! DO NOT INSTALL OR USE A DAMAGED GRINDING WHEEL. The force of rotation may
cause a damaged wheel to fly apart, and could injure operators or bystanders.
SCREW(S)
GRINDING
WHEEL
OUTER
FLANGE
INNER
FLANGE
STAR
WASHER(S)
HEX NUT(S)
WHEEL
GUARD COVER
WHEEL
NUT
SPINDLE
SHAFT