Audio connections, Specifications, Audio connections 6. specifications – Behringer Ultra-Low Latency 2 In/2Out USB/Audio Interface with Digital Output U-Control UCA202 User Manual
Page 6
11 U-CONTROL UCA202 User Manual
10 U-CONTROL UCA202 User Manual
To provide a professional recording interface between mixing
console and computer, you can use the UCA202 in combination
with a suitable mixing console that includes subgroup outputs.
This type of setup allows you to record several signals in the
computer at the same time, to simultaneously play back several
takes or playbacks which have been recorded, and to listen to the
whole recording via loudspeakers (or headphones). Figure 4.1
shows a possible setup with one UCA202.
Connect the outputs of the subgroup (in this case ALT 3-4 OUT)
with the inputs of the UCA202 (6). You can choose to connect the
outputs (5) of the interface either to the TAPE INPUT sockets or
to your monitor speakers. You can connect control headphones to
the socket (3) of the UCA202 or to the headphones output of
your mixing console. Use the USB cable supplied with the unit to
connect your PC or MAC via the USB interface.
By routing each channel that you want to record through the ALT3-4
subgroup, you can now use the input channels of the mixing console
to record different signals (e.g. microphone, guitar, sound module,
etc.) in the computer. If you connect the OUT jacks of the UCA202 to
channel inputs 7/8 (not via TAPE INPUT), make sure that the signal is
not switched to the subgroup but instead to the main output of your
mixer (MUTE key on the UB1204FX-PRO in channel 7/8 not pressed).
Otherwise feedback can occur. Make sure that you use the SOURCE
section on the mixing console to select the correct monitoring paths
(ALT 3-4 and MAIN MIX or ALT 3-4 and TAPE).
If you lead the UCA202 back via a channel input (not TAPE INPUT),
you can also use the aux path in the channel to set up a monitor
mix for live musicians. To do this, use the Aux Send (e.g. Aux 1)
in this channel input. If the musicians want to hear themselves as
well as the playback or previous recording takes, use the Aux Sends
in the recording channels to mix in the recording signals with the
monitor mix.
5. Audio Connections
Although there are various ways to integrate the UCA202 into
your studio or live set-up, the audio connections to be made will
basically be the same in all cases:
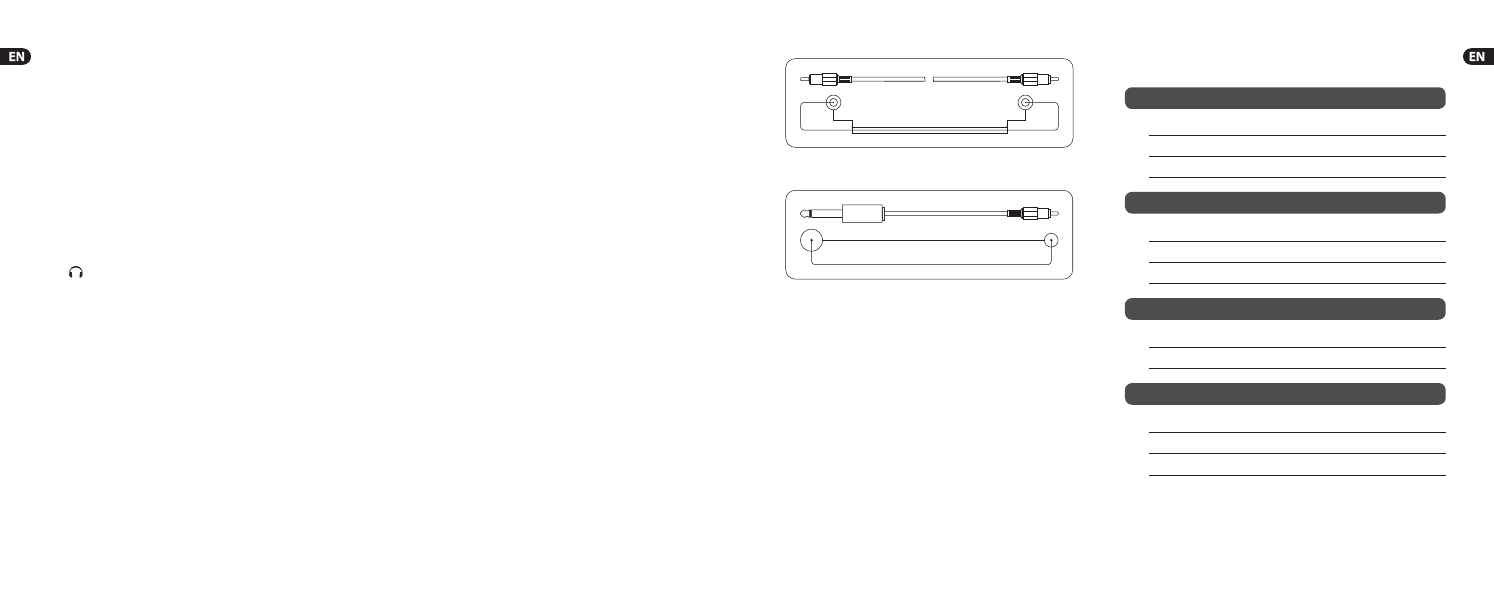
5.1 Wiring
Please use standard RCA cables to connect the UCA202 to other
audio equipment. You can also use an adapter cable.
shield
sleeve
sleeve
tip
tip
Fig. 5.1: RCA cable
sleeve
sleeve
tip
tip
Fig. 5.2: Adapter cable with ¼" jack
5.2 Headphones connection
The UCA202 is provided with a headphones jack. Here,
you can connect any standard pair of stereo headphones
with a 1/8" TRS connector.
6. Specifications
Line In
Connectors
RCA, unbalanced
Input impedance
approx. 27 kΩ
Max. input level
2 dBV
Line Out
Connectors
RCA, unbalanced
Output impedance
approx. 400 Ω
Max. output level
2 dBV
Digital Output
Socket
Toslink, optical cable
Output format
S/PDIF
Phones Out
Socket
1/8" TRS stereo jack
Output impedance
approx. 50 Ω
Max. output pegel
-2 dBu, 2 x 3,7 mW @ 100 Ω