Appendix, How to mount your system onto wall – Philips MCM309R-37 User Manual
Page 31
31
English
Appendix
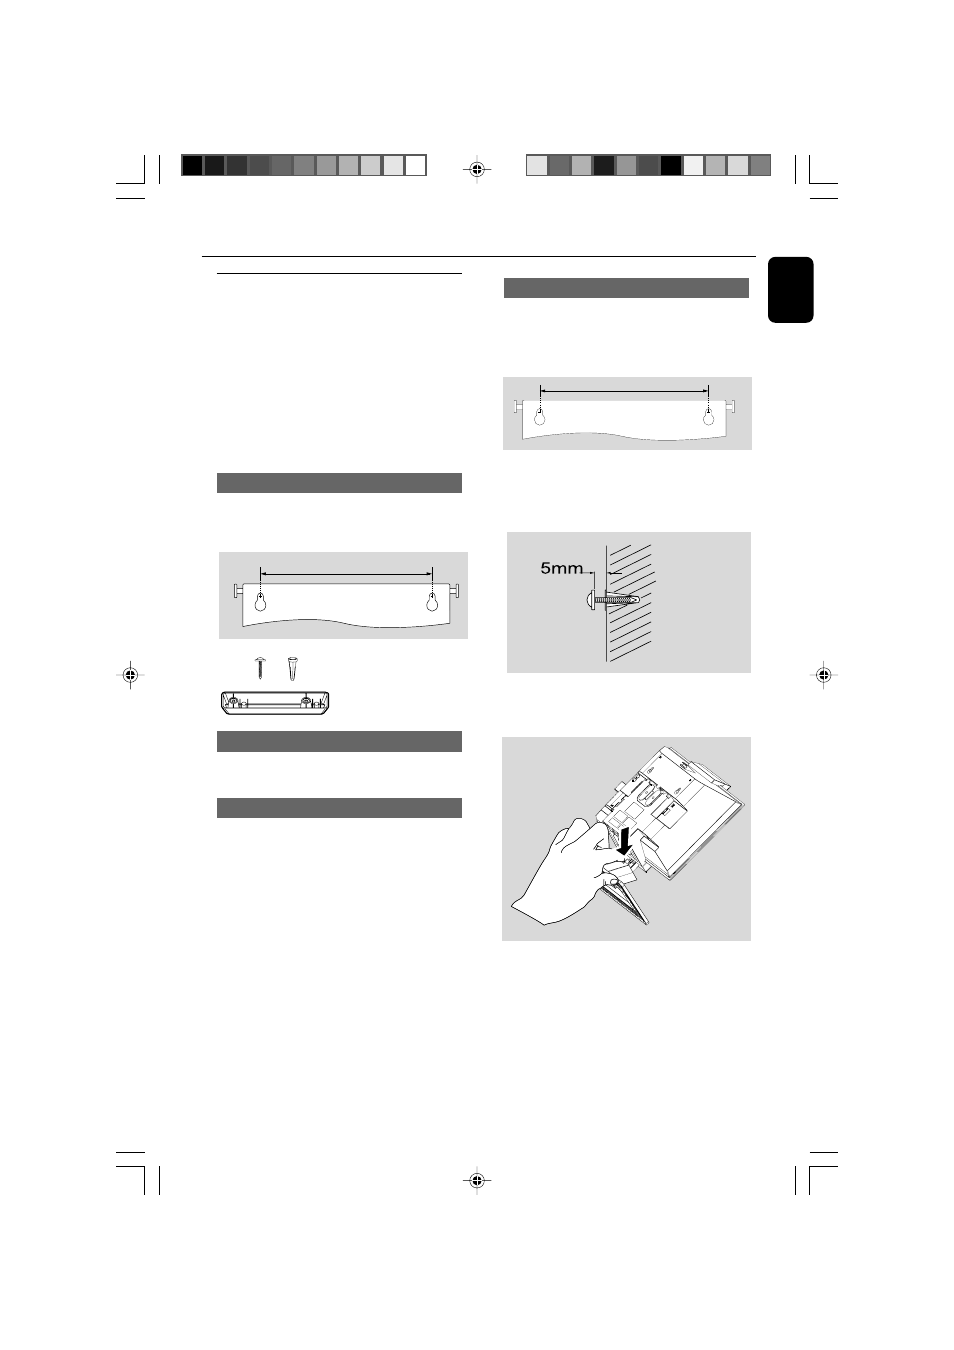
Mounting your main unit onto wall
1
Align the template in the chosen location on a
wall. Use a pencil to mark the drilling positions
(as shown).
164 mm
2
Drill two 6mm diameter holes as marked.
3
Secure the dowels and screws in the holes
respectively, leaving the screws 5mm proud of
the wall.
4
To detach the stand from the main unit,
a. As shown, hold down PRESS
4.
b. Move out the stand to detach.
5
Hang the main unit on the fastening screws.
How to mount your system onto
wall
IMPORTANT!
– The wall mounting instructions are
for use by the qualified wall mounting
person only!
– Ask a qualified person to help you
with the wall mounting, which includes
drilling holes on the wall and
mounting the set onto wall.
What’s in the supplied mounting kit
1 x template
6 x screws and dowels
2 x speaker brackets
What else you’ll need
– Drilling tools (e.g. an electric drill)
Preparation
1
Find a suitable location for mounting and
complete necessary rear connections (see
Preparations).
2
Ask a qualified person to help you with the wall
mounting, who should:
– to avoid unexpected damage, learn about the
piping, wiring and other relevant information
inside your wall;
– according to the drilling requirements,
choose suitable drilling tools;
– take other precautions necessary for the wall
mounting work.
164 mm
1
pg001-033_MCM309R_37_Eng
2007.1.30, 9:58
31