Warning – Bissell Powerforce bagless 6579 series User Manual
Page 5
5
w w w . b i s s e l l . c o m 8 0 0 . 2 3 7 . 7 6 9 1
H
ow to use this guide
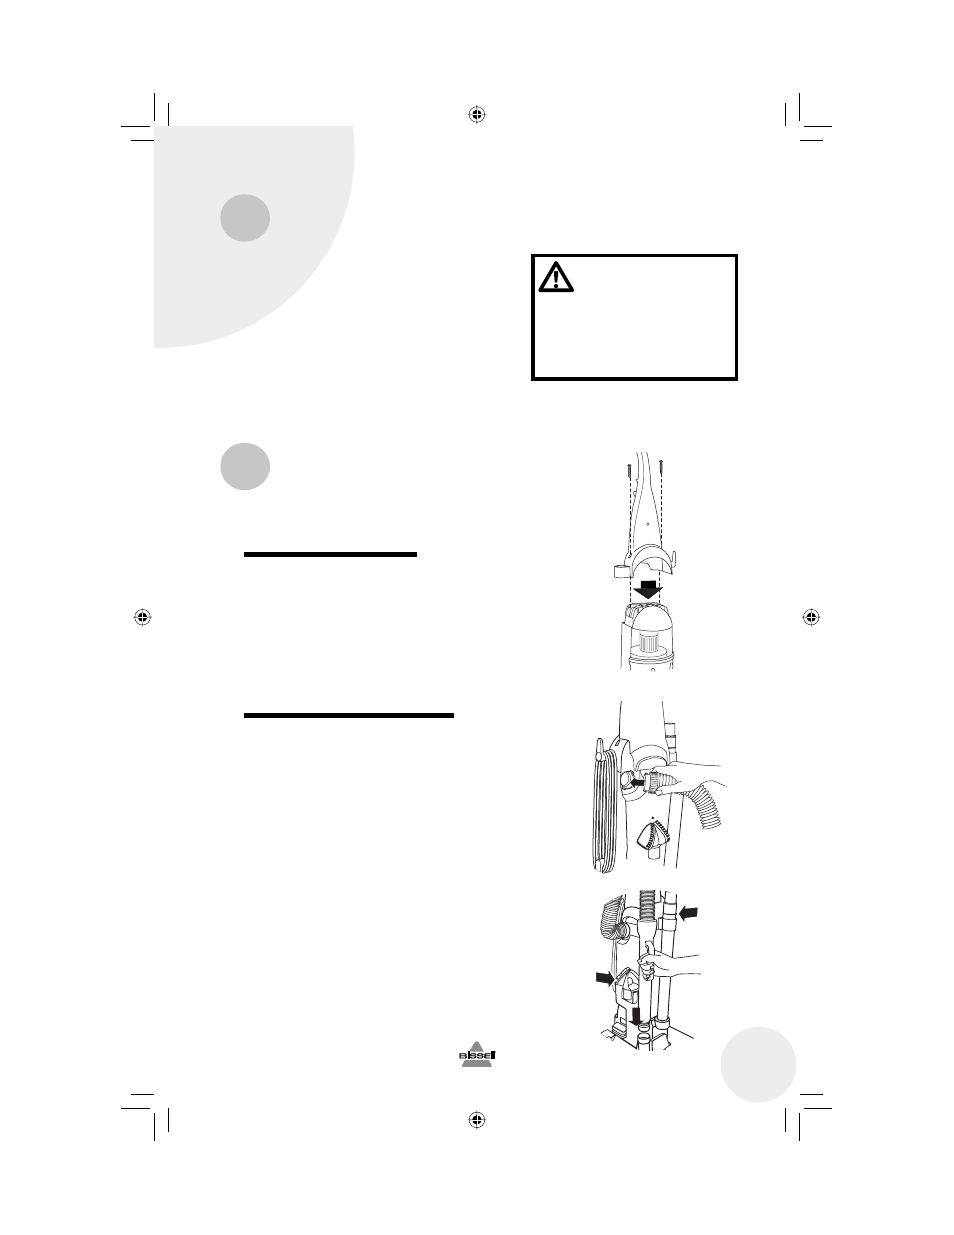
A
ssembly
This User’s Guide has been designed to help
you get the most satisfaction from your BISSELL
PowerForce Bagless. You’ll find assembly and
operating instructions, safety precautions, as well
as maintenance and troubleshooting instructions.
Please read this Guide thoroughly before
assembling your vacuum cleaner.
Pay particular attention to the product diagram,
assembly instructions, and part names. Locate
and organize all parts before assembly. Following
this User’s Guide will greatly enhance your ability
to get the most performance from your BISSELL
PowerForce Bagless for many years.
The only tool you’ll need to assemble your
vacuum cleaner is a screwdriver.
Attach handle to vacuum
1.
Locate the vacuum handle and remove the
screw packet taped to the base of the handle.
2.
Stand the vacuum upright and place the handle
on the top of the vacuum body as shown.
3.
Insert the screws provided from the screw
packet into the existing holes on each side.
Tighten securely with a screwdriver.
Attach vacuum hose and tools
1.
Attach the Twist ‘n Snap™ hose by lining up
the tabs on the base with the corresponding
notches on the back of the vacuum as shown.
2.
Turn the Twist ‘n Snap hose to the right to lock
the hose into place.
3.
Grasping the quick reach handle, slide the end
of the hose wand onto the hose wand base.
Snap the hose into the hose clip.
NOTE: The powerfoot will not operate
effectively unless the hose wand is
firmly attached.
4.
Slide the extension wand and the crevice tool
together into the storage clip on the side of
the vacuum.
5.
Snap the combination tool into the storage clip
on the back of the vacuum.
WARNING:
Plastic film can be
dangerous. To avoid
danger of suffoca-
tion, keep away from
babies and children.
ug310-5825_6579_107.indd 5
ug310-5825_6579_107.indd 5
1/18/07 1:29:34 PM
1/18/07 1:29:34 PM