7 replace the filters – Philips Luftreiniger User Manual
Page 16
16
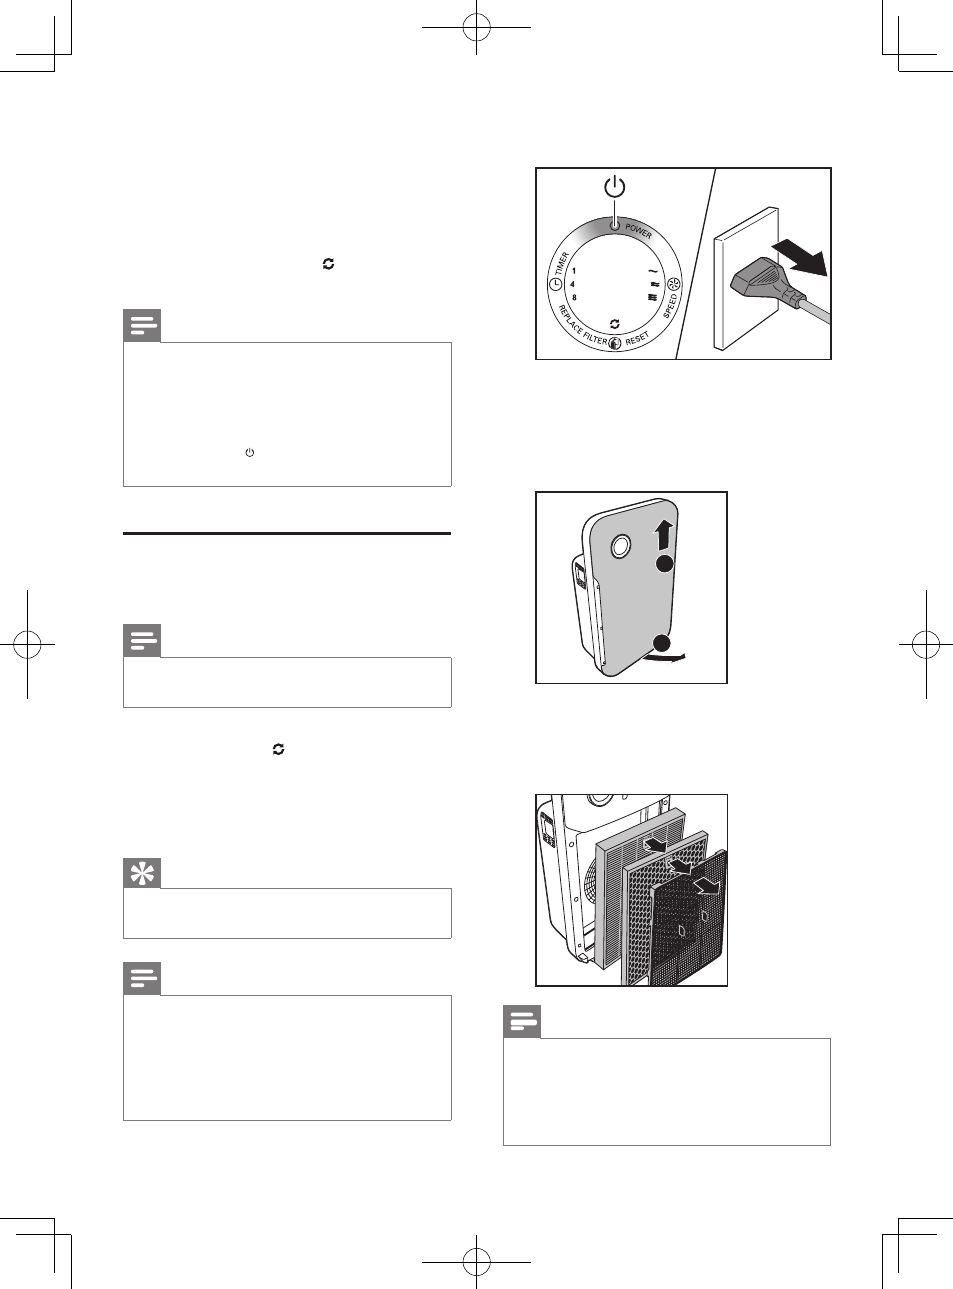
1
Switch off the purifier and unplug it.
2
Place your fingers in the recesses of the
side panels and gently pull the bottom
part of the front panel towards you. Lift
the panel out of the hooks at the top of
the purifier.
1
2
3
Remove the filters using the tag on the
filter. Take the filters by both sides and
gently deposit them into the house hold
trash bin.
Note
•
Do not touch the pleated filter surface, or
smell the filter as it has collected pollutants
from the air.
•
Wash your hands after disposing of the used
filters.
7 Replace the
filters
The filter replacement light ( ) indicates the
filters have to be replaced.
Note
•
If you remove the front panel for filter
changing while the purifier is switched on, all
lights on the control panel will be off.
•
Once the front panel is placed back to the
purifier, all lights flash twice. Then, the purifier
is off. Press the
button to switch on the
purifier again.
Replace the activated carbon
filter and the HEPA filter
Note
•
The activated carbon filter and the HEPA filter
are not washable nor vacuum cleanable.
Replace both the activated carbon filter and
HEPA filter when the light goes on. This will
last for approximately 2 weeks.
On the last day of the 2 weeks, the purifier
beeps every 30 minutes to inform you that the
filter needs to be replaced.
Tip
•
When you remove or insert filters, place the
purifier against a wall for more stability.
Note
•
Insert the filters in the correct position.
•
Make sure you place the filters in the order of
HEPA filter, activated carbon filter, and finally
the pre-filter.
•
Make sure that the side with the tag is pointing
towards you.
EN