Testing for a gas leak, Replacement parts, Replacing the sensor – Bacharach 19-9336 User Manual
Page 3
Testing For a Gas Leak
1.
Turn instrument ON and allow it to warm up (approximately 60 seconds).
2. The instrument is ready to check for gas leaks after the audible alarm begins to
beep. Note that the instrument starts in its high-sensitivity mode.
3. Check for the presence of gas by positioning the tip of the flexible probe near the
area to be tested.
4. An increase in the relative concentration of gas is indicated by the visual alarm’s
LED blinking faster and the audible alarm’s beep rate increasing.
5. Once the presence of the gas has been confirmed, the instrument’s sensitivity
can be lowered by double pressing the ON/OFF button (a decreasing frequency
tone should be heard), allowing the location of the leak to be easily pinpointed.
Replacement Parts
Replacement parts can be obtained by contacting one of Bacharach’s Sales/Service
Centers listed on the back cover of this manual.
Item
Part No.
Sensor . . . . . . . . 19-0575
Sensor Cover . . 19-0576
Battery Door . . . 19-0577
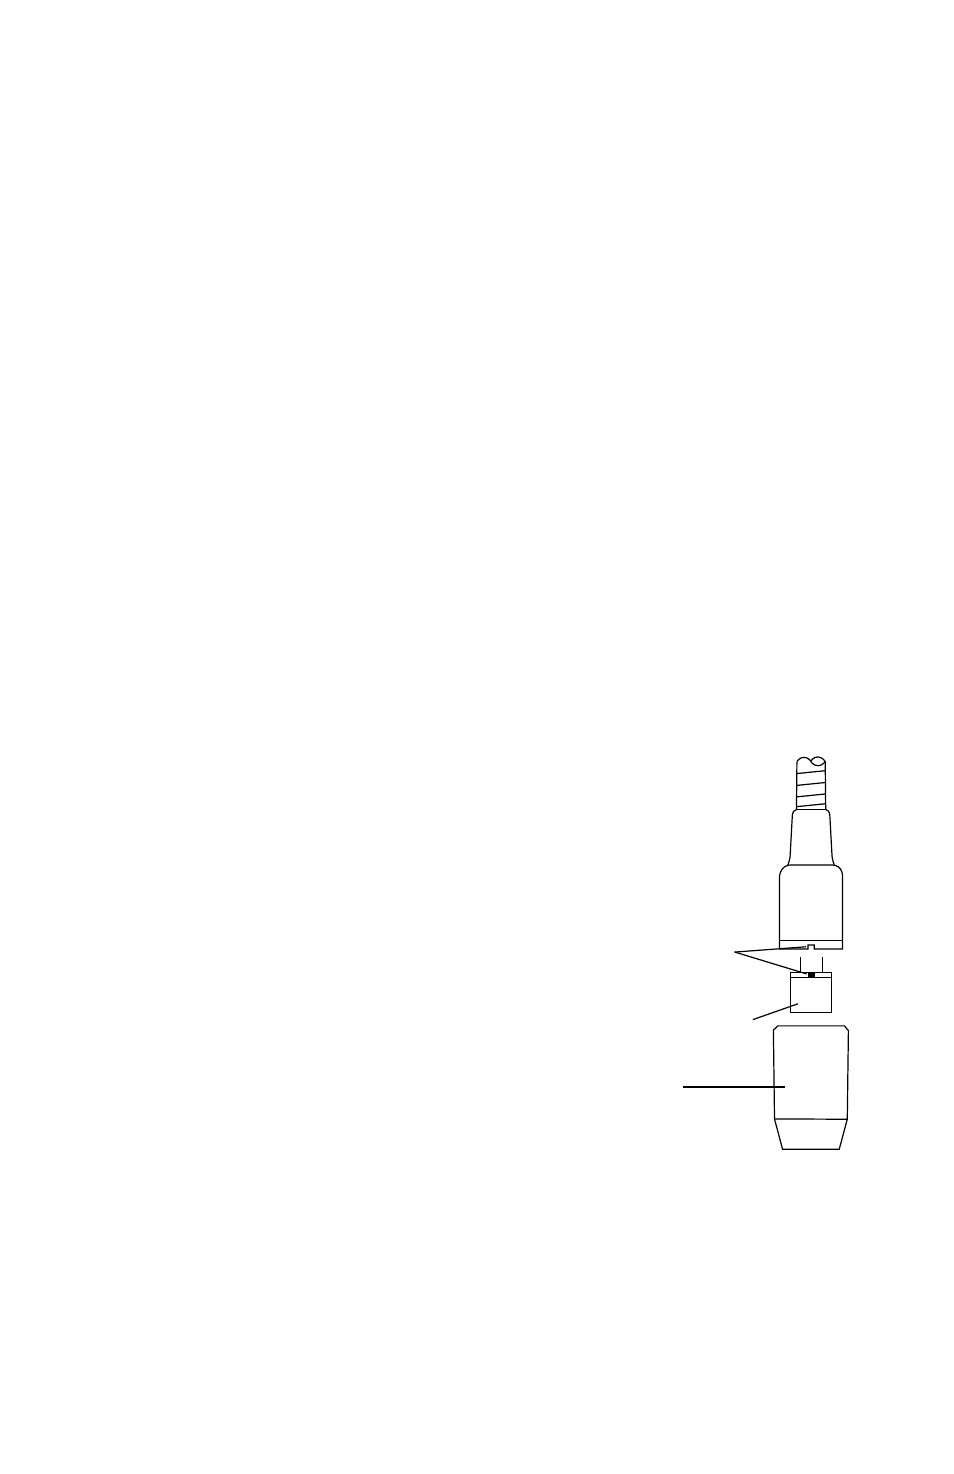
Replacing the Sensor
Replace the sensor if a sensor error occurs
(Visual Alarm LED flashing green and red),
or when the instrument can no longer detect
a known source of combustible gas.
1.
Turn instrument OFF.
2. Pull off sensor cover.
3. Pull out old sensor and discard.
4. Plug in new sensor, being sure to align
tab on sensor with notch in sensor
socket.
5. Install sensor cover.
Align tab on sensor
with notch in socket
Combustibles Sensor
Sensor Cover