Installation, Step b: (wiring and final installation), Step c: (mounting) – Bravo View OVR-090BL User Manual
Page 7
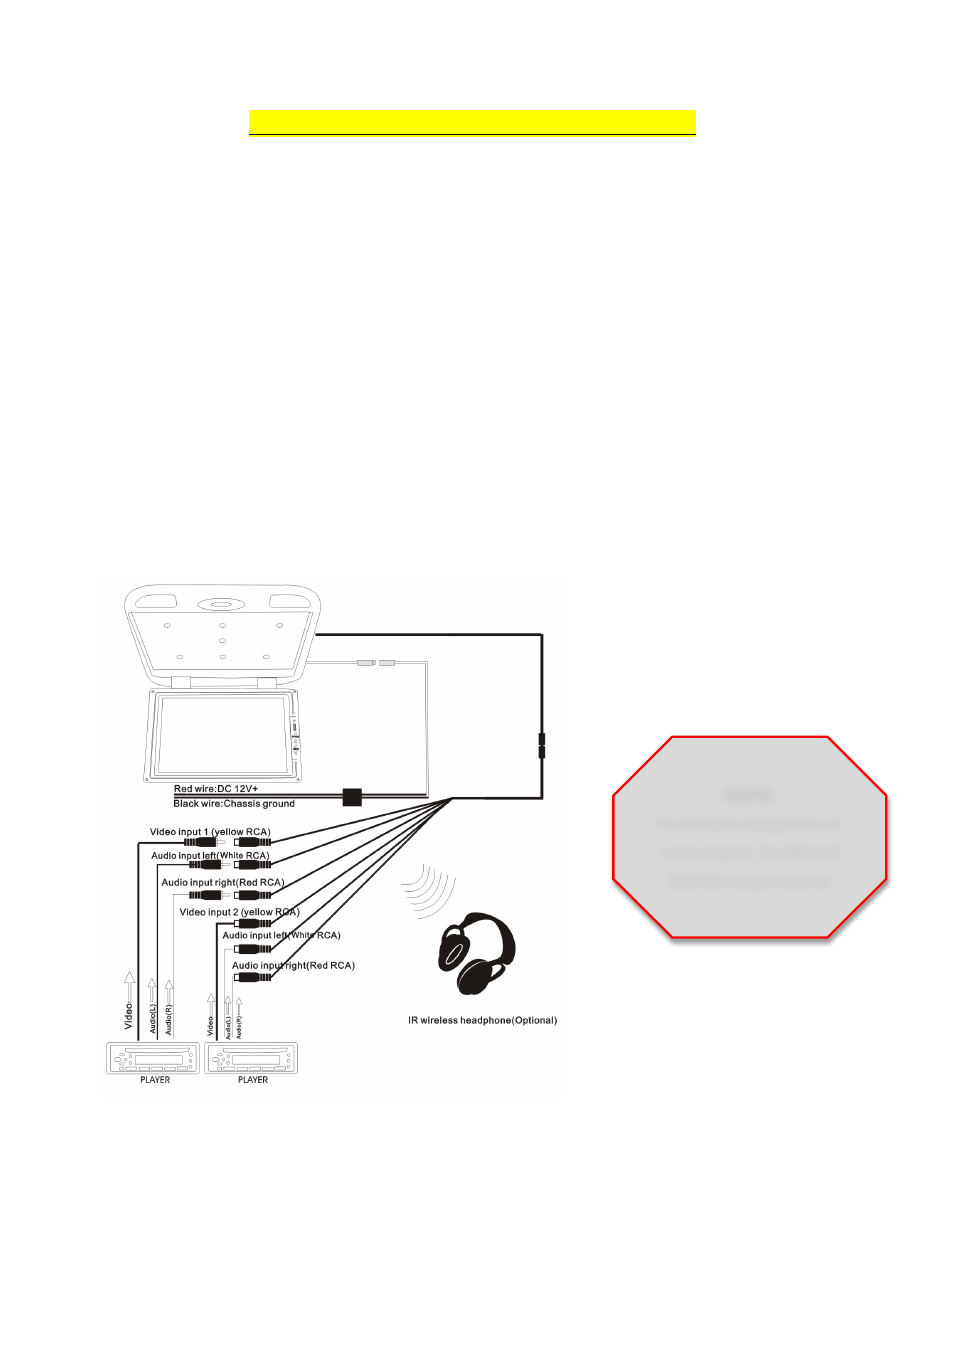
INSTALLATION
PROFESSIONAL INSTALLATION RECOMMENDED!
Step B: (Wiring and Final Installation)
With
the
Metal
Bracket
securely
placed,
drill
a
small
hole
to
accommodate
the
wiring
cable
so
that
the
“Din
Cable”,
male
end
is
at
the
area
where
the
monitor
will
be
installed.
Ideally,
the
hole
for
the
cable
should
be
drilled
in
the
middle
of
the
mounting
bracket.
The
other
end
of
the
cable
should
run
to
the
area
in
which
you
will
have
your
source
unit
installed
(ex.
DVD
Player).
Connect
your
SOURCE
UNIT
to
one
of
the
2
sets
of
RCA
cables
(Yellow-‐Video
Signal,
Red
Audio).
The
Red
fused
wire
should
be
attached
to
the
“Accessory”
wire
of
the
vehicle.
You
can
usually
find
the
“Accessory”
lead
at
the
fuse
box.
Take
a
voltage
meter
and
test
for
+12
volt
positive
power
when
the
“Accessory”
position
of
the
key
is
turned
on
at
the
ignition
switch.
ALWAYS
ENSURE
THAT
YOUR
ACCESSORY
WIRE
IS
FUSED
AT
THE
SOURCE!
Attach
the
Black
wire
to
any
metal
part
of
the
vehicle
that
is
ground.
Step C: (Mounting)
With
the
vehicle
powered
off,
mount
the
monitor
into
place
using
the
pre-‐drilled
holes
(Prior
to
installation,
always
check
the
clearance
of
the
screw
lengths
to
ensure
that
you
do
not
puncture
the
roof).
NOTE:
For Wireless Headphones to
work properly, the White &
Red RCA output must be
connected to your
MOBILE VIDEO SYSTEM.