3disposing of packaging, 4connecting the appliance, 5switching on the appliance – Liebherr UIK 1424 Comfort User Manual
Page 5: 5control, 1refrigerator compartment, 1food refrigeration, 2setting the temperature, 3supercool, 5 control, Control
q
Standard EN 378 specifies that the room in which you install
your appliance must have a volume of 1 m
2
per 8 g of R
600a refrigerant used in the appliance. If the room in which
the appliance is installed is too small, a flammable gas-air
mixture may form in the event of a leakage in the refrigera-
tion circuit. The quantity of refrigerant used in your appliance
is indicated on the type plate on the inside of the appliance.
u
Detach the connecting cable from the rear of the appliance,
removing the cable holder at the same time because other-
wise there will be vibratory noise!
After installation:
u
Remove the protective film from the decorative trims.
u
Remove all transit supports.
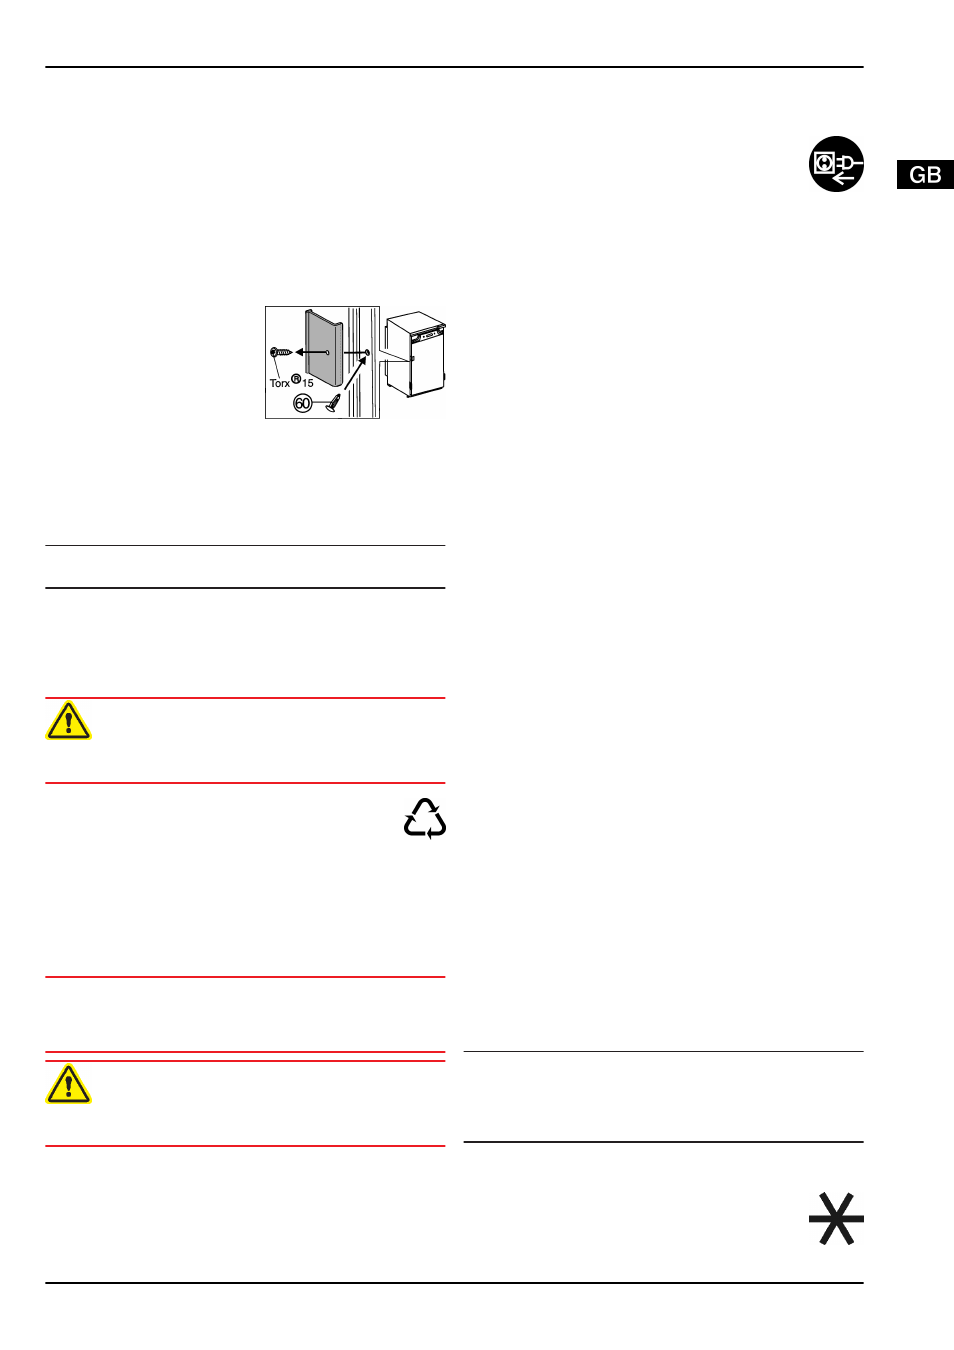
u
Unscrew the red transport
lock. Close the vacated
retaining hole using the
stopper (60).
u
Dispose of packaging material (see 4.3) .
For Side-by-Side installation, freezer and refrigerator side by
side:
u
Always install the freezer on the right of the refrigerator, as
seen from the front.
w
No condensate forms between the appliances thanks to the
side wall heating system foamed in on the left.
Note
u
Clean the appliance (see 6.2) .
If the appliance is installed in a very damp environment,
condensate may form on the outside of the appliance.
u
Always see to good ventilation at the installation site.
4.3 Disposing of packaging
WARNING
Danger of suffocation due to packing material and plastic film!
u
Do not allow children to play with packing material.
The packaging is made of recyclable materials:
-
corrugated board/cardboard
-
expanded polystyrene parts
-
polythene bags and sheets
-
polypropylene straps
-
nailed wooden frame with polyethylene panel*
u
Take the packaging material to an official collecting point.
4.4 Connecting the appliance
NOTICE
Risk of damage to the electronic control system!
u
Do not use stand-alone inverters (conversion of d.c. to a.c./
three-phase) or energy saving plugs.
WARNING
Fire and overheating hazard!
u
Do not use extension cables or multiple socket outlets.
The type of current (alternating current) and voltage at the
installation site have to conform with the data on the type plate
(see Appliance at a glance).
The socket must be properly earthed and fused. The tripping
current for the fuse must be between 10 A and 16 A.
The socket must be easily accessible so that the appliance can
be quickly disconnected from the supply in an emergency. It
must be outside the area of the rear of the appliance.
u
Check the electrical connection.
u
Plug in the power plug.
4.5 Switching on the appliance
u
Press On/Off button
Fig. 2 (1)
.
w
The appliance is switched on. The temperature display indi-
cates the set temperature.
w
If all LEDs in the temperature display light up, demo mode is
activated. Please contact the after sales service.
5 Control
5.1 Refrigerator compartment
The natural circulation of air in the refrigerator compartment
results in zones differing in temperature. It is coldest directly
above the vegetable drawers and at the rear wall. It is warmest
at the top front of the compartment and in the door.
5.1.1 Food refrigeration
u
Store perishable food such as ready-to-serve dishes, meat
products and sausages in the coldest zone. Place butter
and preserves in the upper area and in the door (see Appli-
ance at a glance).
u
Use recyclable plastic, metal, aluminium and glass
containers and cling film for wrapping.
u
Do not store food too close together to enable good air
circulation.
u
To safeguard bottles from tipping over: move the bottle
holder.
5.1.2 Setting the temperature
The temperature depends on the following factors:
-
the door opening frequency
-
the room temperature at the site where the appliance is
installed
-
the type, temperature and quantity of frozen food
Temperature setting to be recommended: 5 °C
An average temperature of approx. –18 °C is then established
in the freezer compartment.
The temperature can be changed continuously. Once the 1 °C
setting is reached, it starts again with 9 °C.
u
To access temperature adjustment: press the setting button
Fig. 2 (2)
once.
w
The LED of the current temperature flashes in the tempera-
ture display.
u
Press the setting button
Fig. 2 (2)
the number of times
needed until the required temperature shines in the LED
display.
Note
u
Long pressing of the setting button sets a slightly colder
value within a small temperature range (e.g.: between 5 °C
and 7 °C). The LED of the next lower temperature range
then shines in the temperature display.
5.1.3 SuperCool
With SuperCool you switch to the highest cooling
performance to reach lower cooling temperatures.
Use SuperCool, to rapidly cool large amounts of
food.
Control
* Depending on model and options
5