5disposing of packaging, 6connecting the appliance, 7switching on the appliance – Liebherr K 2734 Comfort User Manual
Page 7: 5control, 1refrigerator compartment, 1food refrigeration, 2setting the temperature, 3coolplus function, 4shelves, 5 control
4.5 Disposing of packaging
WARNING
Danger of suffocation due to packing material and plastic film!
u
Do not allow children to play with packing material.
The packaging is made of recyclable materials:
-
corrugated board/cardboard
-
expanded polystyrene parts
-
polythene bags and sheets
-
polypropylene straps
-
nailed wooden frame with polyethylene panel*
u
Take the packaging material to an official collecting point.
4.6 Connecting the appliance
NOTICE
Risk of damage to the electronic control system!
u
Do not use stand-alone inverters (conversion of d.c. to a.c./
three-phase) or energy saving plugs.
WARNING
Fire and overheating hazard!
u
Do not use extension cables or multiple socket outlets.
The type of current (alternating current) and voltage at the
installation site have to conform with the data on the type plate
(see Appliance at a glance).
The socket must be properly earthed and fused. The tripping
current for the fuse must be between 10 A and 16 A.
The socket must be easily accessible so that the appliance can
be quickly disconnected from the supply in an emergency. It
must be outside the area of the rear of the appliance.
u
Check the electrical connection.
u
Plug in the power plug.
4.7 Switching on the appliance
Put the appliance into operation about 2 hours before first
loading food to be frozen.
u
Turn the temperature control
Fig. 3 (1)
to the right, from the
0 setting to point 3.
w
The interior light is on.
5 Control
5.1 Refrigerator compartment
The natural circulation of air in the refrigerator compartment
results in zones differing in temperature. It is coldest directly
above the vegetable drawers and at the rear wall. It is warmest
at the top front of the compartment and in the door.
5.1.1 Food refrigeration
u
Store perishable food such as ready-to-serve dishes, meat
products and sausages in the coldest zone. Place butter
and preserves in the upper area and in the door (see Appli-
ance at a glance).
u
Use recyclable plastic, metal, aluminium and glass
containers and cling film for wrapping.
u
Always store liquids and food which is subject to odour or
taste transfer in closed containers or cover them.
u
Foods which give off a large amount of ethylene gas and
delicate foods, such as fruit, vegetables, salad, should
always be stored separately or wrapped so as not to reduce
the storage life; e.g. do not store tomatoes together with
kiwis or cabbage.
u
Do not store food too close together to enable good air
circulation.
u
To safeguard bottles from tipping over: move the bottle
holder.
5.1.2 Setting the temperature
The temperature can be set between 1 (warmest temperature,
minimum cooling performance) and 7 (coldest temperature,
maximum cooling performance).
The middle control setting is recommended, then a middle
temperature of approx.5 °C is established in the refrigerator
compartment.
To ensure ideal temperatures for storing frozen foods, a setting
of “4” to “7” on the temperature controller is recommended.
Selecting “7” makes it possible to achieve temperatures under
0 °C in the coldest part of the fridge compartment.*
An average temperature of approx. –18 °C is then established
in the freezer compartment*
u
Turn the temperature control
Fig. 3 (1)
.
The temperature depends on the following factors:
- the door opening frequency
- the room temperature at the site where the appliance is
installed
- the type, temperature and quantity of frozen food
u
Adjust the temperature as needed, using the control.
5.1.3 CoolPlus function*
At low room temperatures of 18 °C or lower:
u
Press the Cool-Plus switch
Fig. 3 (2)
.
w
The deep temperatures in the freezer compartment are
ensured.
Once the room temperature is again higher than18 °C :
u
Deactivate the Cool-Plus
Fig. 3 (2)
switch manually.
Note
u
At normal room temperatures, in excess of 18 °C, the Cool-
Plus switch should be turned off, as it is not required.
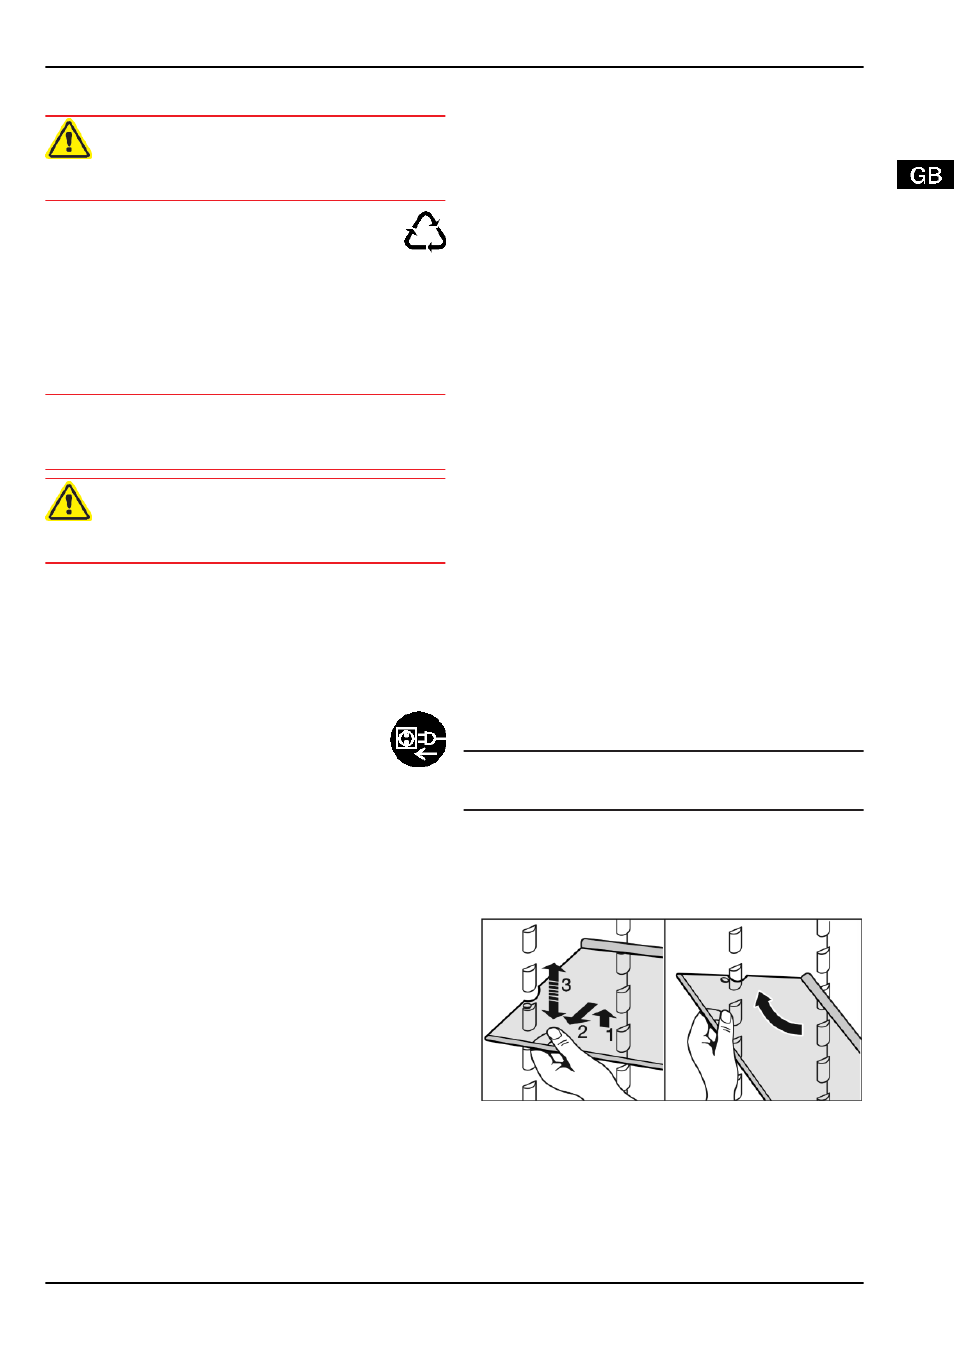
5.1.4 Shelves
Moving or removing shelves
The shelves have stops preventing them from being uninten-
tionally pulled out.
Fig. 9
u
Lift the shelf slightly and pull forward a little.
u
Adjust the height of the shelf. To do so, push the cut-outs
along the supports.
u
In order to remove the shelf fully, place it at a slant and pull
out towards the front.
u
Insert shelf with the raised edge pointing upwards at the
back.
w
The food does not freeze onto the rear wall.
Control
* Depending on model and options
7