6setting the humidity in the hydrosafe, 7drawers, 8humidity control plate – Liebherr KBes 4260 Premium BioFresh User Manual
Page 12: 6maintenance, 1cleaning the appliance, See 6.1), 6 maintenance, Maintenance, 1 cleaning the appliance
You can adjust the temperature slightly colder or warmer. The
temperature can be adjusted from
b1
(coldest temperature) to
b9
(warmest temperature). The presetting is
b5
. At the
b1
to
b4
settings the temperature may drop below 0 ° C and therefore
the food may freeze slightly.
Note
for testing institutes: If temperatures below 3 °C are to be
reached in the refrigerator compartment:
u
set the temperature in the BioFresh compartment to b1-b4.
u
To activate the setting mode: press the SuperCool button
Fig. 3 (2)
for about 5 s.
w
The menu symbol
Fig. 3 (5)
shines. The temperature display
indicates
c
.
u
Press the Up setting button
Fig. 3 (7)
the number of times
required for
b
to flash in the display.
u
To confirm: briefly press the SuperCool button
Fig. 3 (2)
.
u
For a warmer temperature adjustment: press Up setting
button
Fig. 3 (7)
.
u
For a colder temperature adjustment: press Down setting
button
Fig. 3 (6)
.
u
To confirm: press SuperCool button
Fig. 3 (2)
.
w
The temperature slowly adjusts to the new
value.
u
To deactivate the setting mode: press the On/Off button
Fig. 3 (3)
.
-or-
u
Wait for 5 minutes.
w
The temperature is indicated again in the temperature
display.
5.5.6 Setting the humidity in the HydroSafe
u
Low humidity: move the regulator to
the left.
u
High humidity: move the regu-
lator to the right.
5.5.7 Drawers
Fig. 13
u
Pull out the drawer, lift it at the back and draw it forwards for
removal.
u
Push the rails in again!
Fig. 14
u
Pull out the rails.
u
Attach the drawer to the rails and push it in until it engages
audibly at the back.
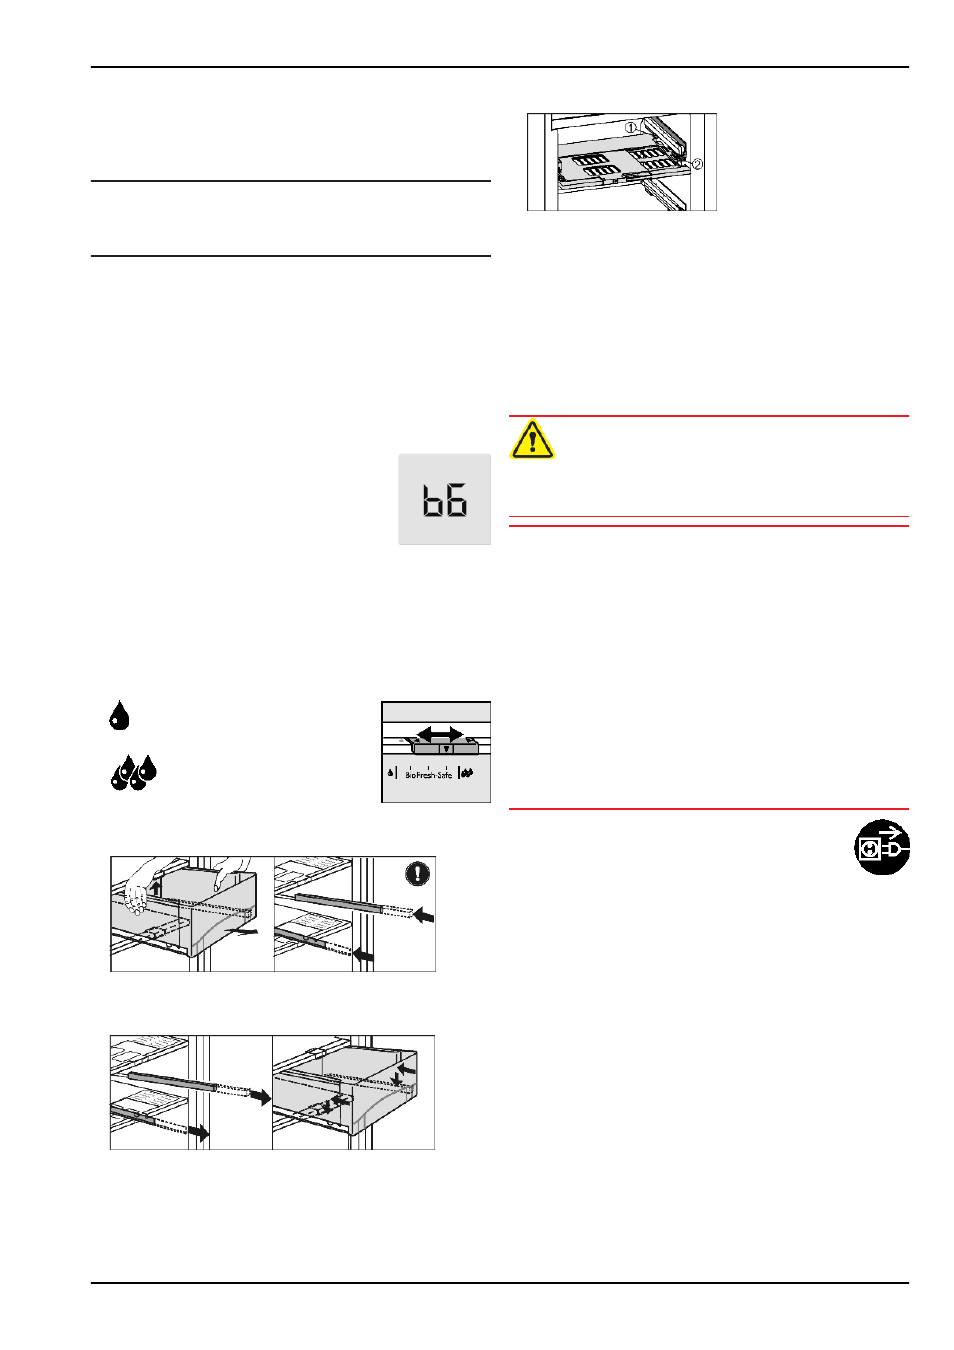
5.5.8 Humidity control plate
Fig. 15
u
To remove the humidity control plate: Having removed the
drawers, carefully draw the plate forwards and lower it for
removal.
u
To insert the humidity control plate: Insert the cover mould-
ings of the plate into the rear holder
Fig. 15 (1)
from under-
neath and engage them in the holder
Fig. 15 (2)
at the front.
6 Maintenance
6.1 Cleaning the appliance
WARNING
Risk of injury and damage as a result of hot steam!
Hot steam can lead to burns and can damage the surfaces.
u
Do not use any steam cleaners!
NOTICE
Incorrect cleaning damages the appliance!
u
Do not use cleaning agents in concentrated form.
u
Do not use any scouring or abrasive sponges or steel wool.
u
Please do not use any aggressive, scouring, sand-,
chloride-, chemical- or acid-based cleaning agents.
u
Do not use chemical solvents.
u
Do not damage or remove the type plate on the inside of the
appliance. It is important for the customer service.
u
Do not pull off, bend or damage cables or other compo-
nents.
u
Do not allow any cleaning water to enter the drain channel,
ventilation grille or electrical parts.
u
Please use soft cleaning cloths and a universal pH-neutral
cleaning agent.
u
Please use cleaning and care products suitable for contact
with foodstuffs in the appliance interior.
u
Empty appliance.
u
Pull out the power plug.
u
Clean plastic outer and inner surfaces with lukewarm
water and a little washing-up liquid.
Do not apply stainless steel cleaning agent to glass or plastic
surfaces to prevent them from being scratched. Darker areas at
the beginning and quite an intensive colour of the stainless
steel surface are normal.*
Maintenance
12
* Depending on model and options