Belkin F1U128-KIT User Manual
Page 5
Page 5
VIII. Windows
95 / 98 and NT
BEFORE YOU INSTALL THE BELKIN BITRONICS SOFTWARE, YOU MUST FIRST
MAKE SURE THAT EACH DEVICE WORKS PROPERLY ON ITS OWN WITH EACH
COMPUTER. DO NOT CONNECT THE BITRONICS SWITCH TO THE COMPUTERS OR
INSTALL THE SOFTWARE UNTIL INSTRUCTED BY THIS PROCEDURE!
1.
Make sure that the printer port on your computer is set to ECP mode. To do this, you must go into your computer’s BIOS or
CMOS setup. Instructions on how to do this differ from one computer to the next. Please consult your computer
manufacturer’s manual, tech support, or website for information on how to do this. Please do not call Belkin
Tech Support on this because each computer’s BIOS setup routine is different.
The BIOS setup routine prompt is displayed a few seconds after you turn on your computer and hear its first beeps. Again, this
varies from PC to PC. Please consult your computer manufacturer’s manual or their tech support for information
on how to do this properly. Usually you will see a message that reads “Press DEL to enter setup” or “Press F2 to enter
setup”. When in the setup program, there maybe a selection for “Integrated Peripherals”, or “Peripheral Setup”. Then, look for
“Parallel Port Type” or “LPT port type”. Change that setting to say “ECP” or “ECP/EPP”. Save your settings then exit. When
Windows® restarts, it may find new hardware, and it may ask you for the Windows® CD. Be prepared to provide this to the
computer.
2.
Make sure that the software and drivers for the devices to be shared are properly installed on both computers. To do this, on
the first computer, connect the first device to it DIRECTLY. Install that device’s software and make sure that that device works
properly. If this device is a Zip
drive, connect the Zip
drive to the first computer directly, install its drivers, and make sure it
works properly. Then, do the same procedure for the second device. If the second device is a printer, disconnect the direct
device from the computer, and connect the printer to the computer directly. Install its drivers and software, making sure that it
works flawlessly. Then, you will repeat installing the software for both devices on all the computers that will be connecting to
the Bitronics switch. THIS IS NECESSARY SO THAT EACH COMPUTER CAN USE AND ACCESS THE SHARED DEVICES PROPERLY.
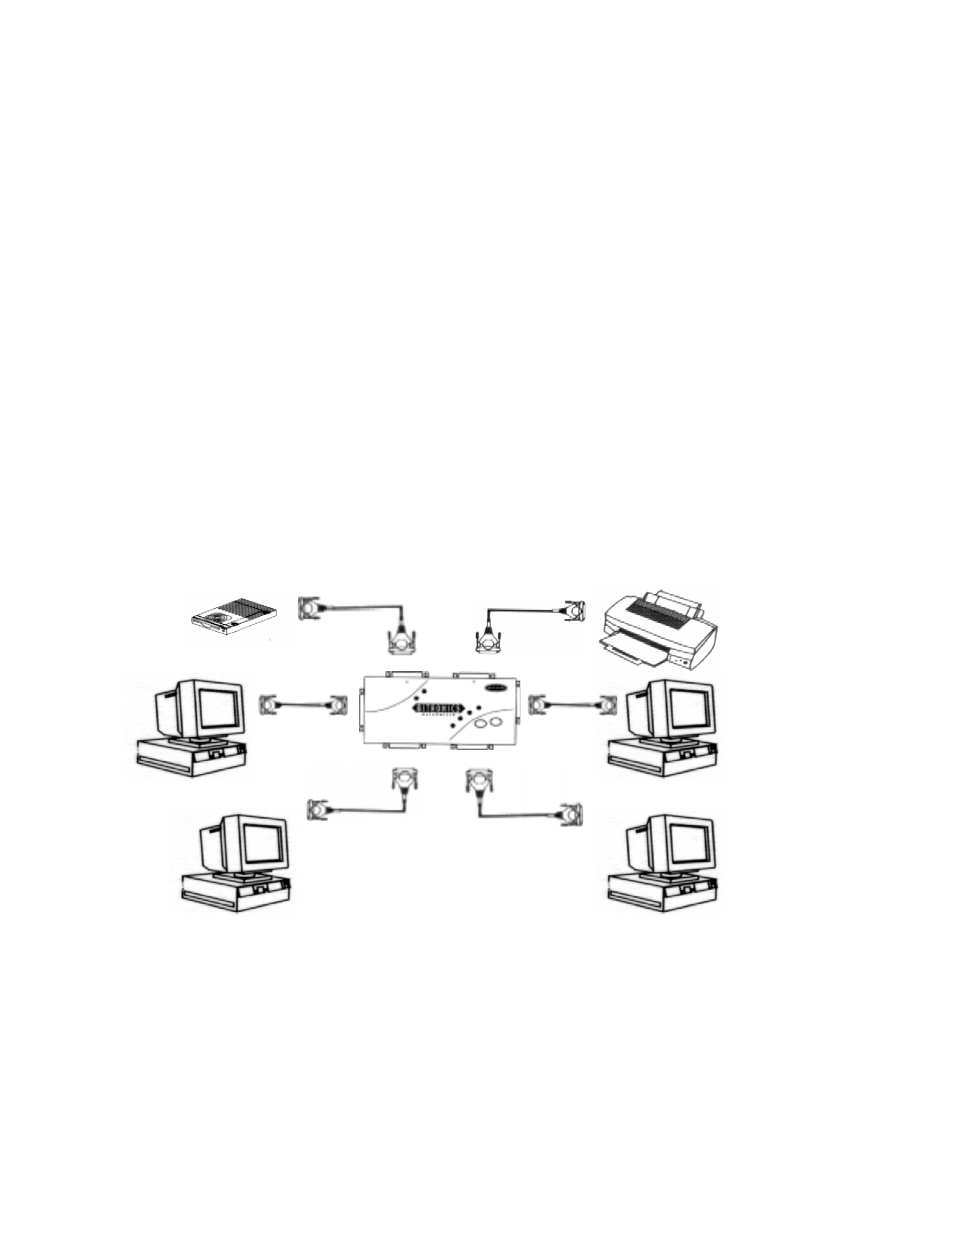
3.
Connect the four computers, and the device to be shared to the Bitronics Switch as shown below. The cables from the
computers to the Bitronics switch are included in the package. Take note of which port each device is connected to:
The example shown has a Zip
drive connected to Port A and an InkJet printer on Port B of the switch.
4.
In order for all computers to properly share the devices, the software must be installed on both computers.
4.1.
Put the disk into your floppy drive. Click on START, then RUN. Enter a:\BITRONIX.exe, then click OK
Device A connected to
Port A
Device B connected to
Port B
These two cables
included