Blue Rhino NB1854WRTR User Manual
Page 3
Contact 1.800.762.1142 for assistance. Do not return to place of purchase.
page no .
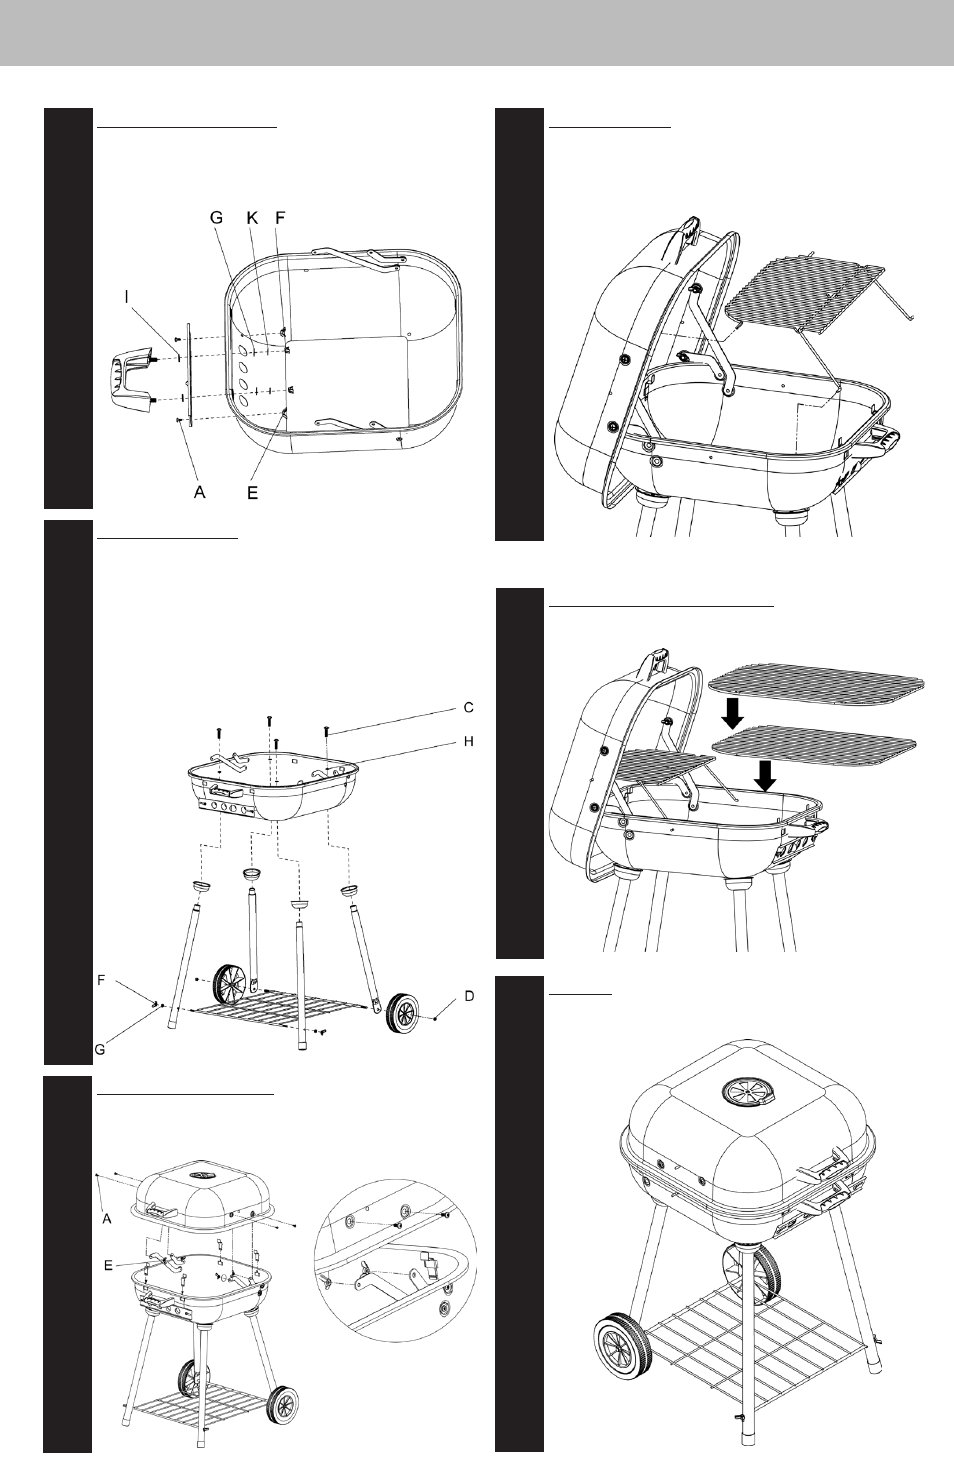
Step
2
Attach handle and air damper
A . Attach handle to bottom bowl using 2 sets of heat resistant washers (I), small
washers (G), large lock washers (K), large wing nuts (F) .
B . Attach air damper to bottom bowl using 2 sets of small screws (A) and small
wing nuts (E) .
Step
3
Attach legs and wheels
A . Attach front legs and wheel legs to bottom bowl using 4 sets of leg cups, large
washers (H), and large screws (C) .
Note: Do not tighten large screws (C) until bottom support grid is attached .
B . Attach bottom support grid to front legs using 2 sets of small washers (G) and
large wing nuts (F) .
C . Attach wheels and bottom support grid to wheel legs using 2 sets of wheel
nuts (D) .
D . Tighten all 4 large screws (C) .
Step
4
Attach top lid to bottom bowl
A . Attach lid to bottom bowl using 4 sets of small screws (A) and small wing
nuts (E) .
B . Insert support clips .
Step
5
Insert warming rack
A . Slide warming rack into holes in lid and bottom bowl .
Note: Look for corresponding holes on side of lid . Insert short wire ends into lid
holes, one side at a time . Position warming rack legs into slots on grill body sides .
B . Cut zip tie on warming rack .
Step
6
Insert charcoal grid and cooking grid
Place charcoal grid and cooking grid into bottom bowl .
Step
7
Completed
Congratulations your assembly is now complete . Read Operating Instructions
before proceeding .