Assembly – Bosch ROS10 User Manual
Page 7
-7-
Assembly
BACKING PAD INSTALLATION
The random orbit sander is equipped with a
backing pad of soft hardness, which is suitable
for general service. Hard and extra-soft pads
are available for other purposes, and in
general are used as follows;
Extra soft pad - Polishing or sanding large or
curved surfaces.
Soft pad - All purpose general sanding and
polishing.
Hard pad - Heavy sanding on flat surfaces,
especially with coarser abrasives.
To change backing pad, hold pad firmly and
remove the four screws that secure the
backing pad and remove old pad. Align new
pad over locating pins on drive spindle, replace
screws and securely tighten. Damaged or
worn backing pads must be replaced
immediately (Fig. 2).
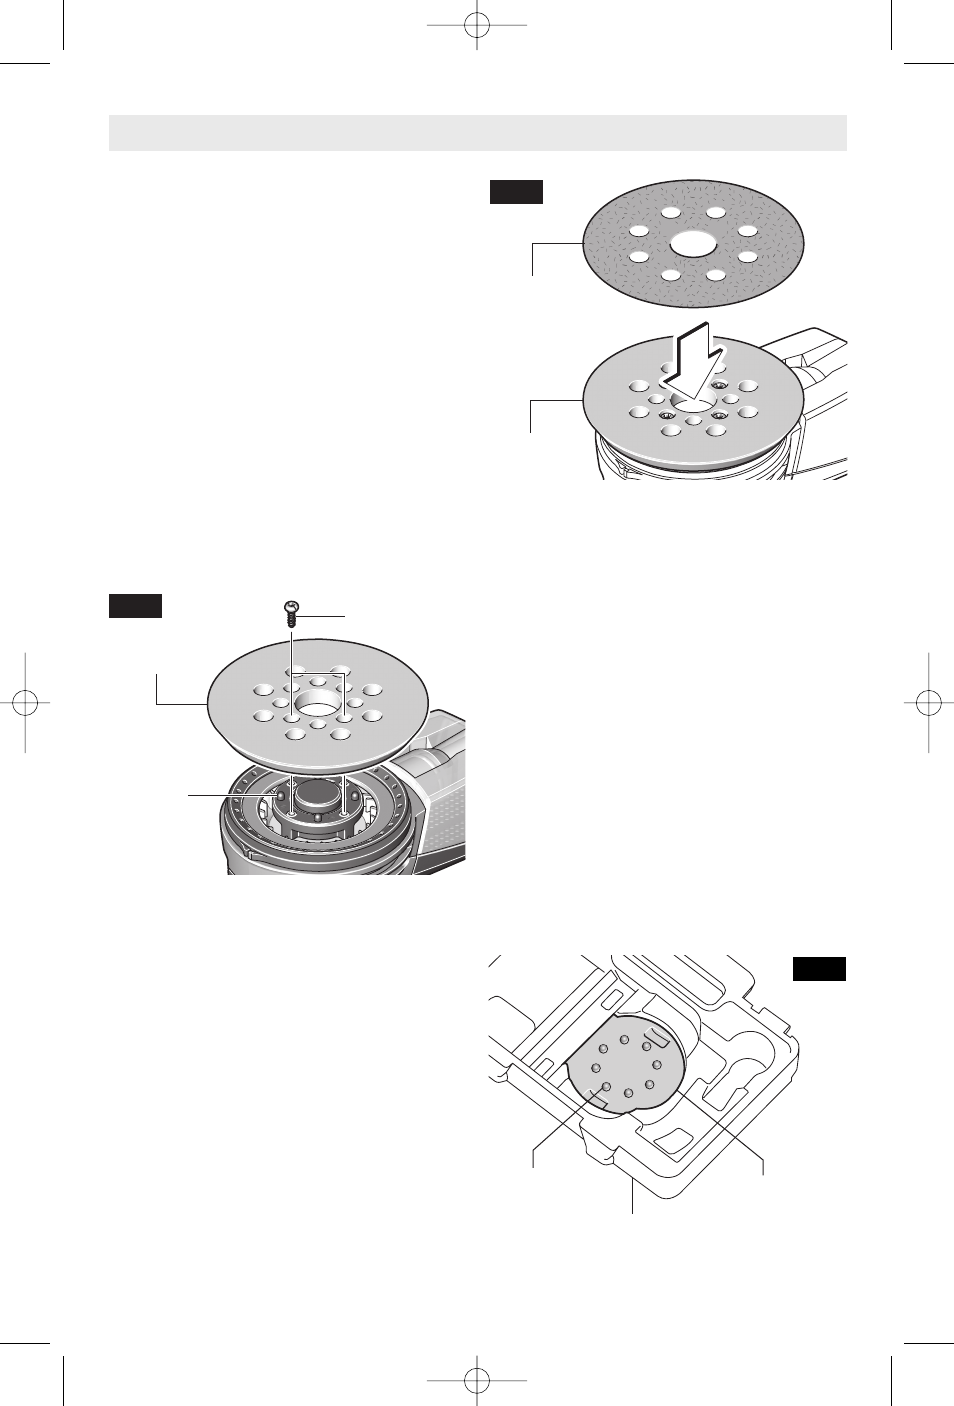
INSTALLING ACCESSORIES
The random orbit sander uses hook-and-loop
backed accessories, which firmly grip the pad
when applied with moderate pressure. To
change the accessory, merely peel off the old
accessory, remove dust from the pad if
necessary, and press the new accessory in
place (Fig. 3). Be sure to align the sanding
disc holes with the holes in the backing pad to
allow the dust extraction system to function.
After considerable service the pad surface will
become worn, and the pad must be replaced
when it no longer offers a firm grip. If you are
experiencing premature wearout of the pad
hooks, it may be due to pressure being applied
to the tool during operation.
PSA BACKING PAD ACCESSORIES
The optional RS036 soft PSA backing pad can
be used with PSA backed accessories with
pressure sensitive adhesive.
To change accessory, peel protective sheet
from the back of accessory. Align accessory
with backing pad and press firmly in place. To
remove, lift an edge of accessory with your
finger nail and peel it off the backing pad.
NOTE: Do not store tool with sanding disc on
pad, as sanding creates heat which increases
the adhesive bond. If the disc is left in place it
may become very difficult to remove.
SANDING DISC ALIGNMENT POSTS
The optional carrying case is equipped with
alignment posts that will allow you to easily
align the holes in the sanding disc, with the
holes in the backing pad. Place the sanding
disc onto the alignment posts with the Velcro
facing up (Fig. 4). Align holes on backing pad
with alignment posts and firmly tool push
downward.
BACKING
PAD
SCREW
FIG. 2
LOCATING
PINS
FIG. 3
ABRASIVE
DISC
BACKING
PAD
FIG. 4
ABRASIVE
DISC
ALIGNMENT
POSTS
CARRYING CASE
BM 2609140467 08-07 8/28/07 8:54 AM Page 7