Belkin F8E825-USB User Manual
Miniwireless optical mouse, User manual f8e825-usb
MiniWireless
Optical Mouse
Navigate your notebook with
optical precision and wireless freedom
User Manual
F8E825-USB
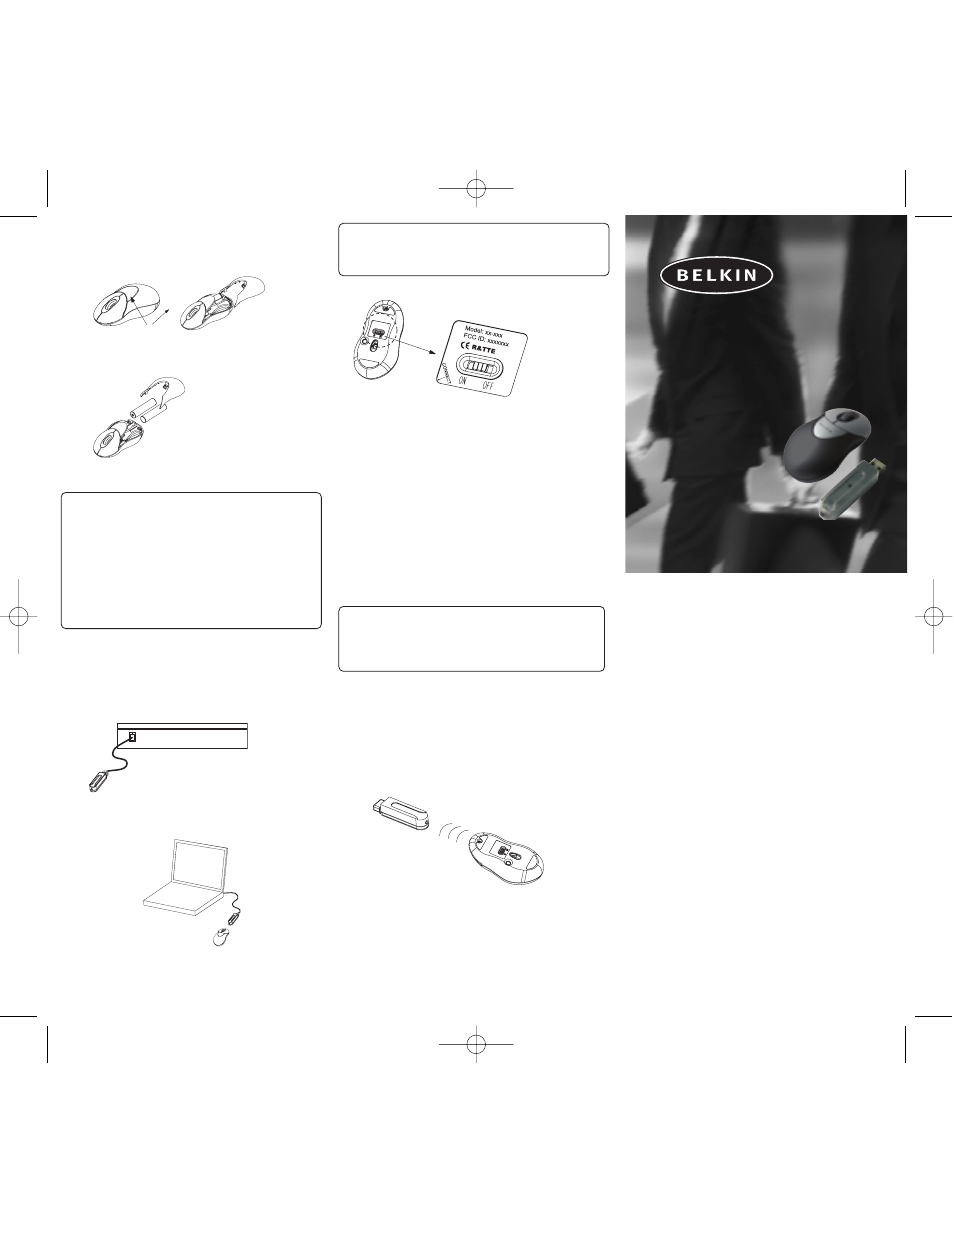
BATTERY INSTALLATION
1. Press the button to open the top cap. (fig. 1)
(fig. 1-1)
2. Insert 2 AAA batteries. (fig. 1-2)
3. Replace the top cap and close it.
!CAUTION:
• Be sure to check polarity (+ or – sign) and
insert battery properly.
• Make sure battery type is AAA alkaline (1.5V).
• Remove the batteries if mouse will not be in
use for a long time.
• Each time you replace the batteries, repeat the
mouse setup by following the “setup for
linkage” (fig. 5).
HARDWARE INSTALLATION
1. Shut down the computer.
2. Connect the receiver either directly or with the
USB extension cable to the USB port on the PC.
(fig. 2)
3. Place the receiver beside the notebook or
desktop PC. (fig. 3)
4. Turn on the PC.
5. Switch on the power of the wireless mouse
located on the backside of the mouse. (fig. 4)
!CAUTION:
While traveling, please switch off the unit to save
battery power. (fig. 4)
DRIVER INSTALLATION
1. Insert the installation CD into your
CD-ROM drive.
2. The CD should automatically load the
installation. If it does not load, click “Start”
then “Run”, then type “X:\setup” (replace “X”
with the correct drive letter for your CD-ROM
drive, usually D). Then follow through the
on-screen instructions to complete the
installation.
3. When the setup is complete, the system will
restart automatically. It will show a mouse icon
in the bottom right-hand corner of the screen.
!CAUTION:
Some computers running Windows® 98 will require
insertion of the Windows 98 CD to finish the
installation of the driver.
ID SETUP
1. Aim the front point of the mouse at
the receiver.
2. IMPORTANT: FIRST, PRESS THE CONNECT
BUTTON OF THE MOUSE; THEN PRESS THE
CONNECT BUTTON OF THE RECEIVER (fig. 5).
NEVER REVERSE THIS PROCEDURE.
3. When the connect button of the receiver is
pressed, the LED inside the receiver will
light. As soon as the linkage is completed, the
LED will go off.
4. The setup must be completed within one
minute. If setup time exceeds one minute,
repeat procedure.
BUTTON FUNCTION SETUP
1. Start the setup from the Control Panel or
directly click on the mouse icon at the bottom
right corner of the screen. It shows the
following functions:
-Button: set up for either right or left hand,
and adjust the speed
-Wheel: set up the functions for hot keys
and zooming
-Motion: set up the speed of the mouse pointer
2. After the function is set up, press “Yes” to store
the new setup.
SETUP FOR MULTI-USERS
When using more than one MiniWireless Optical
Mouse in the same location, set up one mouse at a
time. You must complete the setup for each mouse
before beginning the next.
ENVIRONMENT
To avoid environmental interference, which will
shorten the effective operation distance, please
note the following:
1. Do not put the mouse and receiver on a metal
cabinet or desk. Metal creates RF interference,
which may impair the RF communication and
shorten the communication distance.
2. Keep a distance of more than 1.5m between
fig. 1
fig. 1-1
fig. 4
fig. 3
fig. 2
fig. 5
fig. 1-2
P74211-F8E825-USB man.qxd 01/06/2003 4:26 PM Page 1