Painting, Pintura, Peinture – Boston Acoustics HSi 480 User Manual
Page 10: Lackierung
– 10 –
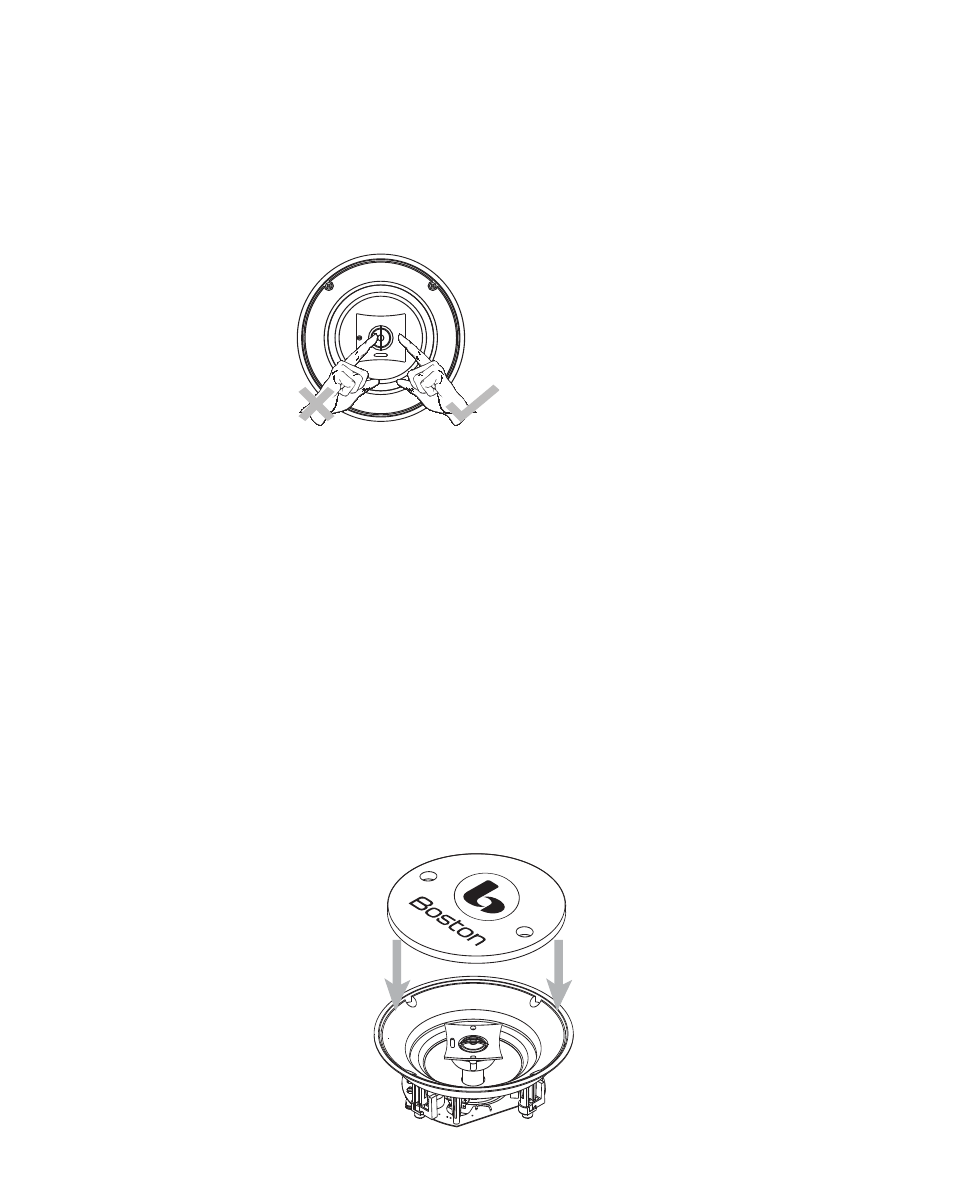
5. Aim the pivoting tweeter toward
the prime listening position by
pressing on the edge of the tweet-
er island. (HSi 460, HSi 470, HSi
N740 and HSi 480 only.) Do not
press on the tweeter dome.
6. Insert the grille into the slots in the
baffle by gently applying pressure
along the edge.
Painting
The Speaker Frame
The speakers may be painted before
or after they are installed. They are
already primed.
1. Insert the supplied paint mask into
the frame of the speaker.
2. Paint the frame. If you are using
spray paint, apply two light coats. If
you are applying paint with a brush
or roller, thin the paint and apply
two very light coats. This helps pre-
vent excessive paint buildup or
“runs” on the frame.
3. After the paint has dried, use the
finger pulls to remove the paint
mask.
5. Dirija el tweeter giratorio hacia la
posición óptima de audición pre-
sionando en el extremo de la base
de isla del altavoz de agudos. (HSi
460, HSi 470, HSi N740 y HSi
480) No presione directamente
sobre la rejilla.
6. Inserte la rejilla en las ranuras del
bafle presionando ligeramente en
los extremos.
Pintura
El marco del altavoz
Los altavoces pueden pintarse antes
o después de la instalación. Vienen de
fábrica con base para pintura o primer.
1. Inserte la plantilla (máscara) para
pintar suministrada en el marco del
altavoz.
2. Pinte el marco. Si utiliza pintura en
spray, aplique dos capas ligeras. Si
utiliza pincel o rodillo, diluya la pintu-
ra y aplique dos capas muy delgadas.
Esto evitará el exceso de concen-
tración de pintura y el “corrimiento”
de la misma.
3. Una vez seca la pintura, tire de los
lugares previstos en la máscara para
retirarla.
5. Orientez le tweeter pivotant vers la
zone d’écoute principale en
appuyant sur le île de tweeter. (HSi
460, HSi 470, HSi N740, HSi 480)
N’appuyez pas sur la dômee du
tweeter.
6. Insérez la grille dans les fentes du
haut-parleur à membrane en
appuyant légèrement sur ses
bords.
Peinture
Coffrets des enceintes
Les enceintes peuvent être peintes
avant ou après leur installation. Elles
ont déjà reçu une couche de fond.
1. Insérez le masque à peinture
fourni dans le coffret de l’en-
ceinte.
2. Peignez le coffret. Si vous utilisez
de la peinture au pistolet,
appliquez deux couches légères. Si
vous appliquez la peinture avec un
pinceau ou un rouleau, diluez-la et
appliquez deux couches très
légères. Vous éviterez ainsi une
accumulation excessive de pein-
ture ou des coulées sur le coffret.
3. Une fois que la peinture est sèche,
utilisez les languettes pour retirer
le masque de peinture.
5. Richten Sie den schwenkbaren
Hochtonlautsprecher in Richtung
der Haupthörzone, indem Sie an
der Kante des Tweeterinsel. (HSi
460, HSi 470, HSi N740, HSi
480) Drücken Sie nicht auf das
Hochtonlautsprecher-Schutzgitter.
6. Fügen Sie das Ziergitter in die
Schlitze in der Schallwand ein,
indem Sie entlang der Kante vor-
sichtig andrücken.
Lackierung
Lautsprecherrahmen
Die Lautsprecher können vor oder
nach der Installation lackiert werden.
Sie sind bereits mit einer Grundierung
versehen.
1. Legen Sie die mitgelieferte
Lackierungsmaske in den
Lautsprecherrahmen.
2. Lackieren Sie den Rahmen. Wenn Sie
den Lack aufsprühen, müssen zwei
dünne Schichten aufgetragen wer-
den. Wenn Lack mit einem Pinsel
oder einer Walze aus der Dose aufge-
tragen wird, verdünnen Sie erst den
Lack und tragen dann zwei ganz
dünne Schichten auf. Dies verhindert
übermäßig dicke
Lackansammlungen oder Lack-
„Tränen“ auf dem Rahmen.
3. Nach dem Trocknen des Lacks
ziehen Sie die Lackierungsmaske
an den Fingerlaschen ab.
Installation Instructions (cont.)
Instructions d’installation (suite)
Installationsanweisungen (Forts.)
Instrucciones de Instalación (cont.)