Using the laptop dock, Using with the feet removed, Connections and part names – Pioneer DDJ-S1 User Manual
Page 13
13
En
Connections
and
part
names
1
FX CH SELECT control
Switches the channel to which the effect is applied.
! Effects applied to the MIC/AUX channel cannot be used with
Serato DJ ver. 1.2. They are scheduled to be supported with
future version upgrades.
2
EFFECT SELECT control
Selects the type of effect.
3
BEATS (PARAMETER) control
Adjusts the effect time.
[SHIFT] + turn:
Adjusts the effect’s parameter 3.
4
LEVEL/DEPTH control
Adjusts the effect’s parameter 1.
5
FX ON/OFF button
Turns the effect on/off.
6
TAP/AUTO (FX MODE) button
Press:
The BPM used as the base value for the effect is calculated by the
interval at which the button is tapped with a finger.
When the button is pressed and held, the effect time is reset.
[SHIFT] + press:
Switches the effect mode from the single mode to the multi mode.
When the [SHIFT] and [TAP/AUTO (FX MODE)] buttons are pressed
again, the effect mode returns to the single mode.
To monitor the effect sounds
When the [HEADPHONES MIXING] control is turned to the [CUE]
side, the Serato DJ software’s effect sounds are not output to the
sound of the channels whose headphones [CUE] button are pressed.
If you want to monitor the Serato DJ software’s effect sounds, turn the
[HEADPHONES MIXING] control to the [MASTER] side and monitor the
effect sounds in the sound of the master output.
Microphone/External input control section
LEVEL
MAX
MIN
OFF
ON
TALK
OVER
MIC 2 / AUX
LOW
MAX
MIN
MID
EQ
MAX
MIN
HI
INPUT
SELECT
MAX
MIN
AUX
MIC 2
LEVEL
MAX
MIN
OFF
ON TALK
OVER
MIC 1
LOW
MAX
MIN
MID
EQ
MAX
MIN
HI
MAX
MIN
MIC 1
1
2
3
4
1
OFF, ON, MIC TALK OVER selector switch
Turns the microphone on/off.
= Using a microphone (p.21)
2
LEVEL control
Adjusts the level of the output sound.
3
EQ (HI, MID, LOW) controls
Boosts or cuts frequencies in order to change the quality of the
sound.
4
MIC2/AUX selector switch
Switches the audio input between the microphone and the external
device.
! [MIC2]: Selects the microphone connected to the [MIC2]
terminal.
! [AUX]: Selects the external device connected to the [AUX IN]
terminals.
= Using a microphone (p.21)
= Using an external device (p.21)
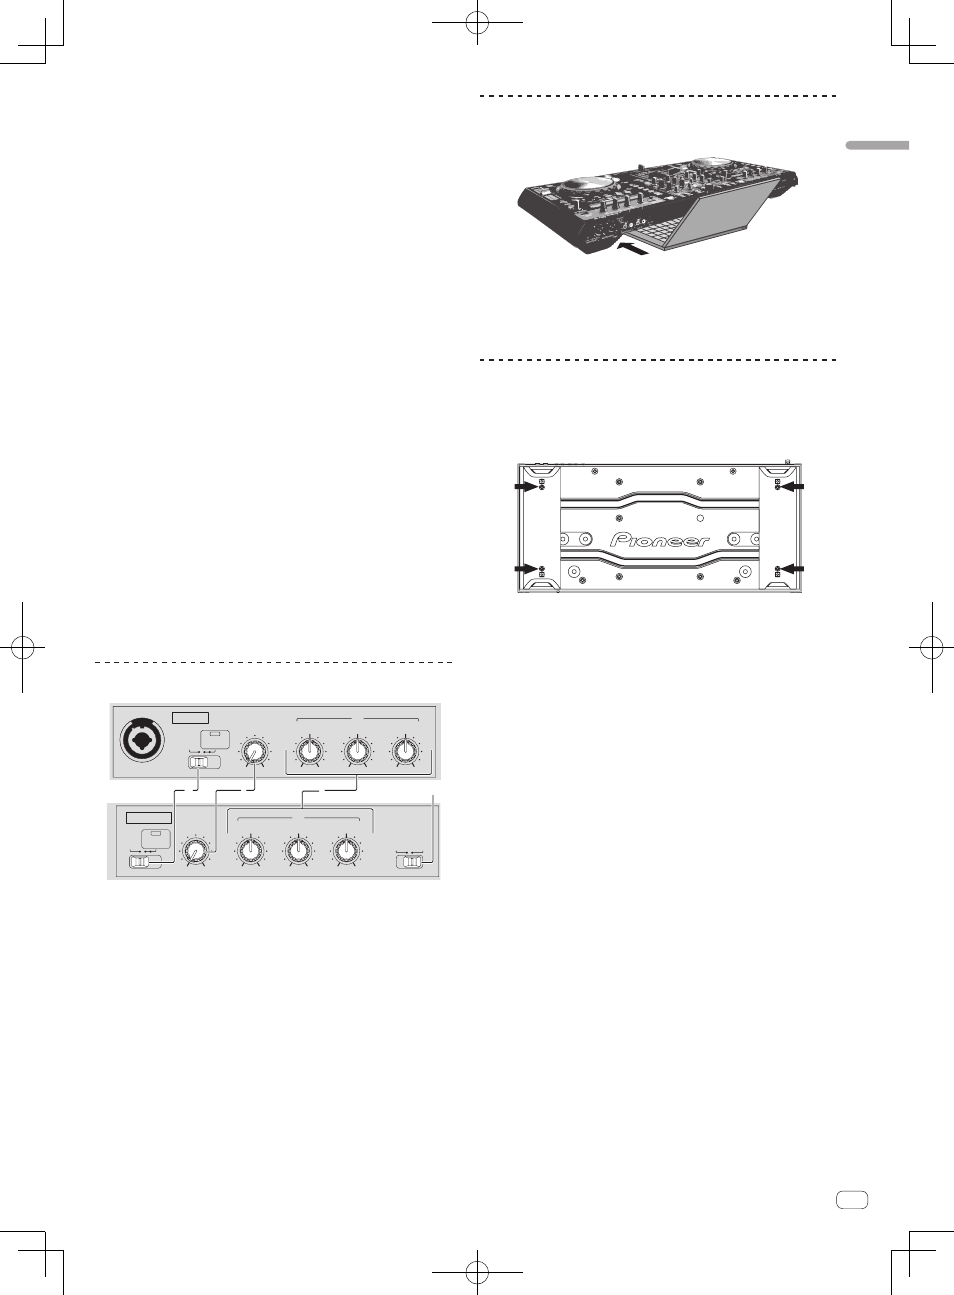
Using the LAPTOP DOCK
The computer’s keyboard section can be stowed under this unit.
! Depending on the size of your (notebook) computer, the keyboard
section may not fit in the LAPTOP DOCK.
! Install in such a way that the computer unit does not touch this unit.
! Install in such a way that the cables connected to the computer are
not stuck under this unit.
Using with the feet removed
This unit’s two feet can be removed.
Use a Phillips screwdriver to remove the screws from the
left and right feet (2 screws each).
! The screws you have removed will be needed when mounting
the feet. Be careful not to lose them. The feet cannot be properly
mounted using other screws.