Instructions for upgrading, Renewal data, Poi data coverage – Pioneer CNDV-1100HD User Manual
Page 5: Display during motorway driving, Renewed points through this upgrade
3
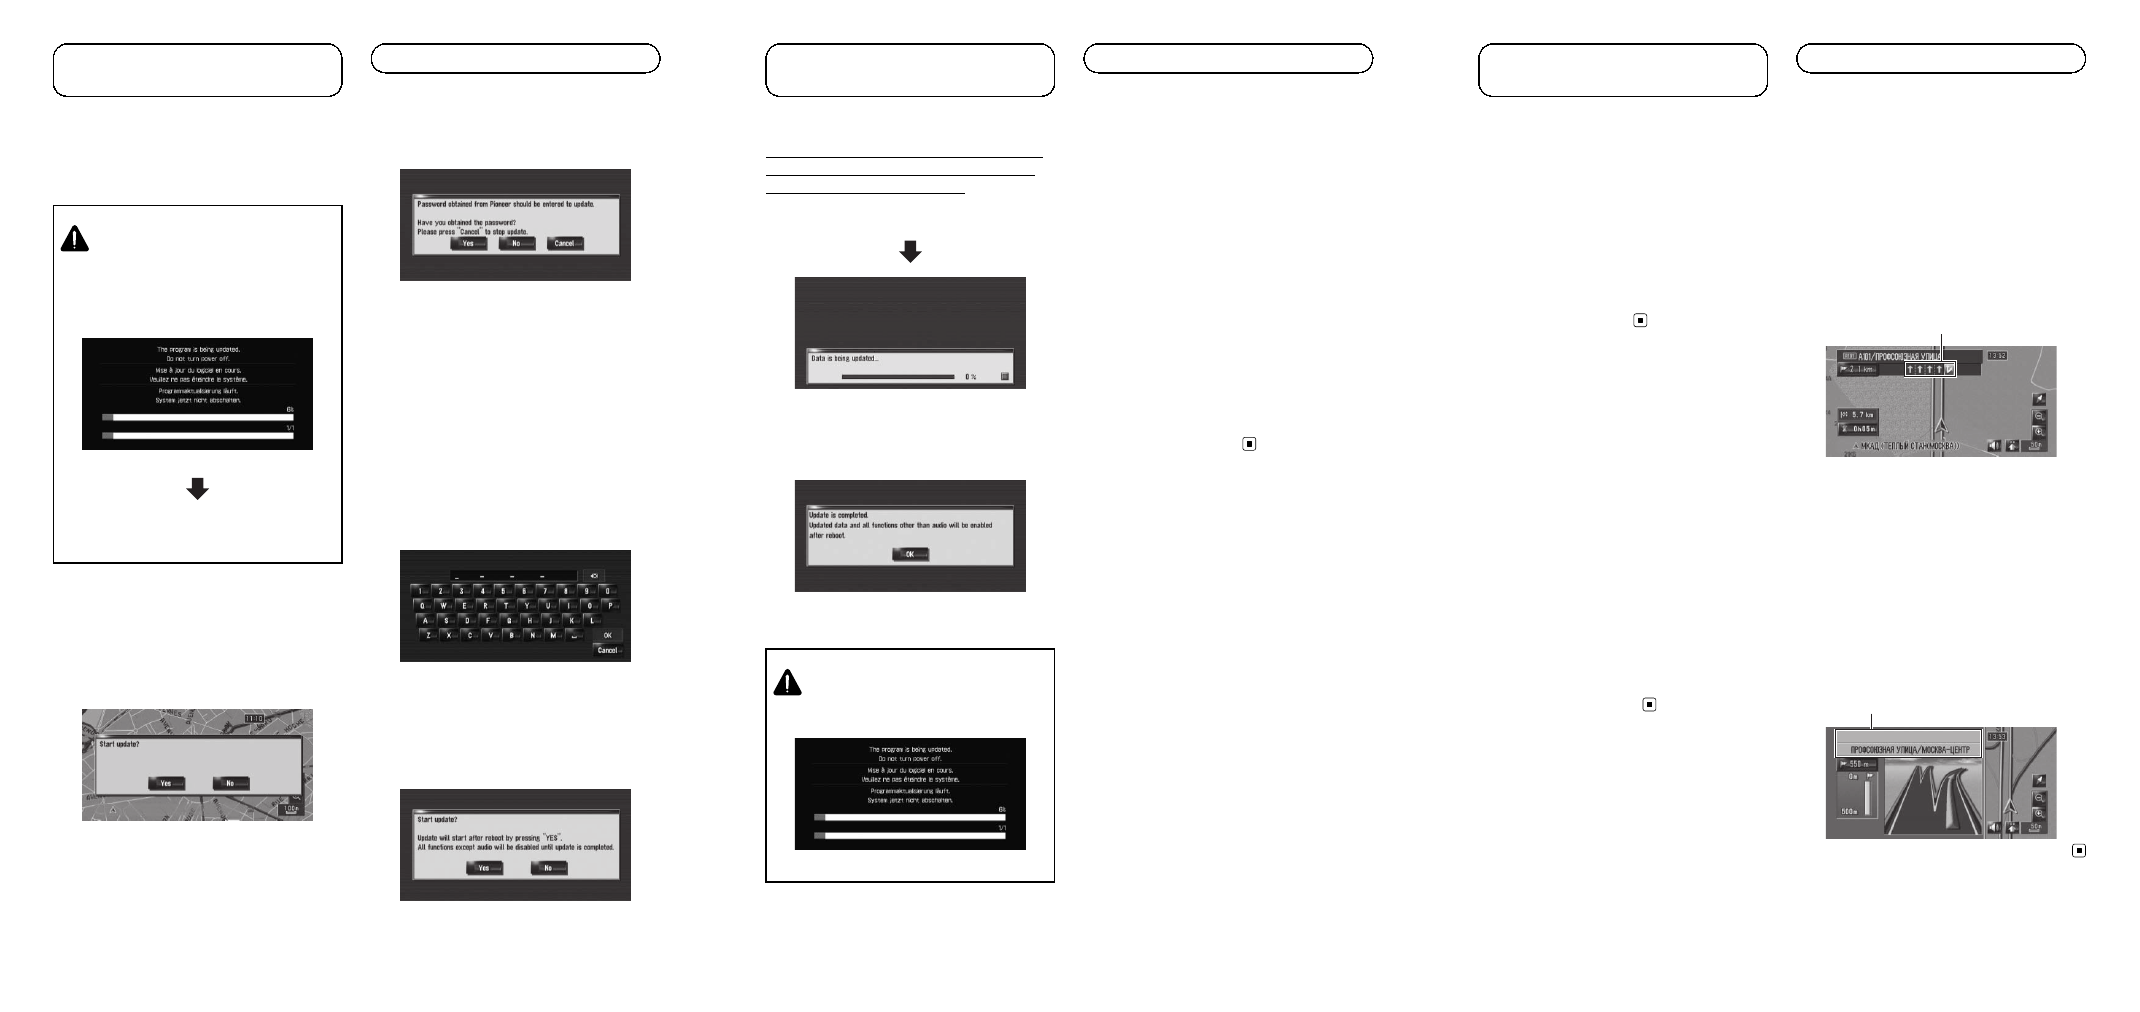
Press the OPEN CLOSE button and in-
sert the upgrade disc into the disc loading
slot.
CAUTION
For users who use AVIC-HD3
II
or use the hardware
upgraded by CNDV-800HD, updating another soft-
ware programme will begin first.
While this screen is visible, NEVER switch the
ignition key position or turn off the power of na-
vigation system.
After the installation is complete, the navigation sys-
tem restarts.
Check the details of the caution message and touch
[
OK].
p The users who use other models can skip this
caution and proceed to the next step.
The message confirming whether or not to
start the update will appear.
p If the message doesn’t appear, eject the
disc and display the map of your current po-
sition and then reinsert the disc.
4
Touch [Yes].
p To cancel the update, touch [No].
5
Touch [Yes].
The message
“Password obtained from
Pioneer should be entered to update. Have
you obtained the password? Please press
“Cancel” to stop update.” appears.
To start the update, touch [
Yes].
Alternative options:
No:
Shows the device number (Device#) of your
navigation system.
Cancel:
Cancels the update.
6
Enter the password for authentication
that you obtained, then touch [OK].
After you touch [
OK], the system starts the
authentication. When the authentication is fin-
ished properly, a message for confirmation
will appear.
7
Touch [Yes] to start the update.
The navigation system restarts and then the in-
stallation begins.
Engb
Instructions for
upgrading
After you touch [
Yes] in this screen, you can-
not abort the update until the installation of
the system programme finishes.
The update takes approximately 1 hours in
total.
When the update of map database is com-
pleted, the finished message appears.
8
Touch [OK] to restart the system.
p After touching [OK], the installation of sys-
tem programme begins.
CAUTION
While this screen is visible, NEVER switch the
ignition key position or turn off the power of na-
vigation system.
After the installation is complete, the navigation sys-
tem restarts.
9
Check the details of the caution mes-
sage and touch [OK].
10 Touch [OK].
The map of your surroundings is displayed.
You can operate the navigation system by
touching keys displayed on the screen as
usual.
11 Press the OPEN CLOSE button and press
the EJECT button to eject the upgrade disc.
Checking whether the upgrade
was done properly
Display
“Service Information” screen to com-
pare the current version number with the pre-
vious one.
= For details of the operation, refer to Check-
ing the device number.
Engb
Instructions for
upgrading
If you upgrade your navigation system by this
disc, the system will have the following
changes.
Renewal data
The following data are updated:
! Map database
! Gracenote
®
Database
POI data coverage
Approximately 113 000 POIs are included in
the database.
p Some facilities and categories used in POI
Search, Vicinity Search, and Overlay POI
will be modified.
= For the modified categories that can be
used on
“Overlay POI”, “Vicinity
Search
” and used on the voice recogni-
tion, refer to Category list for vicinity
search (Renewal).
p Some POI information may not be accurate
or may become inaccurate through the
passage of time. Please directly contact the
POI to verify the accuracy of the informa-
tion about the POI which appears in this
database. POI information is subject to
change without notice.
Display during motorway
driving
When you drive on a motorway, you
’ll get the
following information.
p If the data for these items is not contained
in the hard disk drive, the information is
not available even if there are the signs on
the actual road.
p Informations appear only when the route is
set.
Lane information
In certain locations of the motorway, lane in-
formation is available. The map indicates the
recommended lane to be in to easily man-
oeuvre the next guidance.
Lane information
Lane information is displayed the first time
there is a voice guidance on your route. The
white arrow on the green background indi-
cates the recommended lane. If the next tra-
velling direction screen is displayed when you
approach a interchange, junction, or exit, the
lane information disappears.
Directional information
Directional informations may be displayed
when in the vicinity of interchanges and exits.
Directional information
Engb
Renewed points through
this upgrade