When installing the microphone on the sun visor, Adjusting the microphone angle, Installing the microphone – Pioneer FH-X700BT User Manual
Page 5
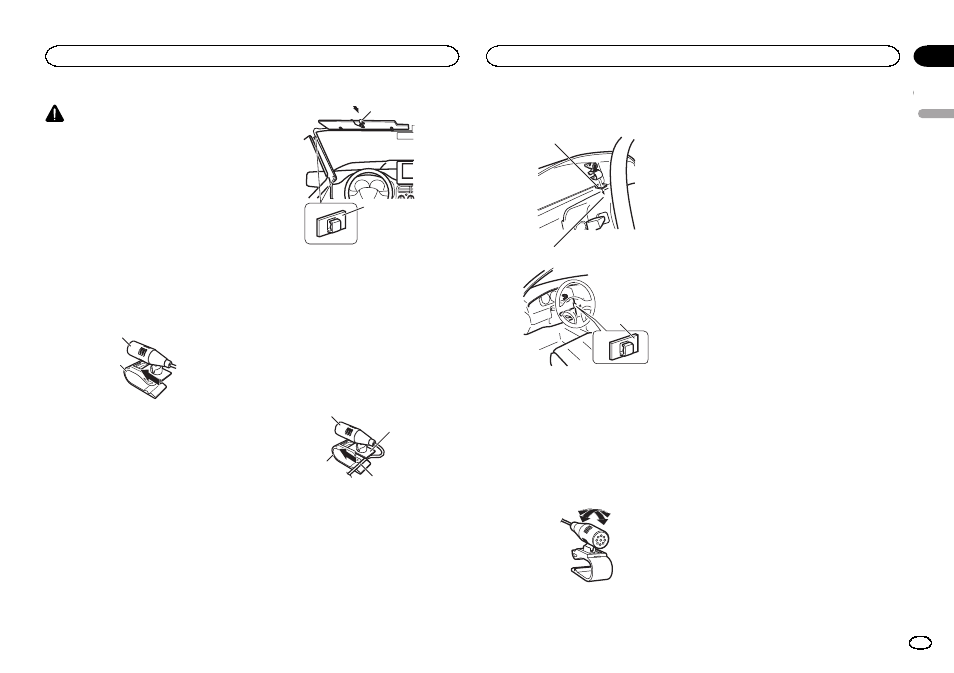
CAUTION
It is extremely dangerous to allow the micro-
phone lead to become wound around the steer-
ing column or shift lever. Be sure to install the
unit in such a way that it will not obstruct driv-
ing.
Note
Install the microphone in a position and orienta-
tion that will enable it to pick up the voice of the
person operating the system.
When installing the
microphone on the sun visor
1
Install the microphone on the micro-
phone clip.
1
2
1 Microphone
2 Microphone clip
2
Install the microphone clip on the sun
visor.
With the sun visor up, install the microphone
clip. (Lowering the sun visor reduces the voice
recognition rate.)
1
2
1 Microphone clip
2 Clamp
Use separately sold clamps to secure the
lead where necessary inside the vehicle.
When installing the
microphone on the steering
column
1
Install the microphone on the micro-
phone clip.
2
4
3
1
1 Microphone
2 Microphone base
3 Microphone clip
4 Fit the microphone lead into the groove.
# Microphone can be installed without using mi-
crophone clip. In this case, detach the microphone
base from the microphone clip. To detach the micro-
phone base from the microphone clip, slide the mi-
crophone base.
2
Install the microphone clip on the steer-
ing column.
2
1
3
1 Double-sided tape
2 Install the microphone clip on the rear side of
the steering column.
3 Clamp
Use separately sold clamps to secure the
lead where necessary inside the vehicle.
Adjusting the microphone
angle
The microphone angle can be adjusted.
English
Installing the microphone
5
Section
Installing the microphone
En
03