Mounting the iphone/ipad stand, About the installation procedure (mac os x) – Pioneer DDJ-WeGO2 User Manual
Page 7
En
7
English
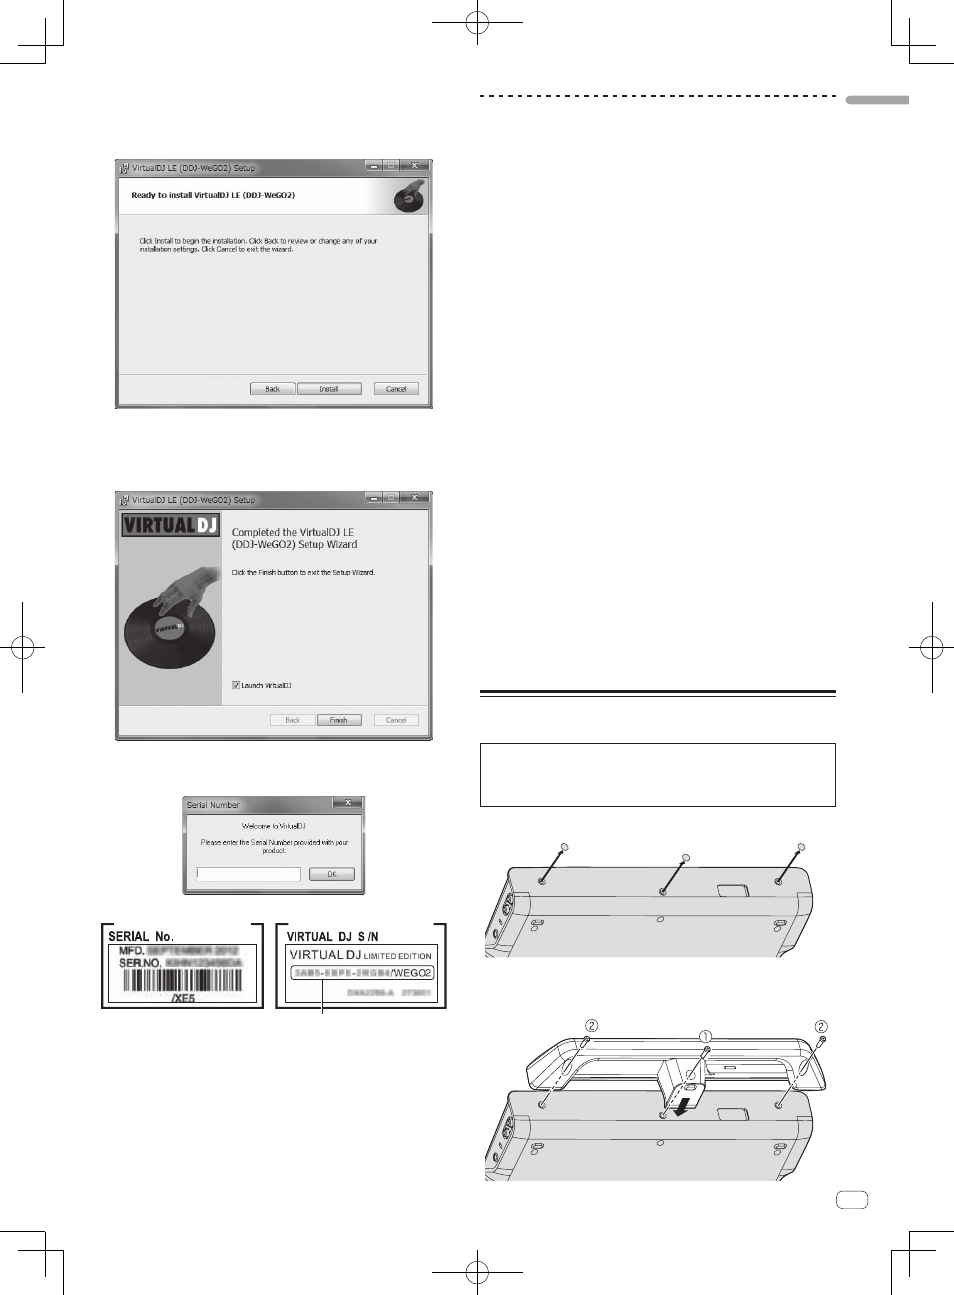
9 When the screen below is displayed, click [Install].
Installation begins.
The message of successful installation appears once installation is
completed.
10 Click [Finish].
This completes the installation procedure.
VIRTUAL DJ LE is launched if [Launch VirtualDJ] on the screen is
checked when [Finish] is clicked.
11 Input the serial number printed on this unit’s bottom
panel (XXXX-XXXX-XXXXX/WEGO2), then click [OK].
This unit’ s bottom panel
VIRTUAL DJ LE Serial number
About the installation procedure (Mac OS X)
1 Insert the included CD-ROM into the computer’s CD drive.
The [CD_menu] icon appears on the screen. Double-click it.
2 When the CD-ROM’s menu is displayed, select [Install
VIRTUAL DJ LE(DDJ-WeGO2)], then click [Start].
The VIRTUAL DJ LE installer is launched.
3 Once the VIRTUAL DJ LE installer is launched, click
[Continue].
4 Read the contents of the license agreement carefully,
click [Continue] and then click [Agree] to accept the
license agreement.
If you do not agree to the license agreement, click [Disagree] to cancel
installation.
5 Select the type of installation for VIRTUAL DJ LE, then
click [Install].
— To select standard installation, click [Install].
— To install in a different location, click [Change Install
Location...] and choose the place of installation.
Installation begins.
The message of successful installation appears once installation is
completed.
6 Click [Close].
This completes the installation procedure.
Checking the latest information on the VIRTUAL
DJ LE software
For the latest information on the operating environment and compatibil-
ity, and to acquire the latest operating system, please visit the following
Atomix productions website:
To obtain the latest version of the VIRTUAL DJ LE software, you must
register your user account on the Atomix productions website.
http://www.virtualdj.com
Mounting the iPhone/iPad stand
To use an iPhone/iPad, mount the included iPhone/iPad stand.
WARNING
Keep the included screws and the screw covers that have been
removed from the unit out of the reach of children. If they should be
swallowed, contact a physician immediately.
1 Remove the three screw covers.
2 Fasten the included screws in the order shown on the
diagram below.
! Do not use any screws other than the included ones.