Troubleshooting, adjustment, & service, Warning, Blade clutch adjustment – Briggs & Stratton FB13250BS User Manual
Page 18
17
Troubleshooting, Adjustment, & Service
A
D
C
B
E
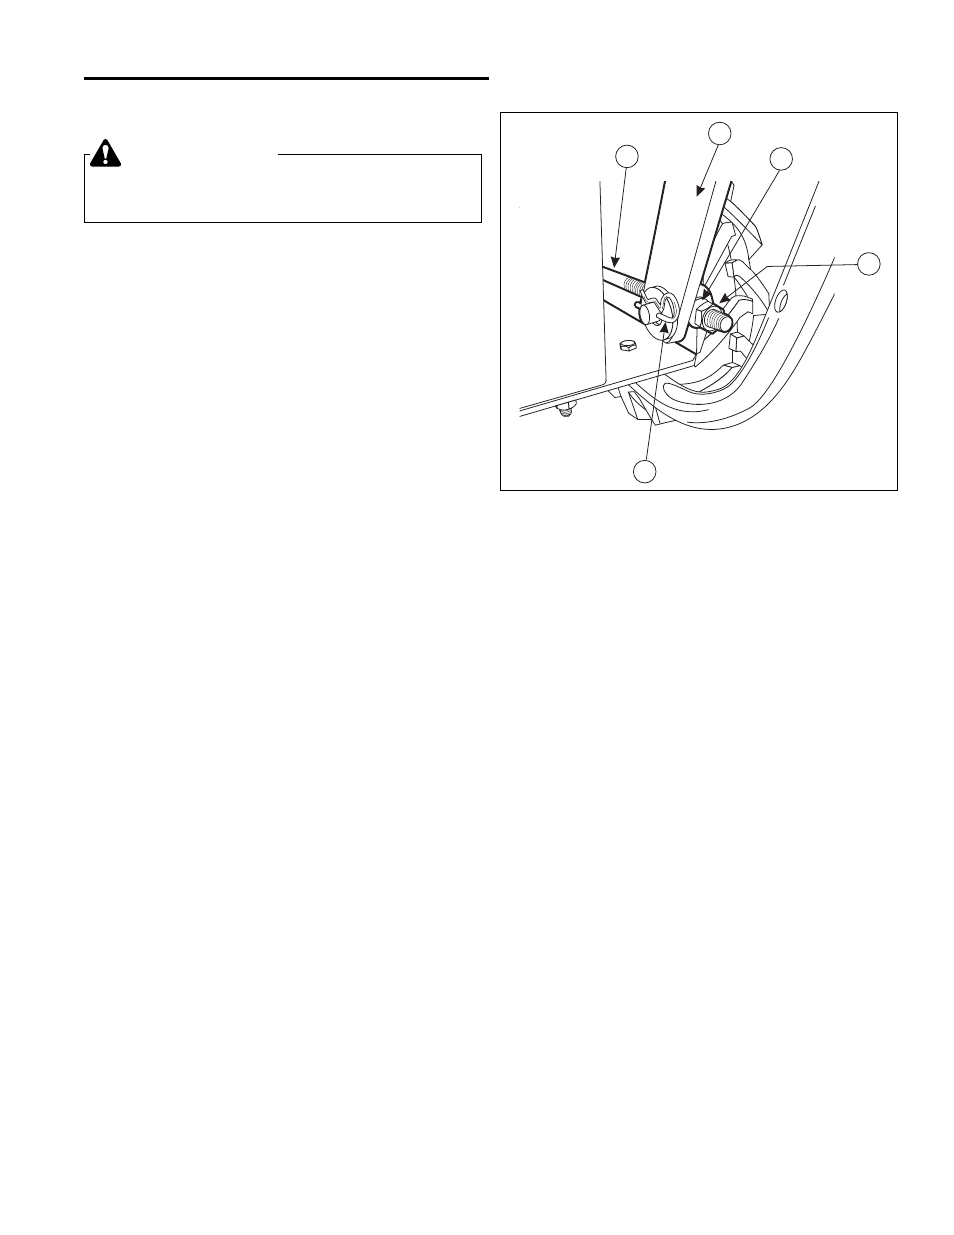
Figure 17 - Blade Clutch Adjustment
A. Clutch Rod
B. Clutch Rod Lever
C. Clutch Rod Fitting
D. Locknut
E. Hairpin Clip
BLADE CLUTCH ADJUSTMENT
If the mower blade does not stop running when the blade
clutch lever is in the DISENGAGED position, does not
run at full speed, adjust the Blade Clutch tension.
1. Remove clutch cover plate (A, Figure 19).
2. Loosen nut (D, Figure 17).
3. Remove hairpin clip (E).
4. Slide clutch rod fitting (C) out of blade clutch lever
(B).
5. Move clutch rod lever (B) to fully disengaged position.
6. Push forward on the blade clutch engagement lever
(Figure 18).
7. Adjust nut (D) and clutch rod fitting (C) until there is
no tension on the spring and minimal slack (approxi-
mately 1/16”) when the fitting is placed into hole in
the blade clutch lever.
8. Attach clutch rod fitting to the blade clutch lever using
washer and hairpin clip. Tighten nut.
9. Start engine. Blade should not rotate.
10. Engage blade. Blade should come up to full speed.
11. .Disengage blade. Blade should stop in 5 seconds or
less. Stop engine.
12. Install clutch cover plate.
WARNING
Shut off engine before attempting this adjustment
procedure.