H inserting batteries h power supply h hold, H setting time and date [ time & date, Replacing the batteries – Olympus VN-3200PC User Manual
Page 3: Standby mode and display shut off
3
- -
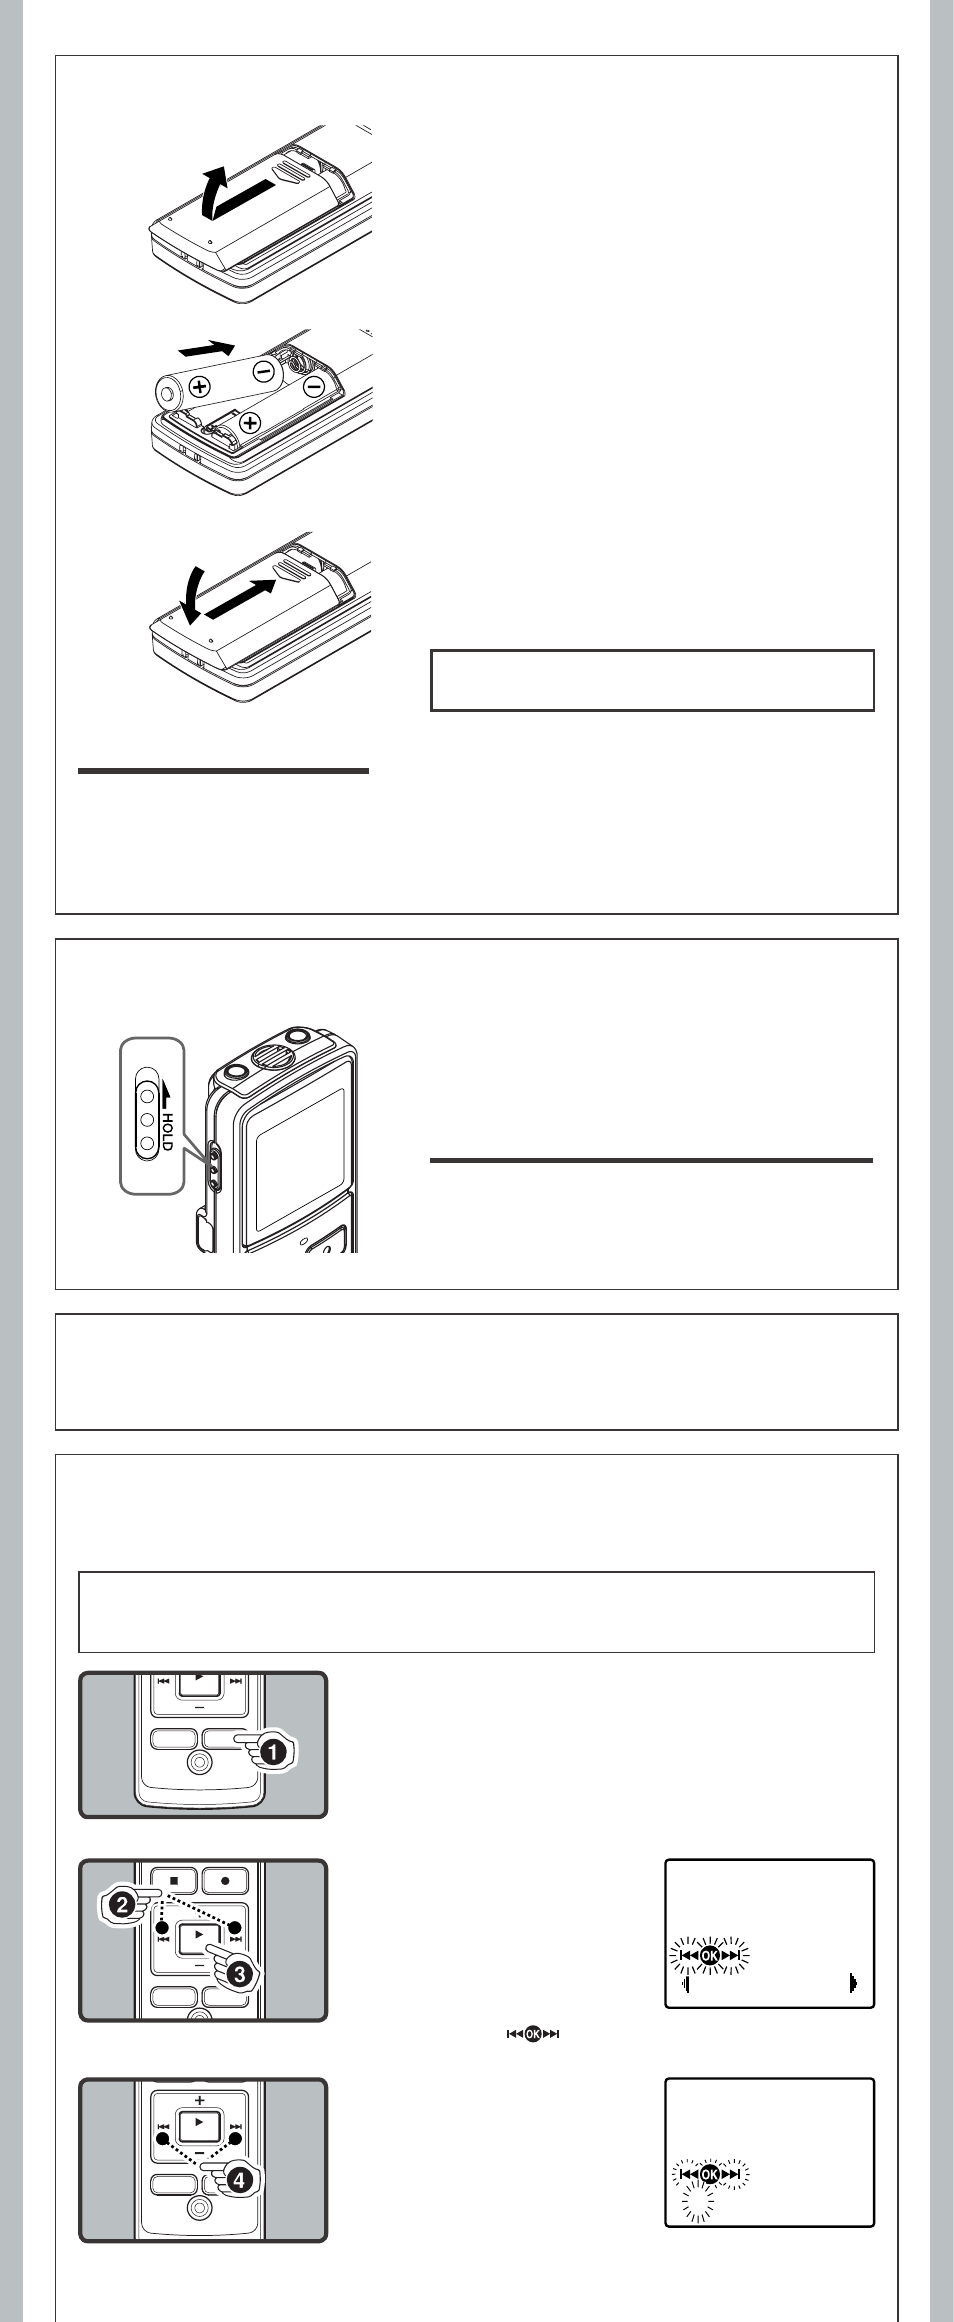
1 Lightly press down on the arrow and
slide the battery cover open.
2 Insert two size-AAA alkaline batteries,
observing the correct polarity.
3 Close the battery cover completely.
• When
the
HOLD switch is set to the direction
of the arrow, the display is turned off after
[HOLD] is displayed. Follow the nex t step
without regard to it.
h Inserting Batteries
h Power Supply
hHold
Setting the HOLD switch to the direction of the arrow holds the current status, and all button
operations are disabled. Remember to release the HOLD switch to use the recorder.
4 Press the 9 or 0
button to select the item
to set.
• Select the item from “Month”,
“Day ”, “Year ”, “Hour ” and
“ Minute” with a f lashing
point.
An optional Ni-MH Rechargeable Battery (BR401)
from Olympus can be used for the recorder.
Replacing the Batteries:
When [N] appears on the display, replace the batteries as soon as possible. Size-AAA alkaline
batteries are recommended. When the batteries are depleted, [O] appears on the display, and
the recor-der shuts off.
• To replace the battery, make sure that you set the HOLD switch to the opposite direction of the
arrow before replacing.
Power on: Slide the HOLD switch in the direction
opposite that indicated by the arrow.
Power off: Slide the HOLD switch in the
direction indicated by the arrow while the
recorder is not in operation.
Standby Mode and Display Shut Off:
If the recorder is stopped for 5 minutes or longer during
recording or playing, it goes into Standby (power-save)
mode, and the display shuts off. To exit Standby mode
and turn on the display, press any button.
2 Press the 9 or 0
button to select
[
Sub Menu].
3 Press the PLAY/OK (`)
button.
• [Time & Date] appears on the
display, and [
] flashes.
1 Press and hold the DISP/MENU button for 1
second or longer to go to the main menu.
h Setting Time and Date [Time & Date]
If you have set the time and date, information as to when a sound file was recorded is stored
automatically with that file.
When you install batteries for the first time or each time you replace the batteries, the
“Month” indication will flash. In such a case, be sure to set the time and date by following
steps
4 through 6 described below.
Time & Date
1. 1‘08 12:00 AM