7applications – AudioSource AMP210 / AMP310 User Manual
Page 7
AMP210 / AMP310
OWNER’S MANUAL
9200 North Decatur St. Portland, OR 97203 • 503.286.9300 • www.audiosource.net
7
APPLICATIONS
NOTE: It should be noted that the AMP210/310 is rated to operate into a
minimum 8-ohm bridged load. Therefore, if you are using more than a single
8-ohm loudspeaker in bridged mode you should consider using an impedance
matching speaker selector, such as the Phoenix Gold® Innovative Home ISM4,
ISM6 or ISM8, or possibly using an impedance matching volume control, such
as the Phoenix Gold® Innovative Home VMT100 available at your favorite DIY
store or electrical supply. The choice of a volume control would allow you the
additional flexibility of being able to attenuate the volume whenever necessary.
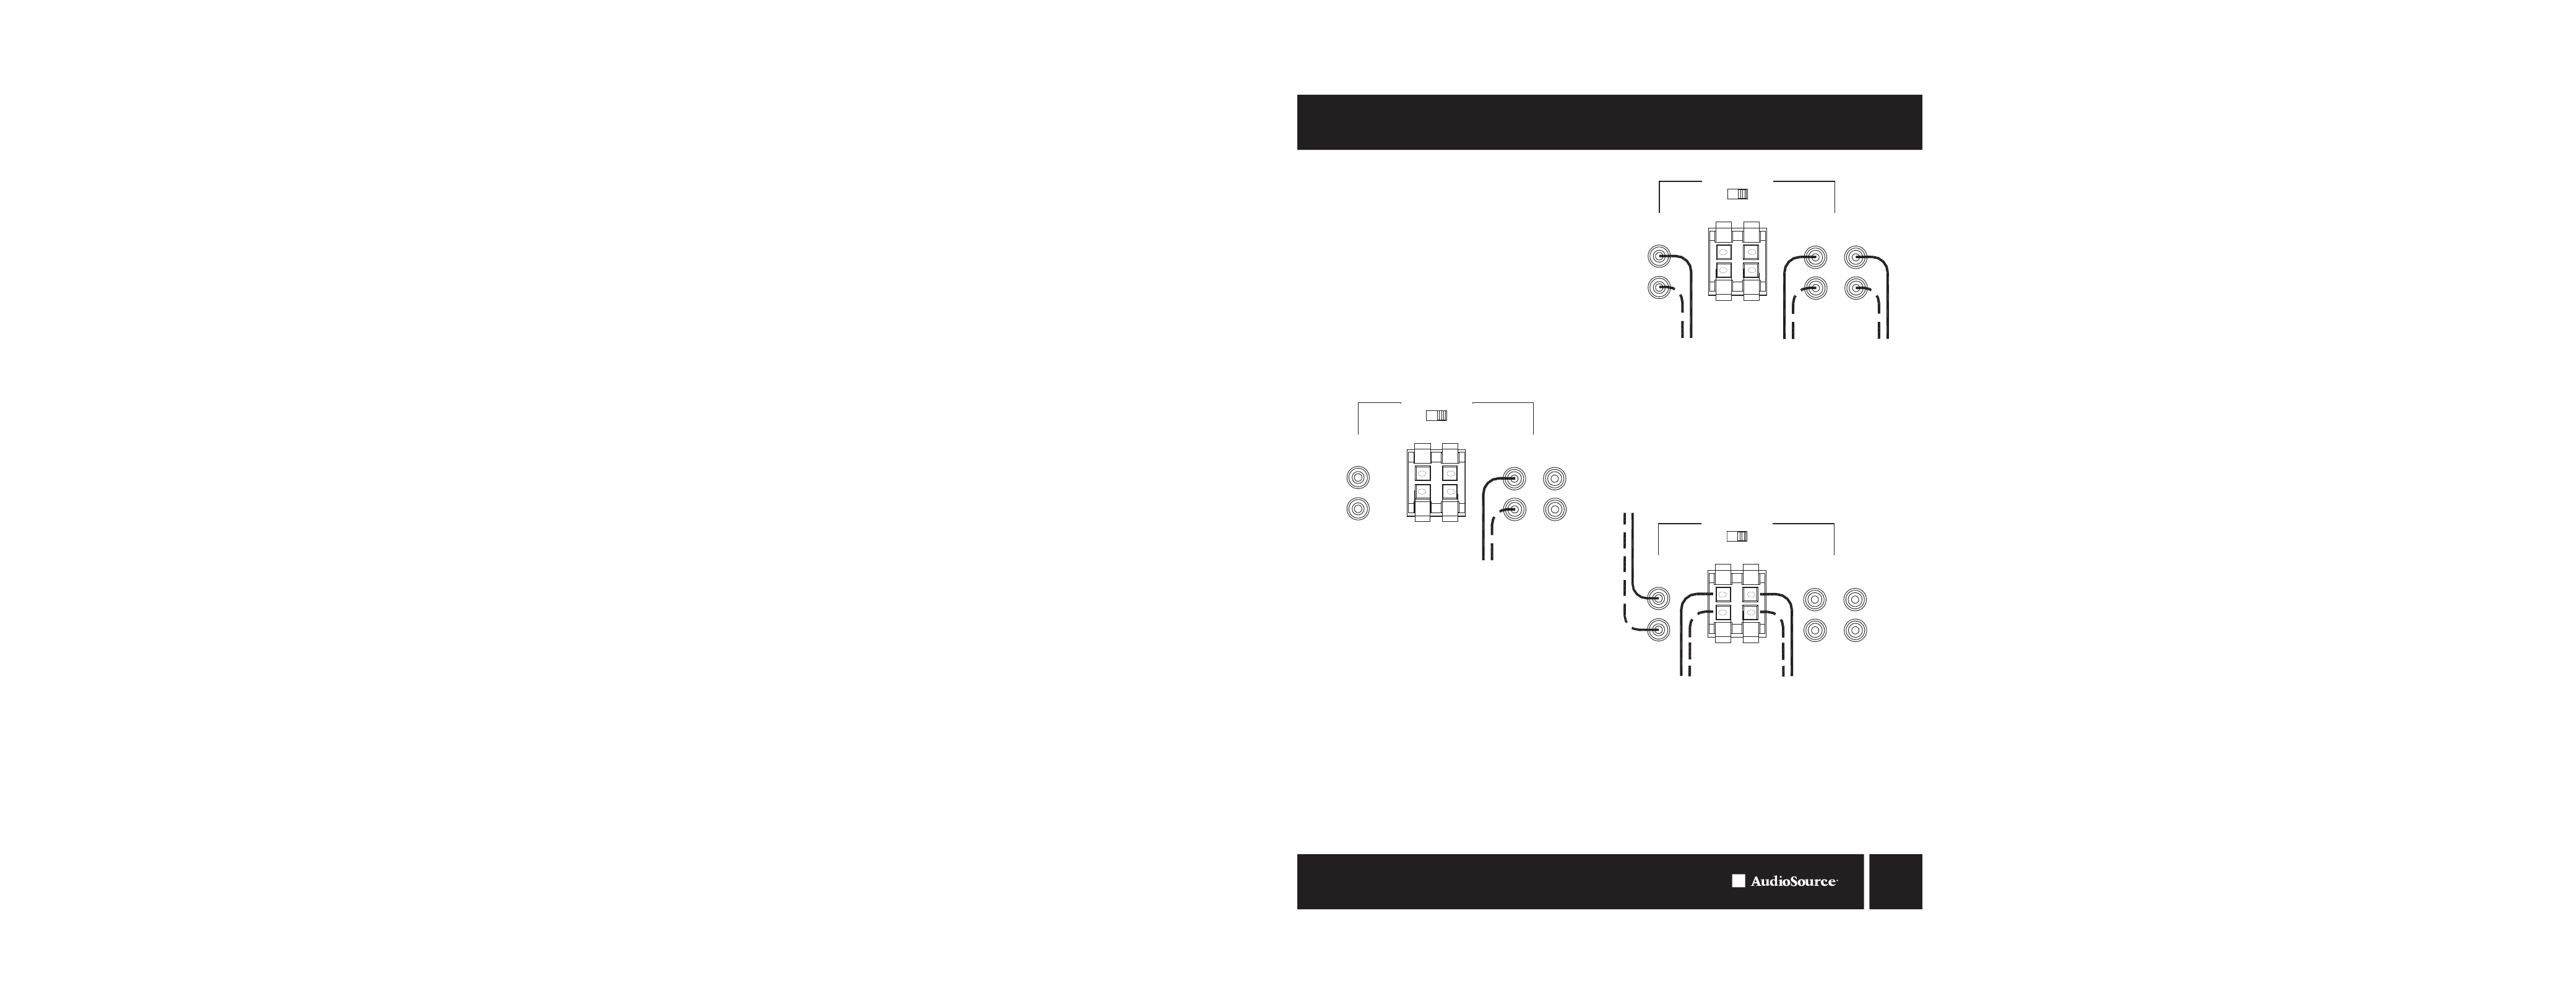
STEREO SETUP
In this configuration, the mode switch is set to “Stereo”. Connect the line out
jacks from a stereo preamplifier or source to the Line 2 input jacks of your
AMP210/310 (Figure 11). Next connect your speakers to the terminals marked
“Speaker A” observing proper polarity (see “Speaker Terminals” Page 6).
Connect a second (optional) pair of speakers to the terminals marked “Speaker
B”. Select the “A” speakers using the front panel speaker selection buttons.
MONO SETUP
In this configuration, the mode switch is set to “Bridged”. Connect the Left line
out from a preamplifier to the left Line 2 inputs of your AMP210/310. Connect
your mono speaker to the terminals of your AMP210/310 (see “Speaker
Terminals” on Page 6). Use the left “Master Level” control on the rear panel to
adjust the volume. Leave the balance set to the center detent position.
SETUP FOR MULTIPLE SOURCE
In the application shown in Figure 12, a distributed audio system is connected
to the AMP210/310 as a local zone amplifier via the Line 2 inputs. Normally
the distributed audio system will be the audio source for the AMP210/310. The
distributed audio is then passed on to be used by additional zones or sub zones
in the distributed system via the Line 2 outputs.
The audio output of a local source, such as an MP3 Player, CD, television,
computer, etc., is connected to the AMP210/310 via the Line 1 inputs, and
whenever the local source is active its signal will take priority over the distributed
audio signal present at Line 2 . However, the distributed audio signal will still
be present at the Line 2 input. In this circumstance the audio output of the
local source will be heard via the AMP210/310. Once the local source is turned
off or muted, the AMP210/310 will automatically switch back the distributed
audio system as an audio source, assuming the local source remains inactive.
The delay time adjustment determines when switch back to the normal source
will occur. This set up assumes all incoming signals are at line level and not at
speaker level.
If the whole house distributed audio was only available as a speaker level signal
you could connect it to the “Speaker In” connections and set the routing switch
to the “Line 2” position, the right hand position of the switch (Figure 13).The AMP
210/310 will no longer be able to pass the Whole House Distributed Audio to
another zone via the Line 2 Output. If you have any questions regarding how to
set this up, please call AudioSource® Tech support at 1.800.435.7115 or
503.286.9300.
Figure 11. Stereo Setup
Figure 12. Line Level with Multiple Sources
Figure 13. Speaker Level with Multiple Sources
IN
L
L
R
L
R
R
Speaker IN
IN
OUT
Line 1
Line 2
Line 1
Line 2
+
+
-
-
V
V
(From Pre-amp Line Out)
IN
L
L
R
L
R
R
Speaker IN
IN
OUT
Line 1
Line 2
Line 1
Line 2
+
+
-
-
V
V
(From Pre-amp Line Out)
(From Local Source Line Out)
(Out to Additional Zones)
IN
L
L
R
L
R
R
Speaker IN
IN
OUT
Line 1
Line 2
Line 1
Line 2
+
+
-
-
V
V
(From Local Source Line Out)
(Speaker Level Input)