Installing the cable management arm (if available), Legal notices – Lenovo ThinkServer RD550 User Manual
Page 2
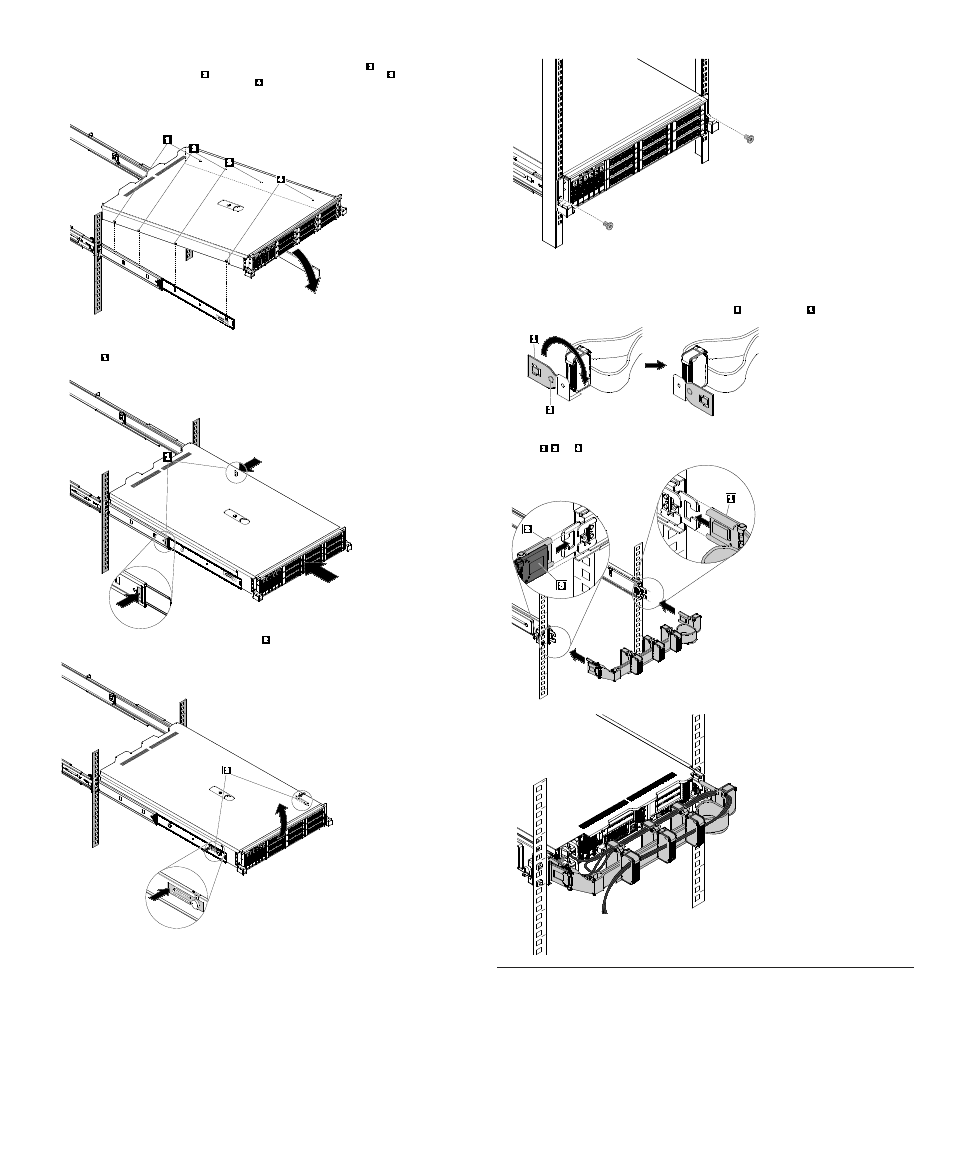
Part II: Install the server.
1.
Fully extend the inner rails on both sides until the inner rails cannot be pulled out further.
2.
Position the server as shown in the following illustration. Mount and secure the pair of rail mounting points
at the rear first. Then,
mount and secure the pair of rail mounting points
. And then, mount and secure the pair of rail mounting points
. Finally, hold and
press the slide rails towards the server until the rail mounting points
are locked into place.
3.
Press the latch
on both sides at the same time to release the inner rails. Carefully slide the inner rails with the server into the rack
cabinet.
Note: If you want to remove the server from the rails, press the latch
on both sides at the same time and then carefully lift the server
upward to release the server from the mounting points.
4.
When you ship the rack cabinet with the server installed, secure the server before shipping. Install the two screws (included in your rail
kit package) into the screw holes in the rack handles of the server. After shipping and rack deployment, you can remove the screws.
Installing the cable management arm (if available)
To install the cable management arm, do the following:
1.
Turn to the rear of the rack cabinet.
2.
Note the orientation of the cable management arm. If needed, press button
to rotate arm-rail joint
by 180 degrees.
3.
Connect the cable management arm to the slide rails. Ensure that the rear ends of the slide rails are inserted into the corresponding arm-
rail joints
,
, and
correctly.
4.
Refer to the following figure to route cables from the server.
Legal notices
Lenovo, the Lenovo logo, ThinkServer, and the ThinkServer logo are trademarks of Lenovo in the United States, other countries, or both.
Other company, product, or service names may be trademarks or service marks of others.