Lenovo ThinkServer RD210 User Manual
Page 3
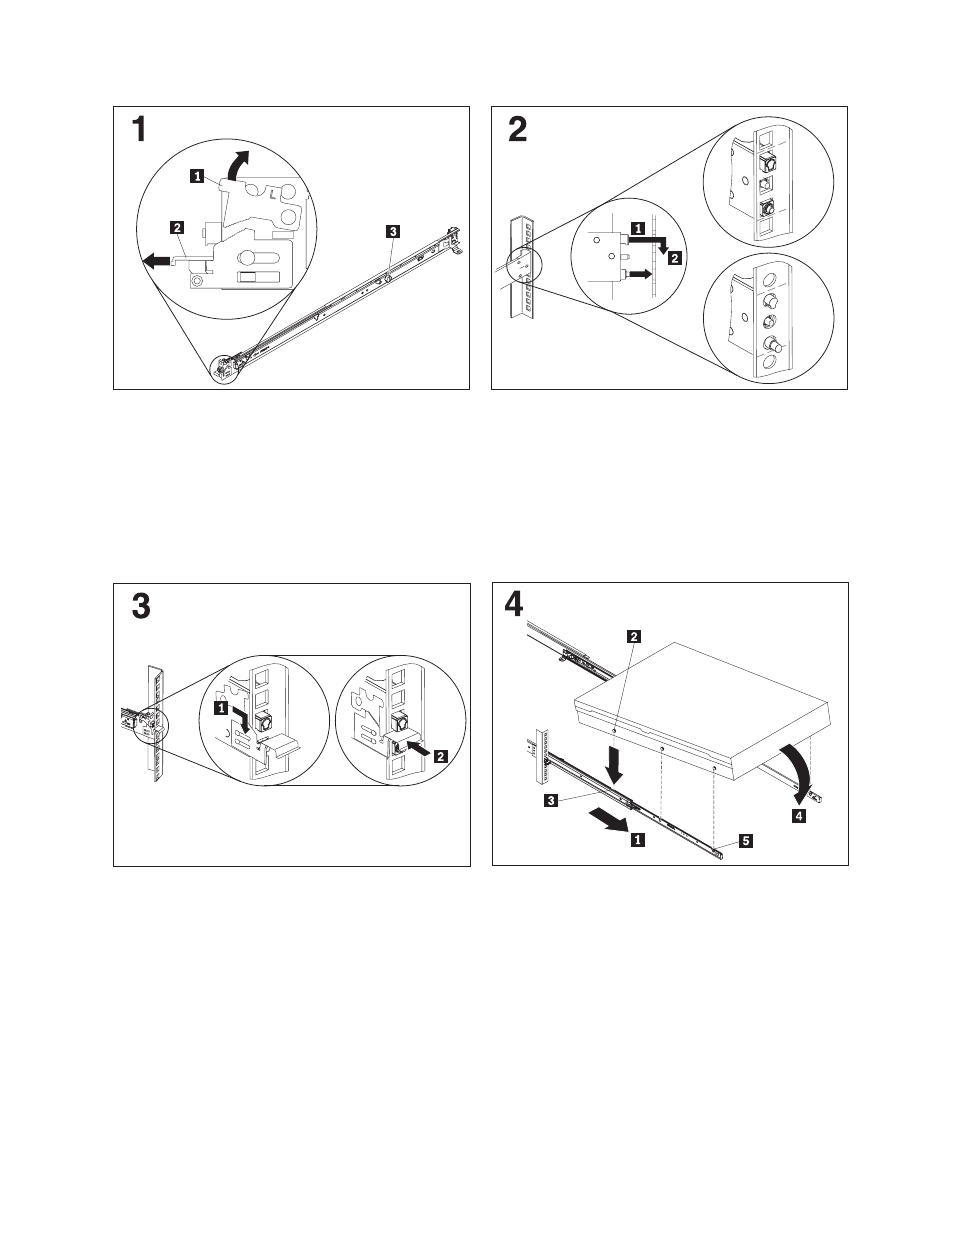
Each
slide
rail
is
marked
with
either
an
R
(right)
or
an
L
(left).
Select
one
of
the
slide
rails
and
push
up
on
the
front
moveable
tab
1 ;
then,
pull
out
the
front
latch
2
to
slide
out
the
front
side
rail.
If
a
thumbscrew
is
installed
in
the
slide
rail
3 ,
remove
it.
Note:
When
you
install
a
2U
server,
be
sure
to
install
the
slide
rails
in
the
bottom
U
of
the
2U
area
in
the
rack.
From
the
front
of
the
rack,
line
up
the
three
pins
on
the
rear
of
the
slide
rail
with
the
three
holes
in
the
selected
U
on
the
rear
of
the
rack.
Push
the
rails
so
that
the
pins
go
into
the
holes
1 ,
and
drop
the
slide
rail
down
2
until
it
latches
into
place.
Pull
the
slide
rail
forward
and
insert
the
two
pins
1
on
the
front
of
the
rail
into
the
two
lower
holes
in
the
U
on
the
front
of
the
rack.
Drop
the
rail
into
place
until
it
clicks.
Push
the
front
latch
2
in
all
the
way.
Repeat
steps
1
through
3
to
install
the
other
rail
into
the
rack.
Make
sure
that
each
front
latch
is
fully
engaged.
Pull
the
slide
rails
forward
1
until
they
click,
two
times,
into
place.
Carefully
lift
the
server
and
tilt
it
into
position
over
the
slide
rails
so
that
the
rear
nail
heads
2
on
the
server
line
up
with
the
rear
slots
3
on
the
slide
rails.
Slide
the
server
down
until
the
rear
nail
heads
slip
into
the
two
rear
slots,
and
then
slowly
lower
the
front
of
the
server
4
until
the
other
nail
heads
slip
into
the
other
slots
on
the
slide
rails.
Make
sure
that
the
front
latch
5
slides
over
the
nail
heads.
3