Append x c, Important – MSI 870A Fuzion User Manual
Page 91
Marvell RAID
MS-7660
Append
x C
C-7
Marvell RAID
MS-7660
Append
x C
Rebuldng Vrtual Dsk
Ths topc descrbes the procedure to manually rebuld a degraded vrtual dsk by usng
the Marvell BIOS setup utlty. Ths s applcable to the RAID 1 vrtual dsk.
Important
The rebuld process s both ntated and completed n the Marvell BIOS setup. The Mar-
vell RAID Utlty (MRU), whch runs n as OS envronment, cannot be used to ether nt-
ate, resume, or complete the rebuld process Spare physcal dsks are not supported.
When a vrtual dsk s degraded, the “Status” of a vrtual dsk s changed from Func-
tonal to Degrade.
Replace the faulty physcal dsk wth an dentcal physcal dsk. (Note: If an dent-
cal dsk s unavalable, use a replacement physcal dsk of larger sze or one wth
a slghtly smaller sze as determned the Ggabyte Roundng settng for the vrtual
dsk.) The BIOS detects the new physcal dsk and lsts the devce under “Free
Physcal Dsks” n the [Topology] pane.
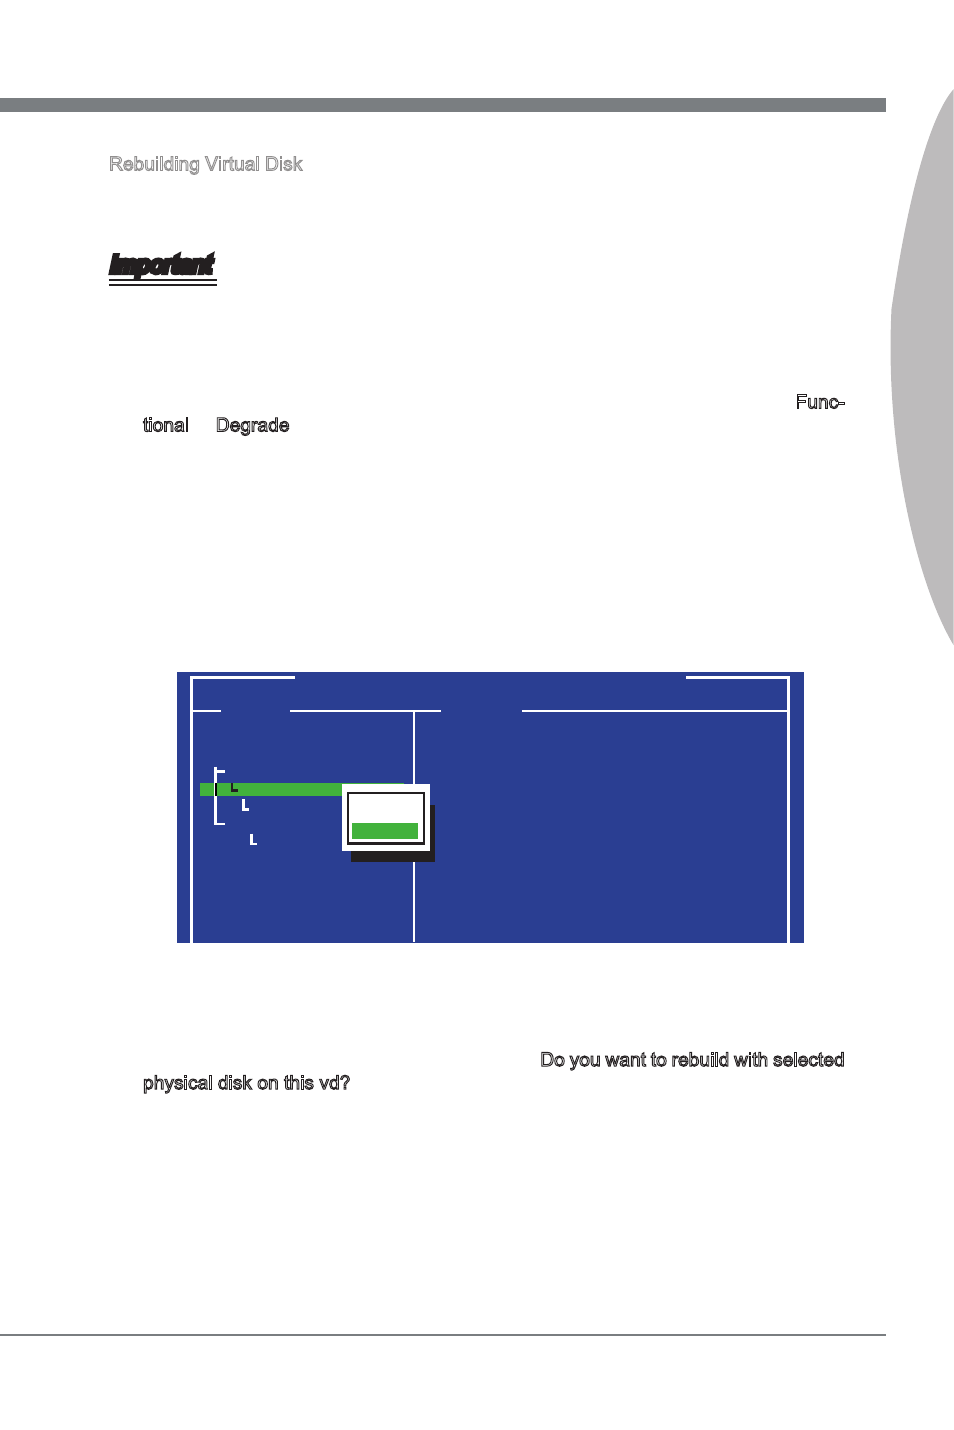
In the [Topology] pane, scroll to “Vrtual Dsk” (VD 0: XXXX), and press Enter to
select. A menu pops-up as shown below. Scroll to “Rebuld” and press Enter to
configure the rebuld process.
1.
2.
3.
Marvell BIOS Setup (c) xxxx Marvell Technology Group Ltd.
Topology
Informaton
ID
Namd
Status
Strpe Sze
RAID Mode
Sze
BGA Status
Number of PDs
Members
: 0
: MRAID1
:
Degrade
: 64K
: RAID1
: 953344MB
: N/A
: 2
: 0 8
HBA 0: Marvell 0
Vrtual Dsks
VD 0: MRAID1
PD 8: ST3750330MS
Free Physcal Dsks
PD 0: ST3750XXX
[Delete]
[Rebuld]
Scroll through the lst of free dsks, and press Space to select a replacement phys-
cal dsk. Press Enter to contnue.
Press Y to confirm the request when prompted Do you want to rebuld wth selected
physcal dsk on ths vd?.
The status of the rebuld process s reflected n the propertes of the vrtual dsk.
4.
5.
6.