Masterbuilt 30-inch Electric Digital Smokehouse (20070312) CONTROL PANEL REPLACEMENT User Manual
Page 2
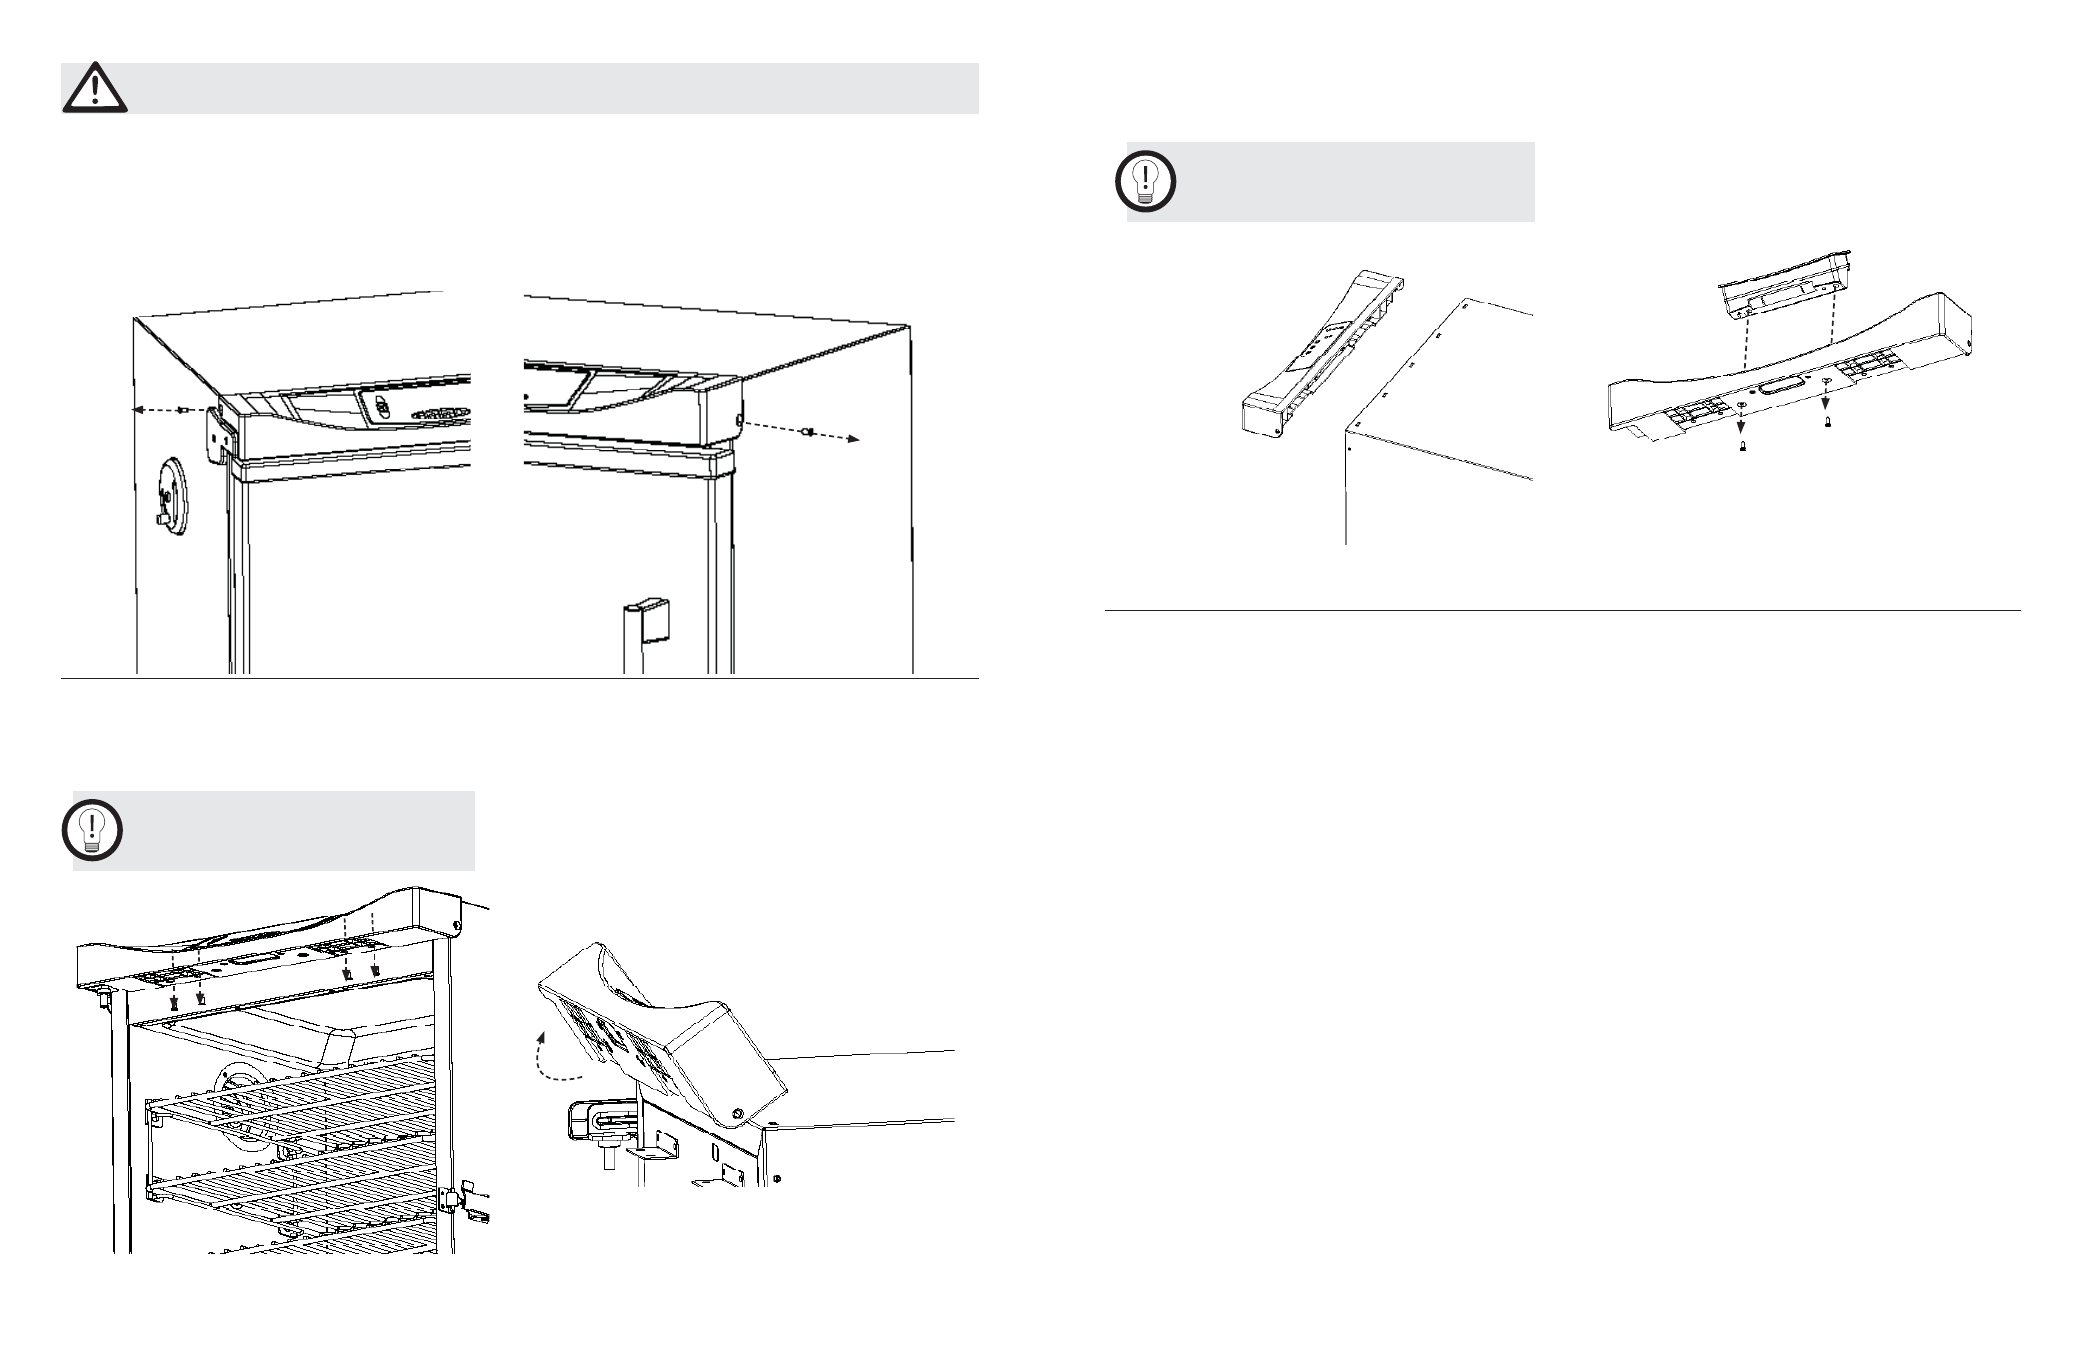
Step 1:
Remove screw on left side of smoker body
as shown below.
Step 2:
Remove screw on right side of smoker
body.
Disconnect unit from power source, and allow it to fully cool, before replacing
control panel.
Step 3:
Remove 4 screws from the control panel
housing as shown.
Step 4:
Pull control panel housing out and up to
remove.
Note :
Note :
Some parts not shown for clarity.
1
Step 5:
Disconnect wires connecting control panel
housing to smoker body.
Step 6:
Remove screws as shown below to remove
control panel from housing.
Step 7:
Insert new control panel into control panel housing.
Step 8:
Follow Steps 1-6 in reverse order, to connect new control panel.
Step 9:
Connect unit to power source, to ensure new control panel is properly connected.
*
After testing allow unit to fully cool.
* If your smoker model has a remote control, it will need to be linked with the new control
panel before it will function properly. See below for directions.
How to Link Remote Control:
A. Turn control panel and remote control “OFF”.
B. Press and hold “SET TEMP” on control panel for 3 seconds.
C. On the remote control press, “MEAT PROBE”, “LIGHT”, “MEAT PROBE”,
“LIGHT” (all buttons must be pressed within 5 seconds of each other)
A short beep will occur after each button press.
2
Note :
Note :
Do not disconnect red and black
wiring.