Hogtunes 692.2 / Lids Complete with 6 x 9 Speakers User Manual
Page 4
With the gasket installed, you will insert the factory metal strip (5 screws)
between the gasket and new lid. Re-install the 5 factory machine screws the
same way they came off the factory lid. The new lid will now be attached to
your saddlebag.
Locate the flap that came with your new kit. The metal bar that was re-
moved from the factory flap will be inserted into the new flap in the appro-
priate end. There is a shorter metal bar in your kit that will go in the
shorter end of the new flap. Once done, using the 4 screws removed from
the factory flap, secure the new flap to the lid/bag.
Re-install the tweeter bridge assembly making sure the rubber part is in
place as shown on the bottom of page 2. Re-install the woofer noting that
on the far end of the wire near the plug, there is a label that indicated
brake side or clutch side. When correctly installed, the speaker connectors
are positioned so they are adjacent to the “out side” of the bag. Re install
the wires for the tweeter bridge assembly to the connectors on the 6x9
woofer.
Included in the kit is adhesive “pads” that when attached, have a provision
to secure the wires in place using the supplied zip-ties. Half the supplied
zip-ties, and half the supplied pads are for one saddlebag, and you guessed
it, the other half is for the other saddlebag.
Its time to route the wires in the saddlebag. Please do a “ghost run” of plac-
ing the wires before applying any adhesives. This will help-trust us! For the
ghost run, have the wire from the woofer go straight to the bag, just in
front of the new flap, and “fold” the wire so it will naturally want to go
straight down. Leave a little slack between the lid and bag to give a little
“wiggle room” for when the lid opens and closes. Have the wire go straight
down to the bottom of the bag and do another fold so the wire wants to
point to the outside back of the saddlebag. Once there, do another fold to
point the wire to the inside back of the saddle bag. Another fold to point
the wire forward along the bottom of the bag, and directly below the point
where you drilled the hole for the grommet, do another fold so the wire
goes straight up to the hole. When done correctly, the black 2 pin plug can
go through the grommet hole, and hang out approximately 4” (10cm)
Once your satisfied the wires are ghost run as instructed, you will want to
plan where the adhesive pads will go, so that the supplied zip ties will se-
cure the wires inside the bag. Note: Before applying the pads, you need to
clean the plastic well using isopropyl alcohol, or similar cleaner. DO NOT
use Acetone (It will eat plastic). With the pads in place, secure the wires in
place using supplied zip ties.
5
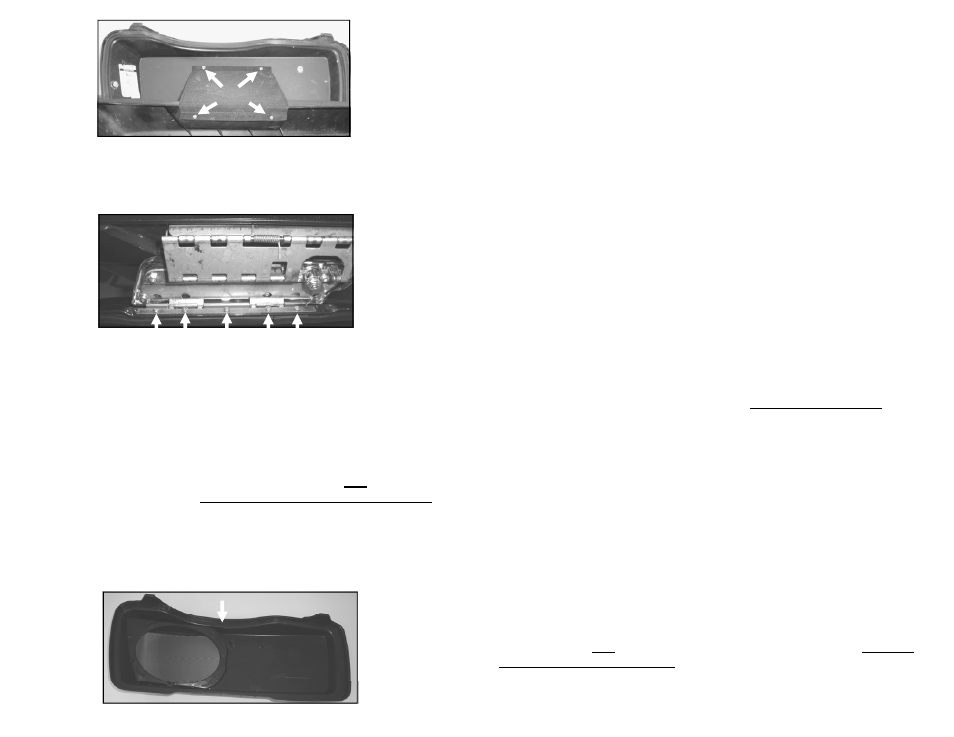
Remove the 4 screws (highlighted with white arrows above) that hold the
cloth flap in place. With the flap off ,slide one of the metal bars out from
inside the flap as it will be used for new lid. The screws just removed will
be re-used.
With the flap off, fold the factory lid all the way over, exposing the 5 screws
highlighted above by white arrows. When these are removed, the factory
lid will be free from the saddlebag. These screws will be used to install the
new lid so keep them handy. With the factory lid off the bike, you will see a
metal “strip” between the rubber gasket and the lid itself that the screws
just removed threaded into. This metal strip must be removed as it will be
used to install the new lid.
In the kit, you will see 2 lengths of rubber gasket material-one for each lid.
Before applying the gasket, you need to clean the plastic well using isopro-
pyl alcohol, or similar cleaner. DO NOT use Acetone (It will eat plastic). It
is strongly recommended that any adhesives in this kit be applied at room
temperature or higher. The white arrow below shows where we suggest you
start applying the gasket. Don’t stretch the gasket when applying. When all
the way around, you can expect to have approx 2.0” (5cm) left over to cut
off. A sharp razor knife is good for this.
4