B4a instruction manual – American Aimers B4A User Manual
Page 13
B4A manual page 13
Page 1 of 1
http://www.hopkinsmfg.com/test2/b4a_manual_page_13.htm
8/13/99
Home
Vision Aimers
Vision 100
Warranty Registration
Vision 1
Instructions
Parts List
B4A
Instructions
Parts List
Aiming Screen Manual
LiteMate Trailer Wiring
Levels
Contact Information
B4A Instruction Manual
Page 13
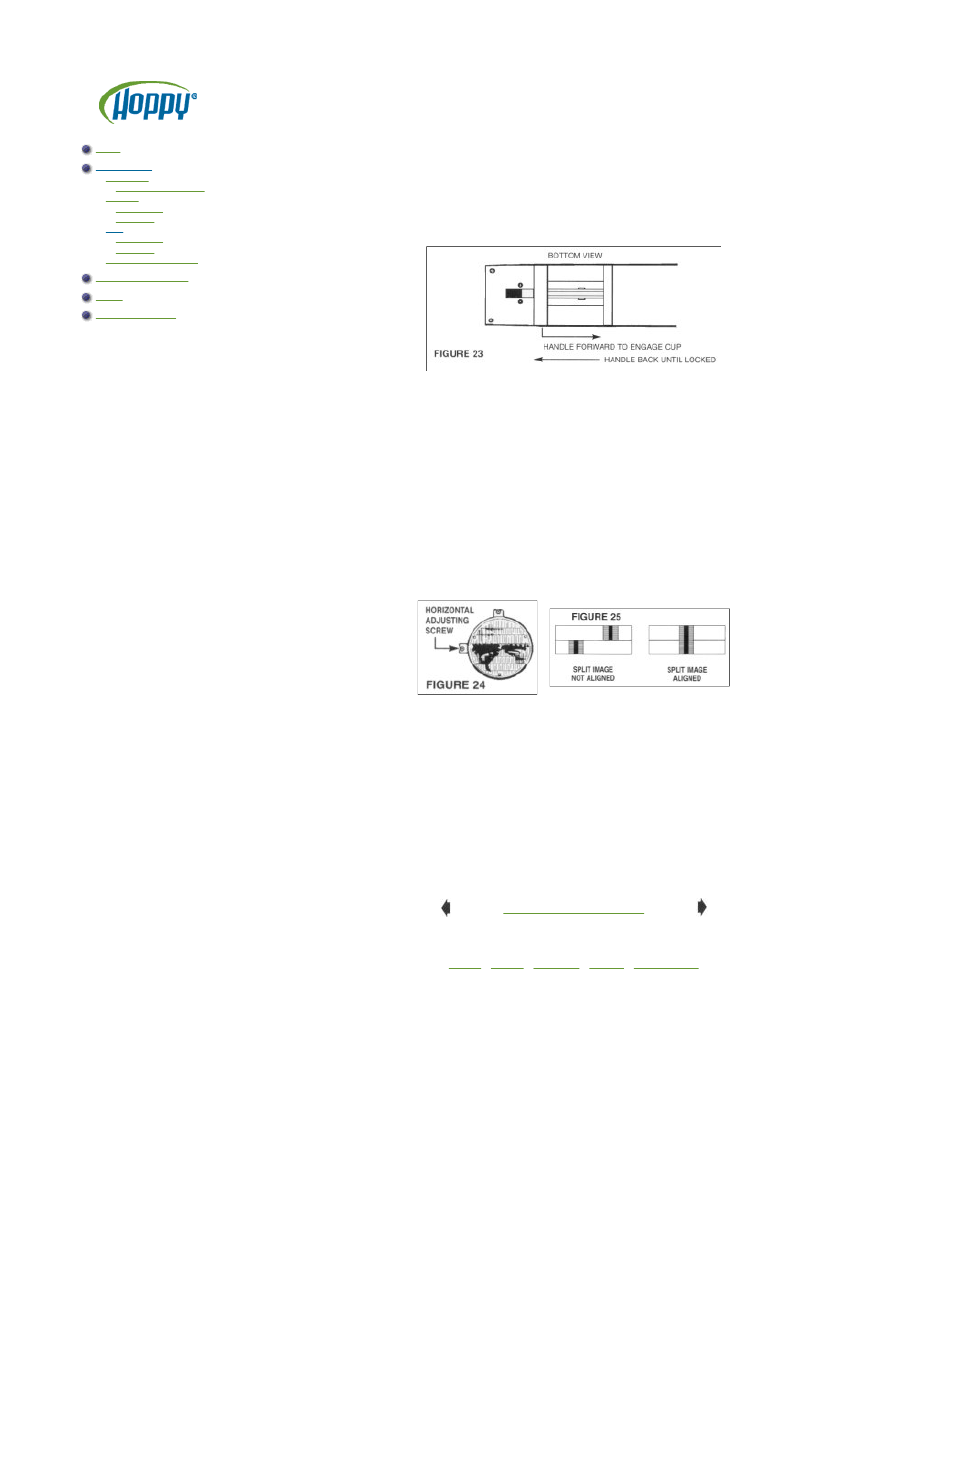
9. Attach each aimer to headlamp (Fig. 22) by pushing piston handle forward, engaging rubber suction cup.
Immediately pull back piston handle until it locks in place (Fig. 23).
10. You are now ready to aim the headlamps for both the horizontal (side to side) and the vertical (up and down).
NOTE: It is good practice to check the FLOOR LEVEL DIALS for proper setting prior to aiming headlamps.
TO SET HORIZONTAL AIM
1. The horizontal dial should be set at zero (Fig. 22).
2. Check to see that the split image target lines are visible in the viewing port (Fig. 22). If necessary, rotate each
aimer slightly to locate the target.
3. Turn horizontal adjusting screw at side of headlamp (Fig. 24) until split image of target line appears in mirrors
as one solid line (Fig. 25).
If adjusting aerodynamic headlamps, the adjusting screws are located under the hood. Refer to page 20,
21 and 22 to determine location of the adjustment screws.
To remove "backlash", make final adjustment by turning screw in a clock-wise direction.
4. Repeat the last three steps with opposite aimer and headlamp.
Return to table of contents
[
Home
] [
Vision
] [
LiteMate
] [
Levels
] [
Contact Info
]