Through-the-wall installations – M&G DuraVent Combustion Air Systems User Manual
Page 10
10
THROUGH-THE-WALL
INSTALLATIONS
Step 1. Determine location for CAS Wall
Thimble. The CAS Wall Thimble should be
located near the stove to keep the connector
pipe to a reasonable length.
Step 2. Install CAS Wall Thimble. Cut and
frame an opening in the wall for the CAS
Wall Thimble. Refer to Table 1 for framing
dimensions. Install the black-painted inside
portion of the CAS Wall Thimble into the
framed opening. Secure the CAS Wall Thimble
with (4) 1-1/2” wood screws through the holes
on the face of the Thimble. Install the outside
portion of the CAS Wall Thimble by sliding
the radiation tube into the tube of the inside
portion of the Wall Thimble (Fig 11). Important:
the Wall Thimble must have a continuous tube
through the wall for a safe installation. The
CAS Wall Thimble can accommodate walls
up to 12” thick. If the wall is too thick for the
two halves of the CAS Wall Thimble to reach
each other, a field-fabricated tube of 26-gauge
galvanized steel (or better) must be made to
bridge the gap between the two halves. Slide
the field-fabricated tube over the inner portion
of the Wall Thimble and then slide the outer
portion of the Wall Thimble into the field-
fabricated tube to complete the continuous
tube through the wall. Make sure the air-inlet
openings of the Wall Thimble’s outside portion
are facing downward. Secure the outside
portion of the Wall Thimble to the wall with (4)
2-1/2” wood screws. Seal the perimeter of the
CAS Wall Thimble where it meets the wall with
a non-hardening sealant to provide a weather-
resistant seal.
Step 3. Connect CAS Connector Pipe. Refer
to Step 3 of the Vertical Installation. Use 45- or
90-degree elbows as needed.
Step 4. Connect to air inlet of stove. Refer to
Step 4 of the Vertical Installation.
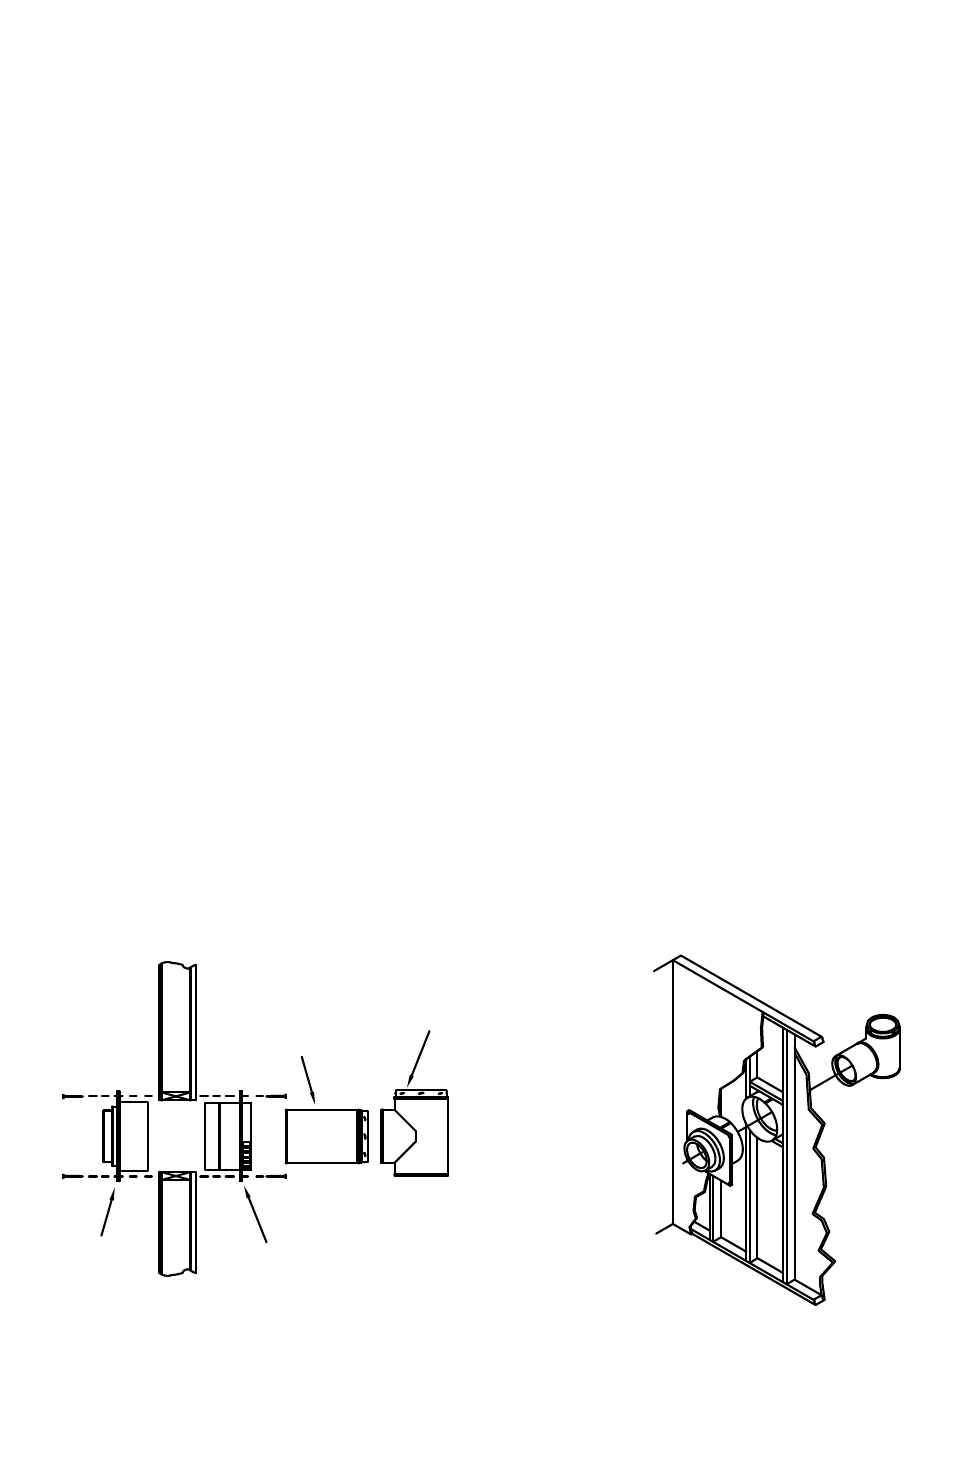
Step 5. Install the chimney branch through the
wall. A horizontal section of chimney is needed
to go through the wall and twist lock into the
CAS Wall Thimble. Depending on your wall
thickness, use a section of chimney that will
reach from the Wall Thimble to the outside.
Connect the chimney Tee to the horizontal
chimney section (Fig 11). Support the chimney
TWIST LOCK CHIMNEY TEE
ONTO CHIMNEY BRANCH
AND ENSURE IT IS LEVEL
AND FACING UPWARDS.
USE ADDITIONAL SCREWS
IF NEEDED TO SECURE
CONNECTION.
TWIST LOCK SHORT
CHIMNEY SECTION
INTO WALL THIMBLE.
ATTACH INSIDE
PORTION OF WALL
THIMBLE WITH (4)
1-1/2" SCREWS.
THE TWO HALVES OF THE WALL THIMBLE
MUST OVERLAP. ATTACH OUTSIDE PORTION
OF WALL THIMBLE WITH (4) 1-1/2" SCREWS.
Figure 11