Mh7399 – DuraVent DuraChimney II User Manual
Page 2
2
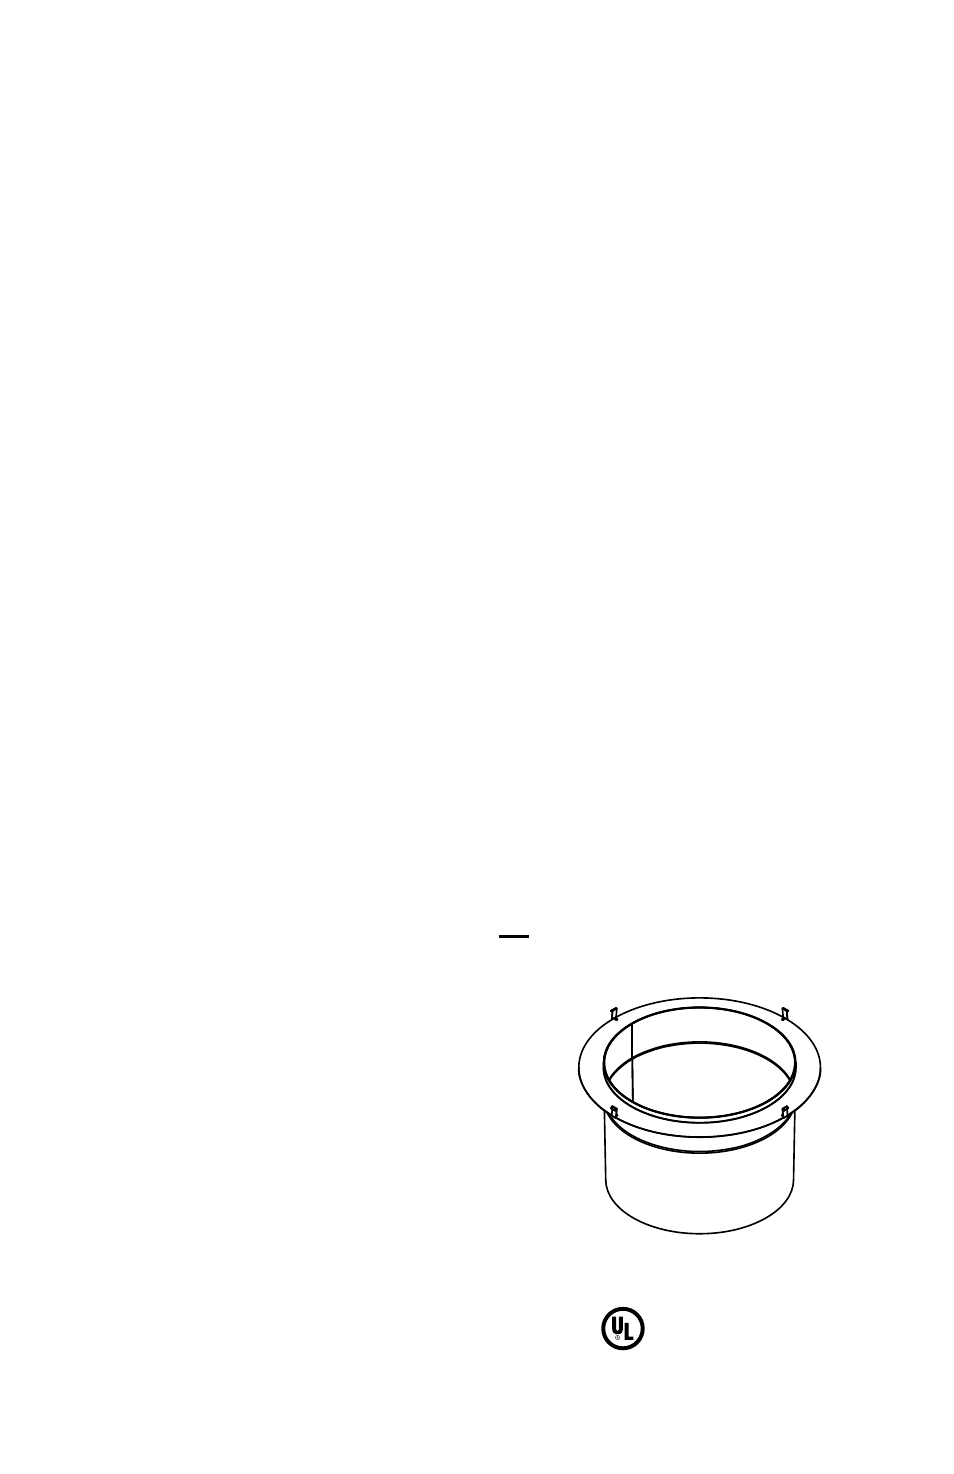
Figure 1
MH7399
Read through these instructions before
beginning your installation. Failure to
install as described in these instructions
will void the manufacturer’s warranty and
may have an effect on your homeowner’s
insurance and UL listing status. Keep these
instructions for future reference.
These installation instructions apply to installing
the European Copper Chimney Pots King
or Bishop model shroud/pot onto DuraTech
(10”-16” diameter) or DuraChimney II (10”-14”
diameter) chimney. Refer to the full DuraTech
or DuraChimney II installation instructions
(L151, or L180) for complete details on properly
installing a DuraTech or DuraChimney II system.
Refer to European Copper Pots installation
instructions for details about proper installation
of their products. Currently, only the King and
Bishop models are listed for use with DuraTech
and DuraChimney II.
Listing: UL listed to UL 103 and ULC S604
standards.
To install a European Copper Chimney Pot
(King or Bishop model) properly on DuraTech
or DuraChimney II, the standard chimney cap is
removed from the system and replaced with a
dedicated, UL listed Adapter. The Adapter must
be used with DuraTech or DuraChimney II in
order to maintain the UL listing of the system.
Install DuraChimney II in accordance with
the DuraChimney II Installation Instructions,
L180. For DuraTech, install the chimney in
accordance with the DuraTech Installation
Instructions, L151. These instructions are
available from DuraVent’s website, www.
duravent.com.
Figure 1 shows the Adapter itself. The same
Adapters are used for both DuraTech and
DuraChimney II. There are two different
Adapter models, each available for the
different chimney diameters; one dedicated
to the King model, and a separate Adapter
dedicated for the Bishop model. Use only the
correct Adapter model and diameter for the Pot
and chimney diameter used for your system
(e.g. use only the 14” Bishop Adapter for
installation of a Bishop Pot on a 14” chimney
system). Figure 2 shows the overall completed
installation of the European Copper King
model onto DuraChimney II using the Adapter.
Figure 3 shows attachment detail of the
Adapter for DuraChimney II. Figure 4 shows
the overall installation of the King model onto
DuraTech chimney, and Figure 5 shows the
attachment detail of the Adapter for DuraTech.
Installation of the Bishop model is the same as
that of the King, except for using the dedicated
Bishop Adapter.
The top of the chimney pipe for both DuraTech
and DuraChimney II must extend between
2” and 4.5” above the collar of the Chase
Top Flashing (or Chase Top Collar). For
DuraChimney II, install the required Storm
Collar on the outer wall of the chimney, as
normal (Figure 3). For DuraTech chimney, do
not install the Storm collar (Figure 5).