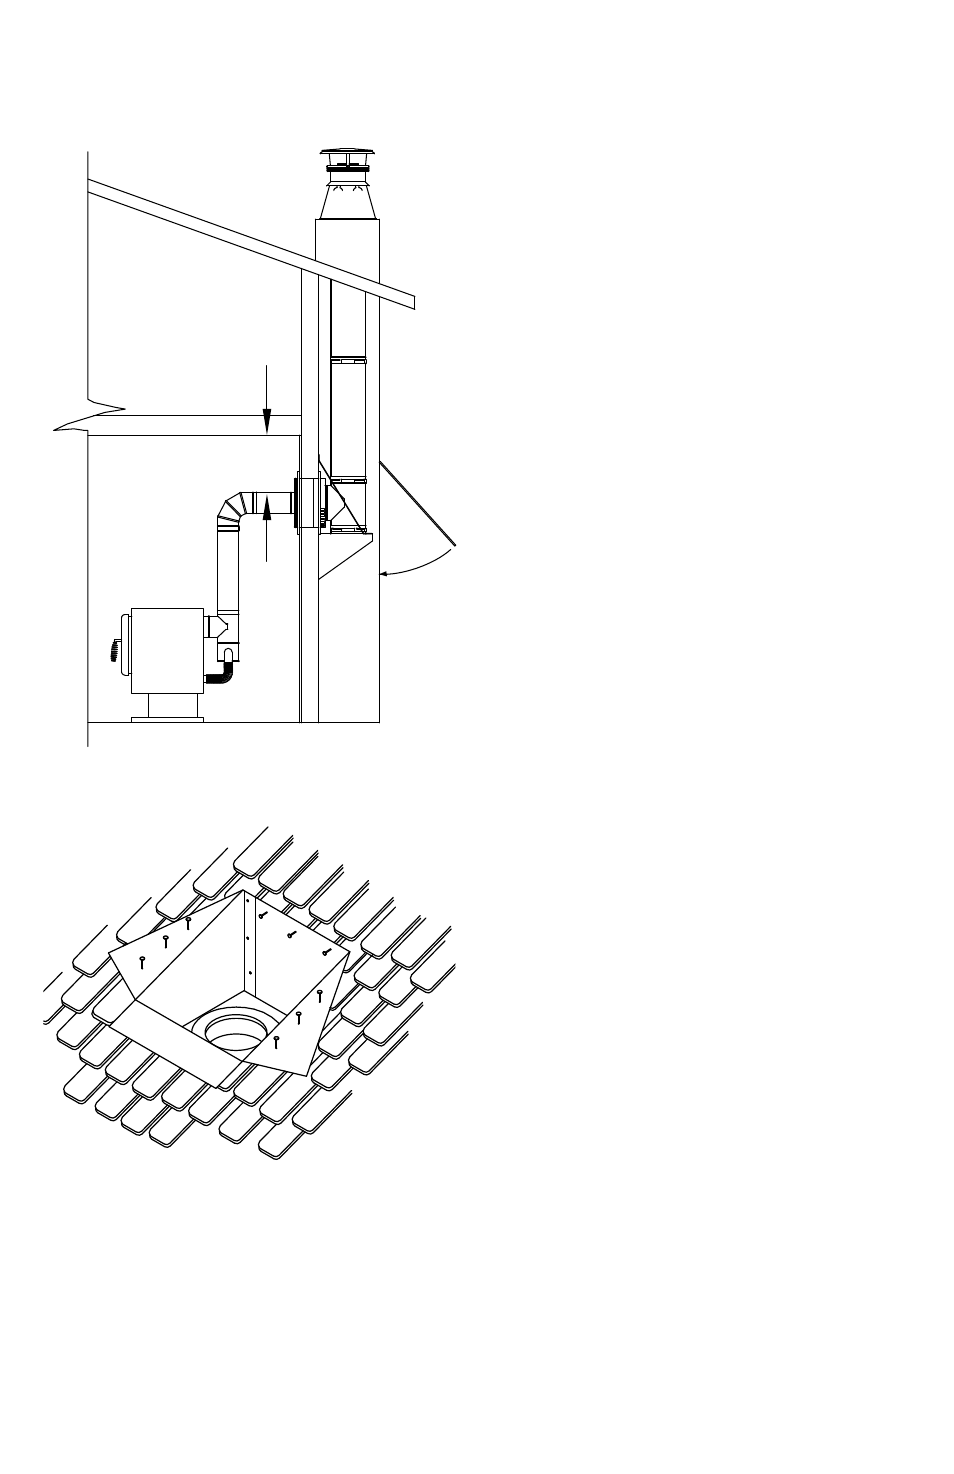
Fig 3, Through-the-ceiling installations – DuraVent Combustion Air Systems for DuraPlus HTC User Manual
Page 6
6
THROUGH-THE-CEILING
INSTALLATIONS
Step 1. Determine the location of the CAS
Ceiling Support. The CAS Ceiling Support is
installed instead of a standard Support Box.
The CAS Ceiling Support can support up to
40-ft of DuraPlus HTC chimney. The CAS
Ceiling Support should be located directly
above the stove if possible to facilitate the
installation of the CAS Connector Pipe. If
possible, use a plumb bob to ensure the center
of the Ceiling Support will be directly over the
stove’s outlet. If the CAS Ceiling Support is not
aligned with the stove outlet, elbows will be
required for the offset.
Step 2. Install CAS Ceiling Support. Cut
and frame an opening for the CAS Ceiling
Support. Refer to Table 1 for proper framing
dimensions. Install the CAS Ceiling Support
into the framed opening, and ensure the
Ceiling Support is level. The square portion of
the Ceiling Support must be a minimum of 2”
below the finished ceiling (Fig 1, 2). Secure
the Ceiling Support with at least (2) 1-1/2”
wood screws per side; minimum of (8) wood
screws total.
For most installations, the CAS
Ceiling Support can be left at full height (does
not need to be cut down), and it can act as
an insulation shield for the attic space. If the
CAS Ceiling Support is being installed into a
cathedral ceiling, the box can often be installed
connected directly to the roof rafters, and then
folded over and nailed down or trimmed to be
flush with the roof (Fig 4).
Alternatively, the CAS Ceiling
Support can be installed in a chase enclosure
that is placed directly against the outside
of the Ceiling Support and extends up to
the underside of the roof. In this type of
Figure 3
Figure 4
FOR THRU-
THE-WALL
INSTALLATIONS
USING A CHASE
ENCLOSURE,
PROVIDE AN
ACCESS DOOR
FOR CLEANING
CUT AND FOLD SIDES OF CEILING SUPPORT TO BE FLUSH WITH
ROOF. SECURE WITH NAILS OR SCREWS AS DESCRIBED.
Fig 3
For Thru-the-Wall
installations using a
chase enclosure,
provide an access
door for cleaning.
Maintain at least 8"
clearance between
CAS Stove Pipe and
ceiling
MAINTAIN AT LEAST
8" CLEARANCE
BETWEEN CAS
STOVE PIPE AND
CEILING