7ceiling supported – M&G DuraVent DuraTech® 5-8 User Manual
Page 7
7
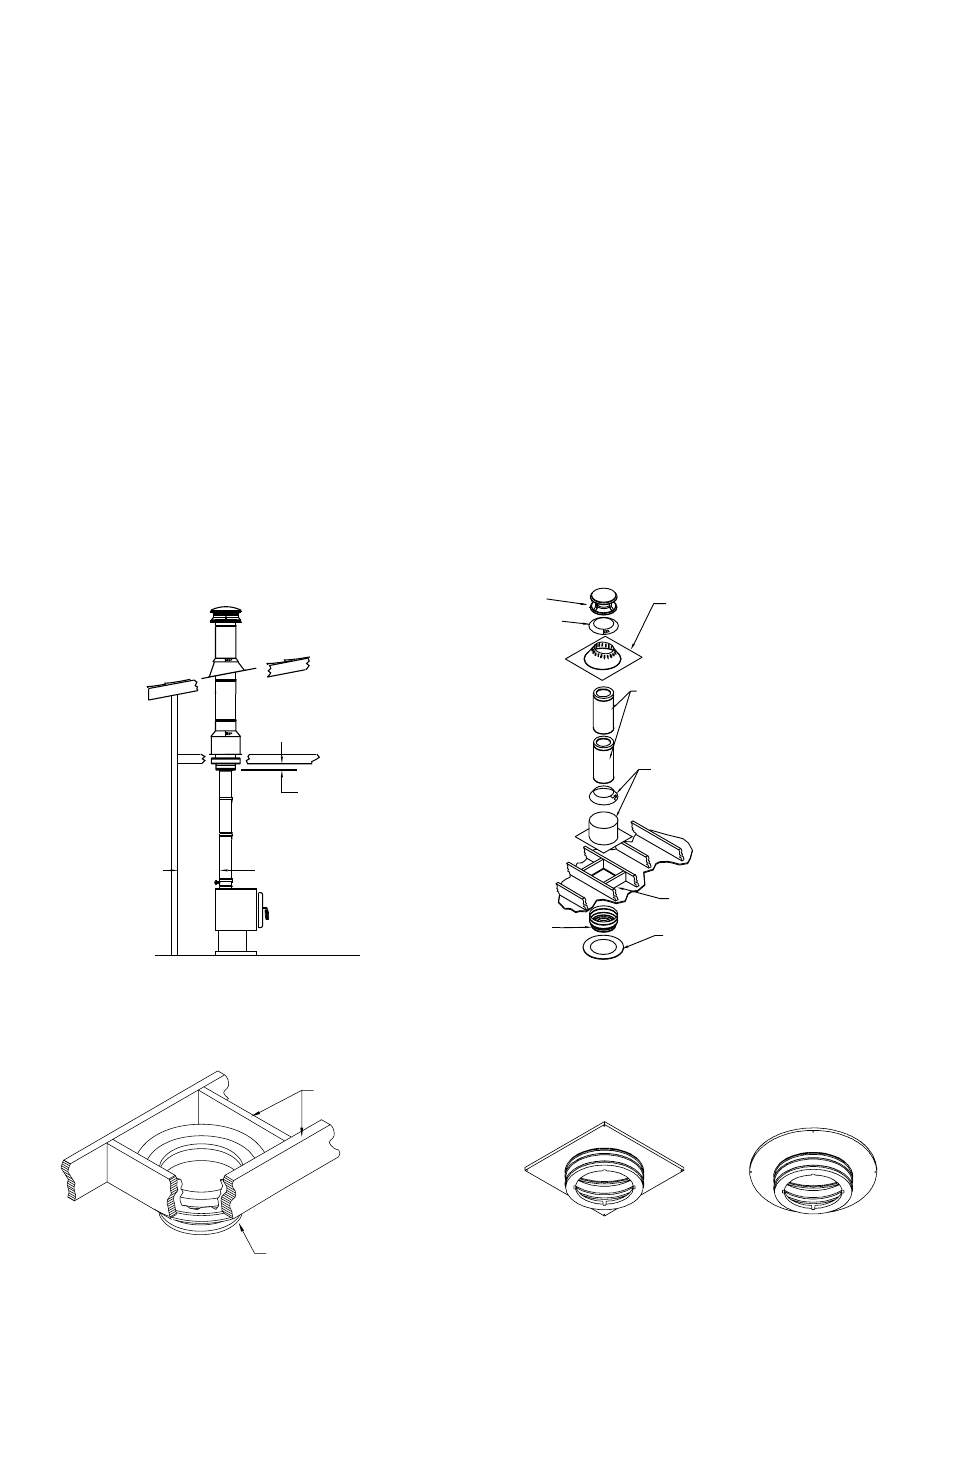
CEILING SUPPORTED
1. Place Appliance: Position the appliance
according to the manufacturer’s instructions.
The flue outlet collar should be placed
between the rafters or joists above, if possible.
2. Frame Support Opening: Drop a plumb
bob to the center of the appliance’s flue outlet
and mark this center point on the ceiling. Refer
to Table 2 for specific framing and clearance
dimensions. Mark appropriate cutting lines
around the center point. Cut a square hole in
the ceiling for the Support Box. Frame a level,
square opening centered over the hole which
you have cut. (Figures 3 and 4).
Figure 3
Figure 4
Figure 5
3. Install Support Box: For installation into
a flat ceiling, there is the option of the Round
Support Box, the Flat Ceiling Support Box,
the Square Ceiling Support Box , Reduced
Clearance Support Box , or the CAS Ceiling
Support. The CAS Ceiling Support is only
used when installing the CAS system. Refer
to the DuraTech CAS Installation Instructions
for directions on how to install the remainder
of the Combustion Air System.. The Flat
Ceiling Support Box is primarily used for
Oil Appliances and comes unpainted. For
the Square Ceiling Support Box, Reduced
Clearance Support Box, and the CAS Ceiling
MINIMUM OF 3
INCHES BELOW
FINISHED CEILING
18 INCHES
MINIMUM FOR
SINGLE WALL
STOVEPIPE
ADJUSTABLE FLASHING
CHIMNEY SECTIONS
ATTIC INSULATION SHIELD
ROUND TRIM COLLAR
FRAMED OPENING
ROUND SUPPORT
BOX
CHIMNEY CAP
STORM
COLLAR
JOISTS & FRAMING
3 INCH MIN REQUIRED
BELOW FINISHED CEILING
3 INCH MIN BELOW
FINISHED CEILING
ROUND SUPPORT BOX WITH
SQUARE TRIM COLLAR
ROUND SUPPORT BOX WITH
ROUND TRIM COLLAR