Installing bearing cartridge- qc and qce versions, Qc and qce versions – Graymills QC User Manual
Page 2
795-91382
02-10
Graymills Corporation – 3705 N. Lincoln Ave. – Chicago, IL USA – www.graymills.com
4. Holding lower section stationary, rotate upper shaft clockwise to unlock sections and then
continue to loosen by hand. Once loose, you can also rotate bearing cartridge to separate the
upper and lower sections of the shaft.
5. Remove bearing cartridge and upper shaft by pushing up from shaft end. The upper shaft is
retained in bearing cartridge.
Installing Bearing Cartridge- QC and QCE versions
1. Place bearing cartridge containing upper section of shaft into bearing housing
2. Holding upper shaft stationary using one 5/8” open end wrench on the straddle-milled slot,
tighten the lower section using second open end wrench on its straddle-milled slot. NOTE:
Shafts are threaded with a left-hand thread, thus tightening requires turning counter-
clockwise.
3. Install (2) 4mm screws inside bearing housing and tighten with hex key.
NOTE: A 3-phase motor can be wired to run in reverse; however, this will cause the shaft to
loosen during operation, due to the left-hand thread of the shaft. Flow will also be reduced by
90%
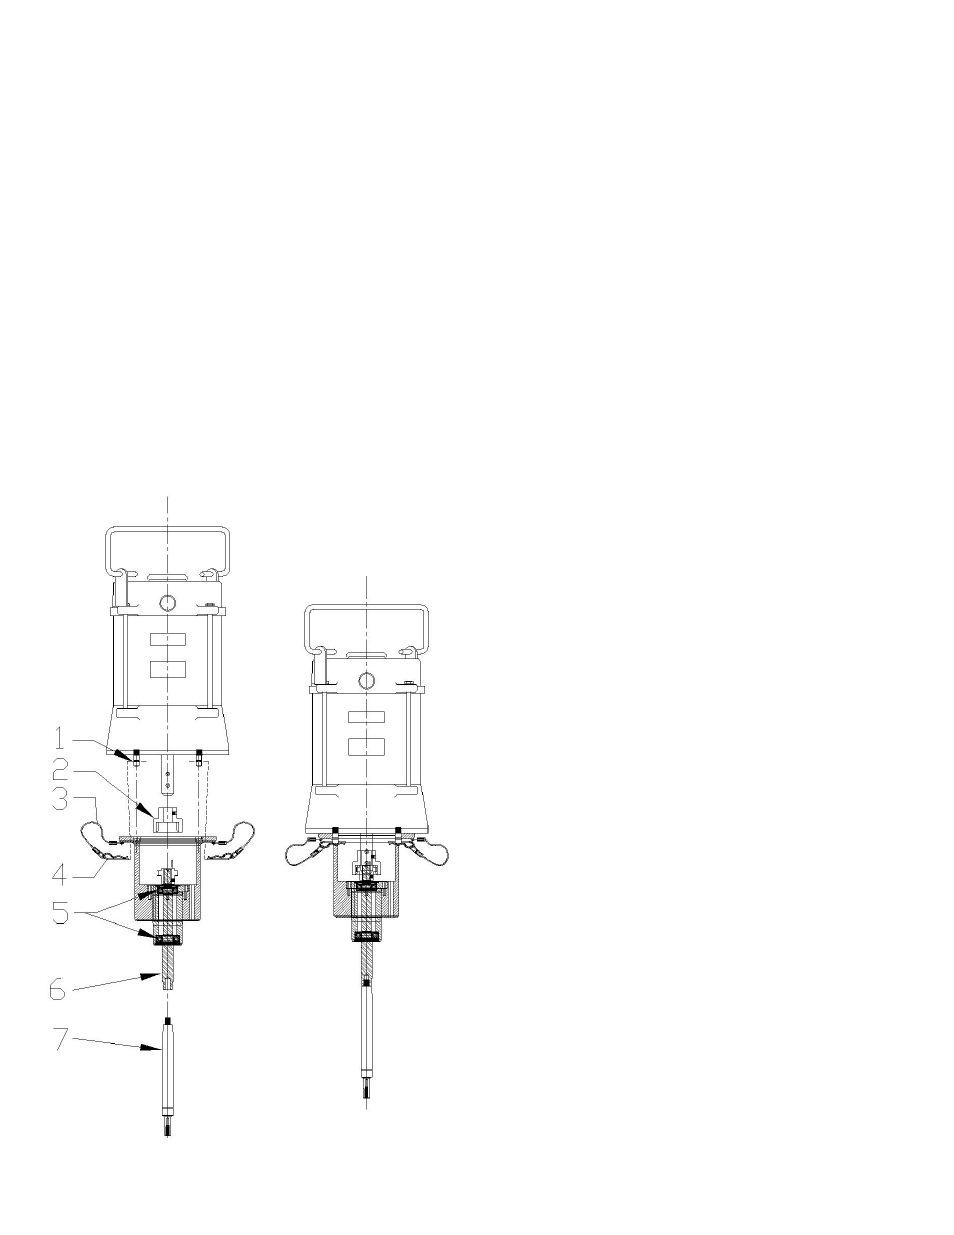
QC and QCE Versions
Part Numbers
1.
Retaining Pin
568-38859-88
2.
Coupling Set
QC
Models
C-37717
QCE
Models
C-37718
3.
Lanyard 765-91349-13
4.
Hair Pin Clip
756-91348
5.
Bearing Service Kit
QC
Models
C-38983
QCE
Models
C-38984
6.
Upper Pump Shaft
QC
Models
560-38821-86
QCE
Models
560-38814-86
7.
Lower Pump Shaft
QCM3 (before 5/1/06)
560-38820-86
QCM3 (after 5/1/06)
560-39534-86
QC4000
560-38954-86
QC3
560-39174-86
QCME3 (before 5/1/06)
560-38820-86
QCME3 (after 5/1/06)
560-39534-86
QCE4000
560-39534-86
QCE3
560-39174-86
QCWE2
560-41020-86
QCGE2 560-41020-86