First steps – BrandTech Scientific Dispensette TA User Manual
Page 30
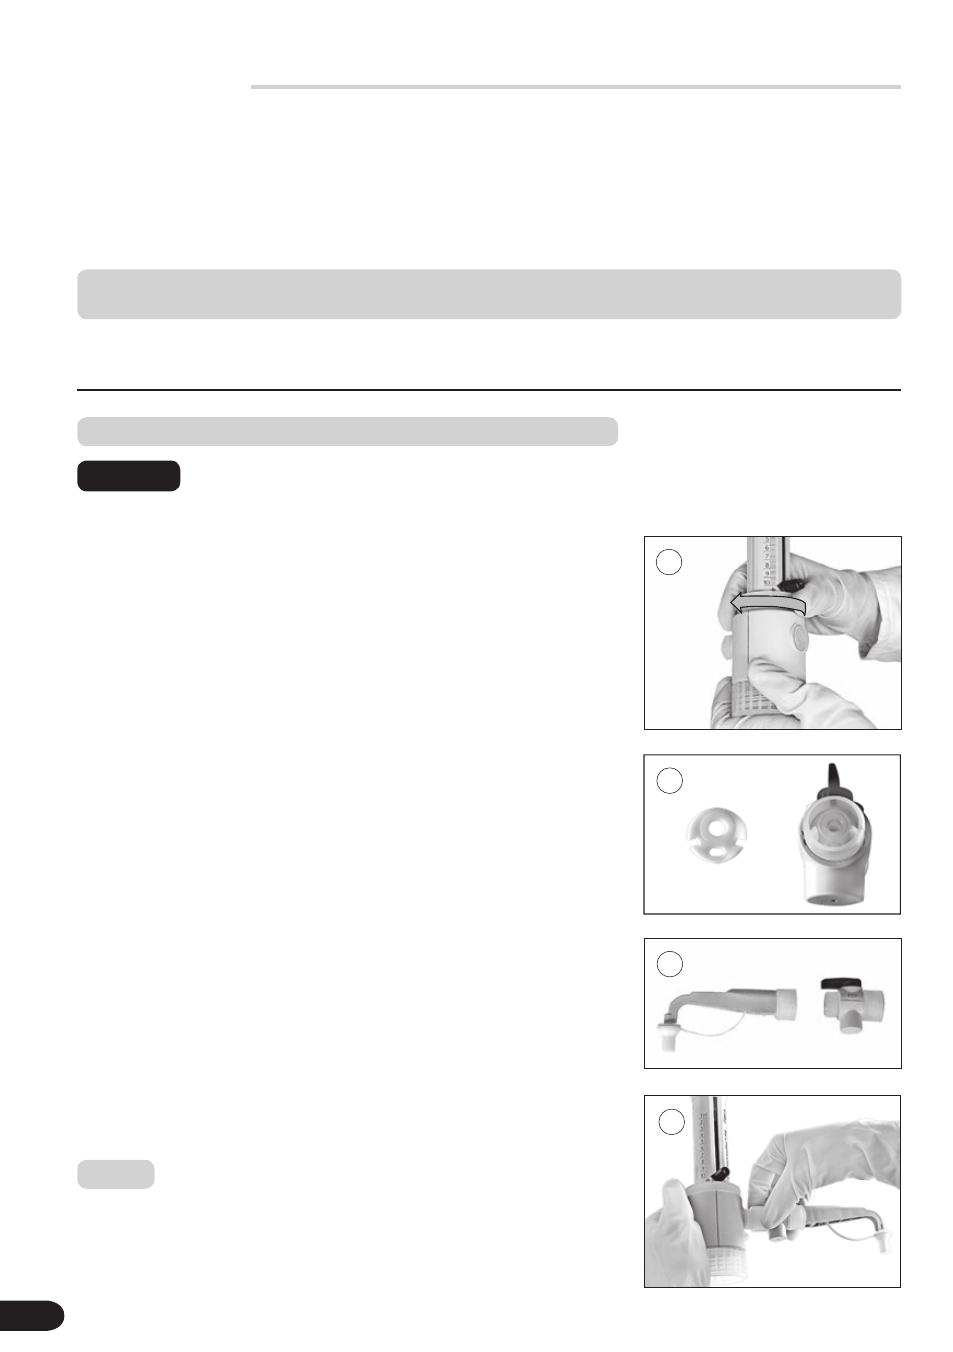
3
4
2
1
30
First Steps
Is everything in the package?
Confirm that your package includes:
Bottle-top dispenser Dispensette
®
TA, discharge tube, telescoping filling tube, SafetyPrime
™
recirculation
valve and recirculation tube (optional), mounting tool, three bottle adapters, a performance certificate and
this operating manual.
3.
Mounting the
SafetyPrime
™
recirculation valve
(optional)
4.
Mounting the
Discharge tube
Wear protective clothing, eye protection and gloves! Follow all safety
instructions and observe limitations of use and operating limitations
(page 26-28).
Recirculation valve and discharge tube must be correspondent to the
model. After two days tighten the locking nut.
Before use in trace analysis, the instrument must be thoroughly clea-
ned first. See 'Cleaning for trace analysis' (page 42).
Warning:
Assembly
Push the SafetyPrime
™
recirculation
valve approx. 2 mm into the discharge
tube and firmly finger-tighten the locking
nut (Fig. 3). Check the SafetyPrime
™
recirculation valve for a tight fit.
Push the discharge tube (optional with
SafetyPrime
™
recirculation valve) approx.
2 mm into the valve block and and firmly
finger-tighten the locking nut
(Fig. 4). Check the discharge tube for a
tight fit.
Before mounting the SafetyPrime
™
recir-
culation valve or the discharge tube make
sure that the sealing washer is always
inserted (Fig. 2).
2.
Check sealing
washer(s)
Nominal volume, ml
Adapters for
bottle thread
Filling tube
Length, mm
Dispensette
®
TA
10
GL 28/ S 28 (ETFE), GL 32 (ETFE),
S 40 (PTFE)
125-240
Make sure that the safety ring is firmly
tightened (Fig. 1).
1.
Check safety ring
Note: