Pre-dive plan mode, Overview, Activation from ready-mode – A&D 2 Plus User Manual
Page 8: Activation from surface mode
PRE-DIVE PLAN MODE
OVERVIEW
The Monitor 2+ has a built-in dive planner that allows you to plan
both no-stop dives and decompression dives. The planner takes into
account the temperature of the most recent dive and altitude.
WARNING: Planned decompression dives violate the
responsible diving practice standards of every major
diving organization. Recreational or sport scuba divers
should not attempt decompression dives. Only profes-
sional divers with extensive experience, training, and the
appropriate equipment for decompression diving (includ-
ing the presence of an on-board recompression chamber)
should attempt to plan a decompression dive. Those who
attempt decompression dives must be willing to accept an
increased risk of decompression sickness.
You can access the Pre-Dive Plan Mode form either Ready Mode or
Surface Mode. When you access the planner from Surface Mode, you
have the option of adding surface-interval time to plan for a dive at
some point later in the day.
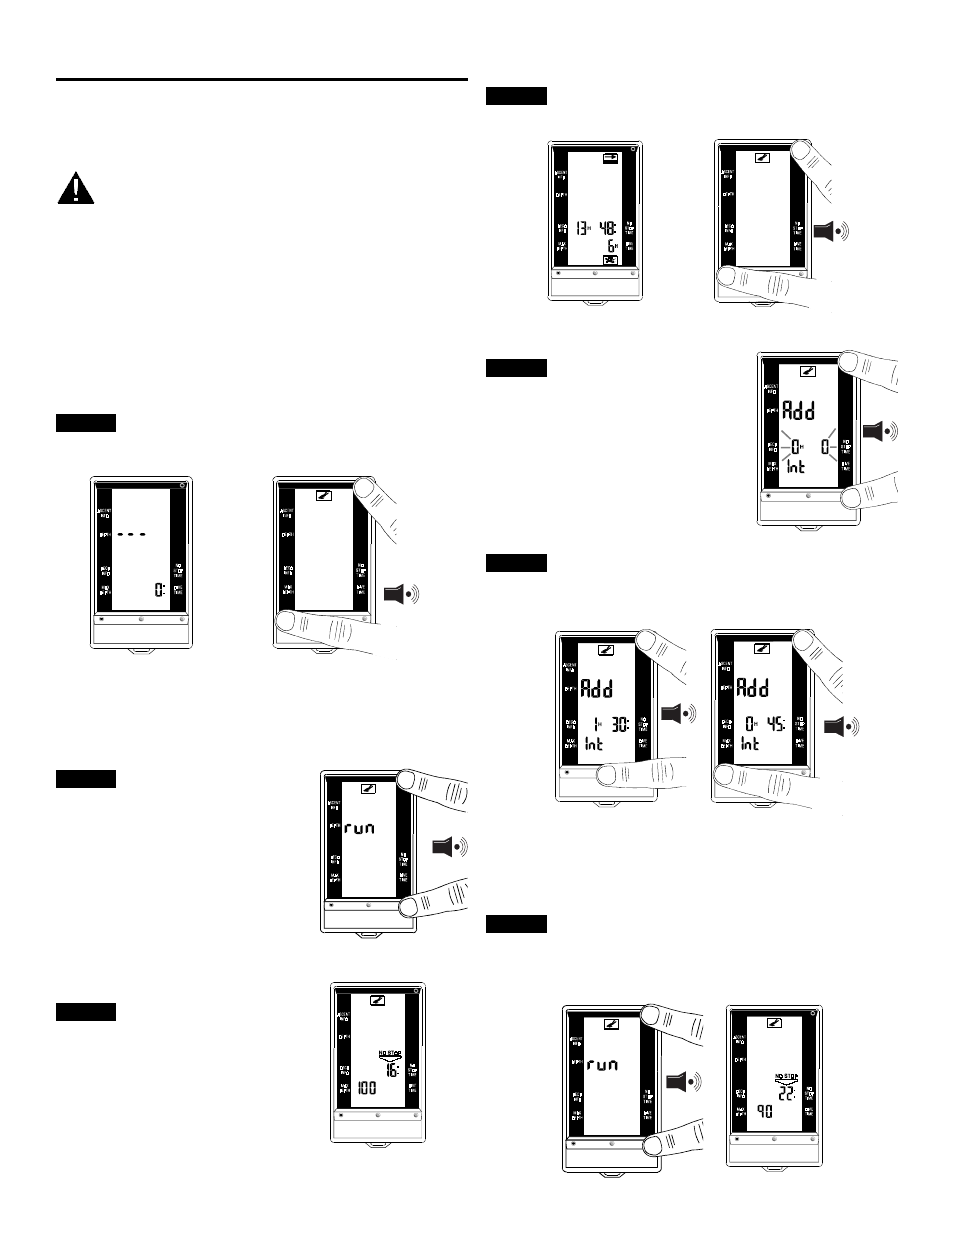
ACTIVATION FROM READY-MODE
STEP 1
NOTE: Always moisten your fingertips before touching the contacts.
Otherwise, you cannot get a good electrical connection. Contacts only
need to be touched momentarily unless noted otherwise.
Ready Mode
From Ready Mode, touch contacts A & B. The computer
will emit one beep and the Dive Plan Icon will appear at
the top of the screen.
Touch contacts A & D to
confirm the selection. The word
RUN will flash for about five
seconds and then start scrolling
through the available time-
depth combinations.
The Monitor scrolls from 50 to
200 feet in 10-foot increments.
STEP 2
For each depth the computer
gives the maximum allowable
no-stop time at that depth.
STEP 3
Note: If you want to stay longer than the
no-stop time limit, proceed to "Planning a
Decompression Dive" on page 36.
ACTIVATION FROM SURFACE MODE
STEP 1
From Surface Mode, touch contacts A & B. The computer
will emit one beep and the Dive Plan Icon will appear at
the top of the screen.
STEP 2
Surface Mode
Touch contacts A & D to
confirm the selection. The
words "Add" and "Int" appear
along with a flashing surface
interval time.
STEP 3
If you do not want to add any additional surface time, go
to step 4. If you do want to add surface time, touch
contacts A & C. If you add too much surface time and
want to decrease it, touch contacts A & B.
STEP 4
Increase Time
Decrease Time
Note: Surface interval time increases in 15 minute increments for the
first 6 hours, 30 minute increments from 6 to 12 hours, and 1-hour
increments after that.
After adding the desired amount of surface interval time,
touch contacts A & D. The word "run" flashes for a few
moments, then the Monitor starts scrolling from 50 to
200 feet in 10-foot increments. For each depth the
computer gives the maximum allowable no-stop time at
that depth.