ATN 6800c User Manual
Page 5
4
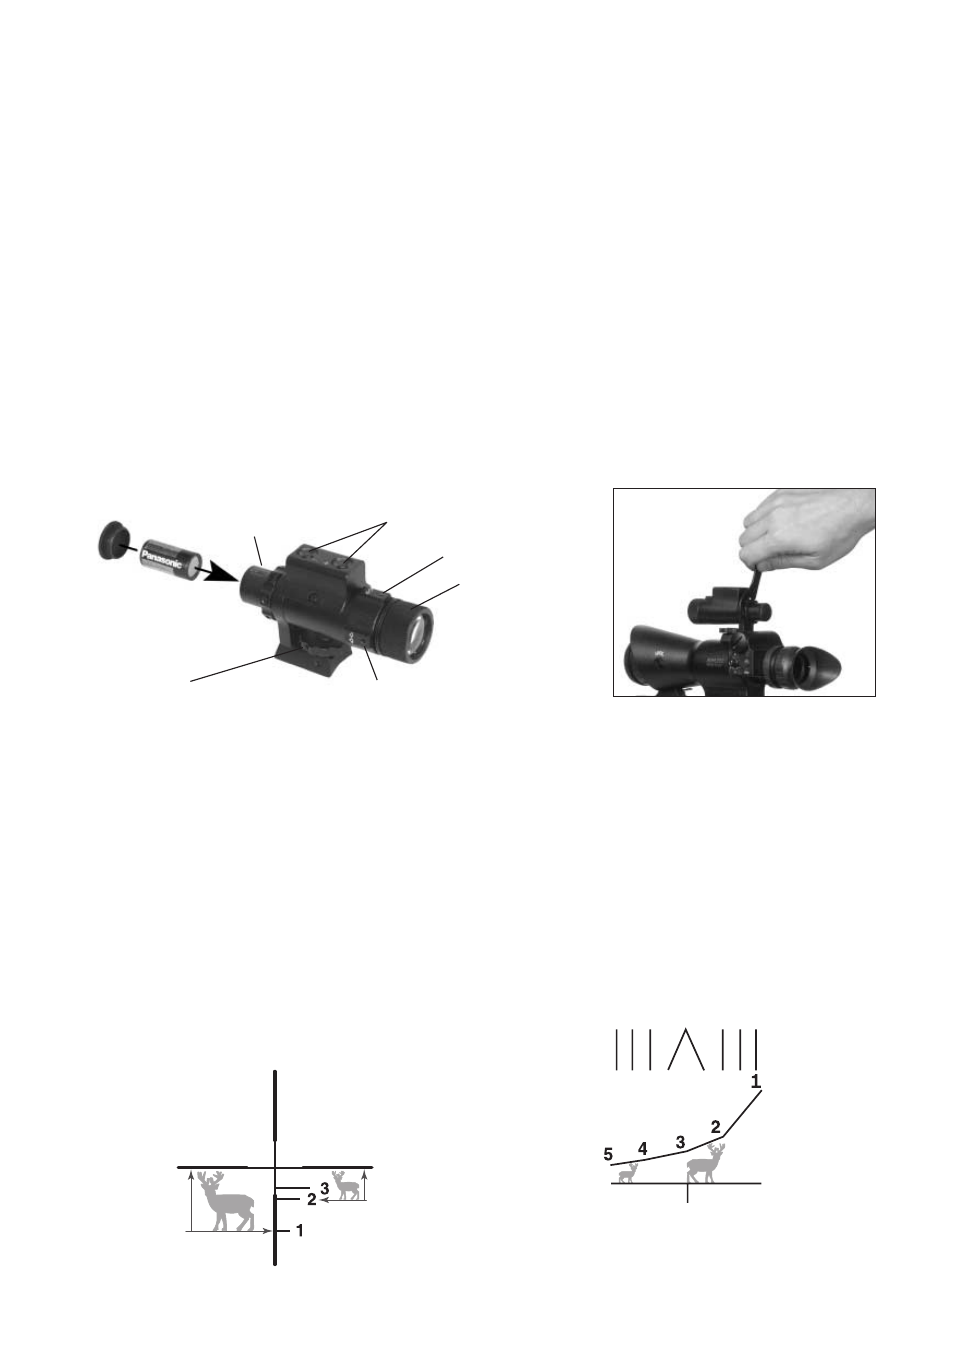
IR ILLUMINATION
Infra-red (IR) Illuminators are common for night
vision technology. The IR light greatly enhances
the performance of your Aries scope, while
remaining almost totally invisible to the naked
eye. In dark environment, power up the Aries
scope. Now, find a scene and examine it with-
out the IR on then with IR powered up. Note
the difference in illumination. It is important to
remember that the IR illuminator is simply an
infra red light source, and like any light source
it may loose its effectiveness over a great dis-
tance.
To fix the IR Illuminator to the riflescope screw
the thumb screw on the IR into the thread on
the scope. To switch the IR on and to adjust the
brightness rotate the rheostat located on the
side of the Illuminator. The changes of adjust-
ment could be observed while looking through
the scope. The IR is off when the mark on the
rheostat coincides with “0” on the scale.
NOTE: The riflescope could be equipped with
digitally controlled IR.
The IR illuminator control buttons are located
on its side. To switch the Digital IR illuminator
on/off press “+” and “-” buttons simultaneously.
When the IR illuminator is switched on you can
see the green LED lit. By pushing the buttons
“+” and “-” you may adjust the IR brightness.
The IR beam is focusable to change the field
of coverage. To change the beam width slightly
turn the IR lens.
You could change the IR control panel fitting
your needs. The screw-tool included into the
set should be used for weakening the fixing
screw located on the IR. Rotate the IR placing
at in the most convenient position. Tighten the
screw with the screw-tool to fix the new posi-
tion.
IR Brightness
Adjustment
Battery
Housing
Fixation
Screw
IR Elevation
IR Windage
IR Focusing
The range finder reticle in your Night Vision Rif-
lescopes was designed to assist you in deter-
mining the range of your target.
These distances are based on a 6’ target.
ARIES350/6800/7800 RETICLE
A 6’ target fits between the numbered baseline
(the three short horizontal lines directly next to
the numbers) and the main horizontal line. If
the 6’ target fits between the 1 and the right
horizontal post of the main line the target is 100
yards away. If the same target fits between the
2 and the right post of main line the target is
200 yards away. The same is with the three,
the target is 300 yards away.
ARIES350/6800/7800 RETICLE
A 6’ target fits between the numbered baseline
and the main horizontal line. If the 6’ target fits
between the 2 and the right horizontal post of
the main line the target is 200 yards away. If
the same target fits between the 5 and the right
post of main line the arget is 500 yards away.
The same is with the 1,3 and 4.The target would
be either 100,300 and 400 yards away.
The vertical lines in chevron reticle are propor-
tioned to help in rangefinding and in making
allowances for wind or movement.
RANGEFINDE RETICLE
If a 6’ target fits
between these two
lines then the target
is 100 yards away.
If a 6’ target fits
between these two
lines then the target
is 200 yards away.
If a 6’ target fits
between these two
lines then the target
is 500 yards away.
If a 6’ target fits
between these two
lines then the target
is 200 yards away.