Operating procedure – Edgecraft Chef's Choice 2000 User Manual
Page 6
6
After developing a burr in Stage 1, the knife edge is honed in Stage 2. Using the same pro-
cedure as in Stage 1, the knife is pulled through, alternating in the left and right slots. The
angle guides in this stage are set at a slightly larger angle than Stage 1, thus developing
double-beveled facets along each side of the edge. The facet formed in this stage is very
narrow and might best be described as a micro-bevel immediately adjacent to the edge
itself. Normally only three pairs of alternating pulls in Stage 2 are sufficient. You will now
find no trace of a burr and the edge will be extremely sharp.
Caution: The resulting edge is likely to be much sharper than you are accustomed to
and must be handled with great care to avoid personal injury.
The sharpening and honing disks have a normal life of about 3000 resharpenings. You will
observe a 2 to 3 fold decrease in the aggressiveness of the diamond wheels during this time.
Replacement sharpening modules are available from your distributor or the factory.
oPEratinG ProcEDurE
sharpening - stage 1
1. Turn the sharpener on. CLEAN THE KNIFE BEFORE SHARPENING. Accumulation of fat or
grease on sharpening disk will reduce its effectiveness.
2. Stand facing the front of the sharpener (facing the on/off switch side). Place the knife in
Stage 1 in the slot between the plastic spring guide and the knife Blade Guide as shown in
Figure 7, making sure the face of the knife blade is resting flat against the Blade Guide. You
can start in either the right or left slot, but always alternate slots after each pull.
3. Move the blade downward in the slot while slowly pulling it toward you until it contacts the
rotating diamond disk. Make sure as you pull the knife down and forward through the slot
that it is fully inserted and its edge rests
lightly on the front Edge Stop Plate (as seen in
Figure 6). Apply only just enough downward pressure to make contact with the front Stop
Plate. Additional pressure is unnecessary and counterproductive. Do not be concerned about
resting the knife edge on the Edge Stop Plate; it was designed so that it will not damage the
knife’s edge.
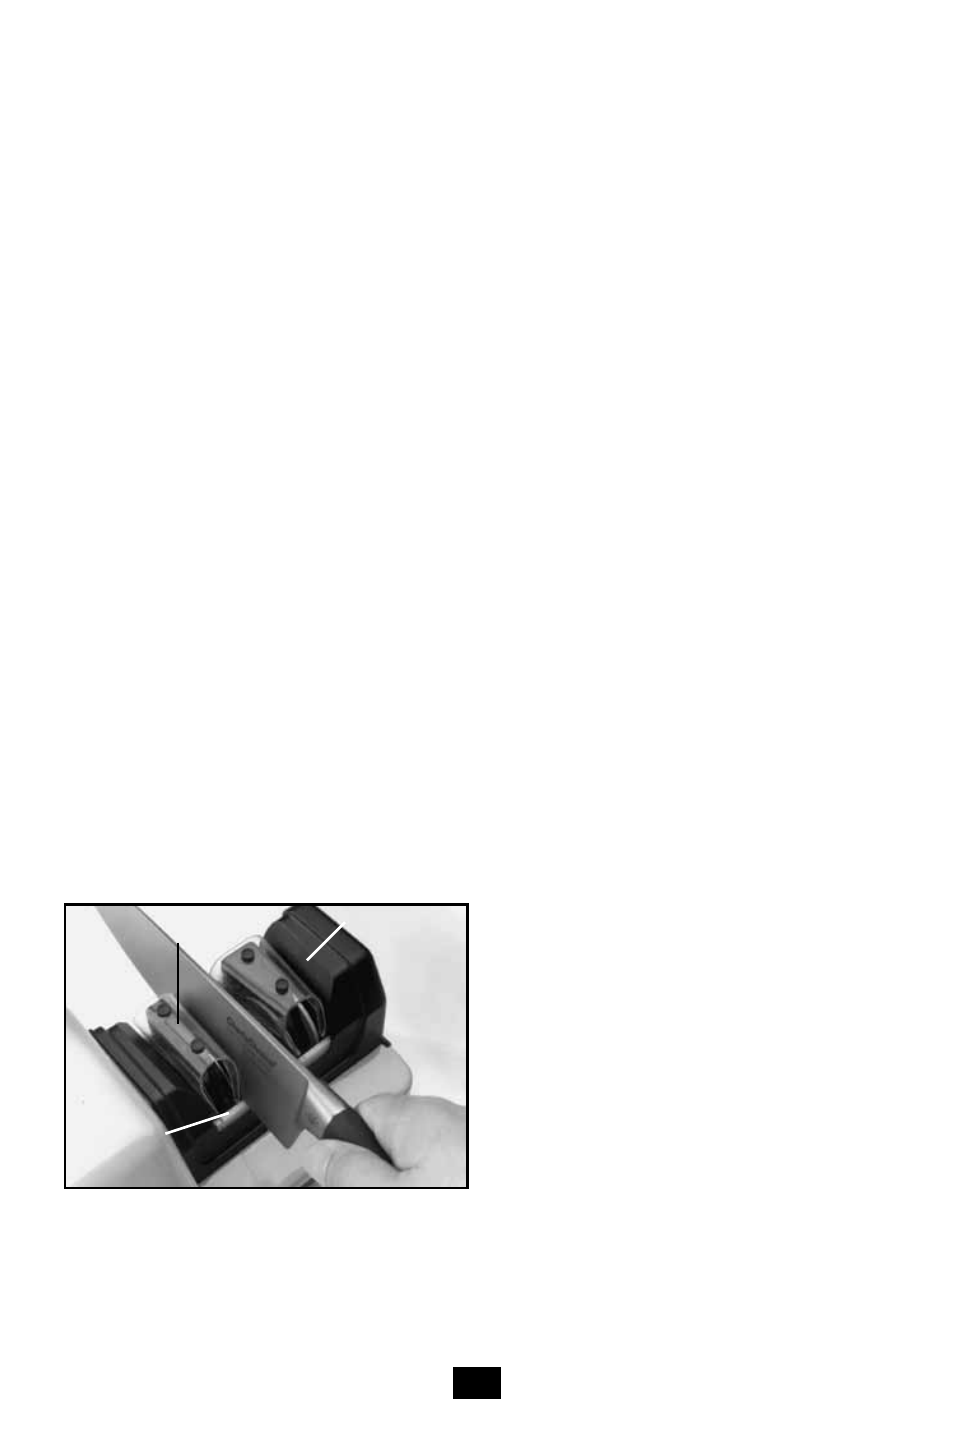
Figure 6. Sharpening in Stage 1: Knife is inserted
between the knife Blade Guide and the plastic spring
until edge rests lightly on Edge Stop Plate.
Plastic Spring
Edge
Stop Plate
Knife Blade
Guide